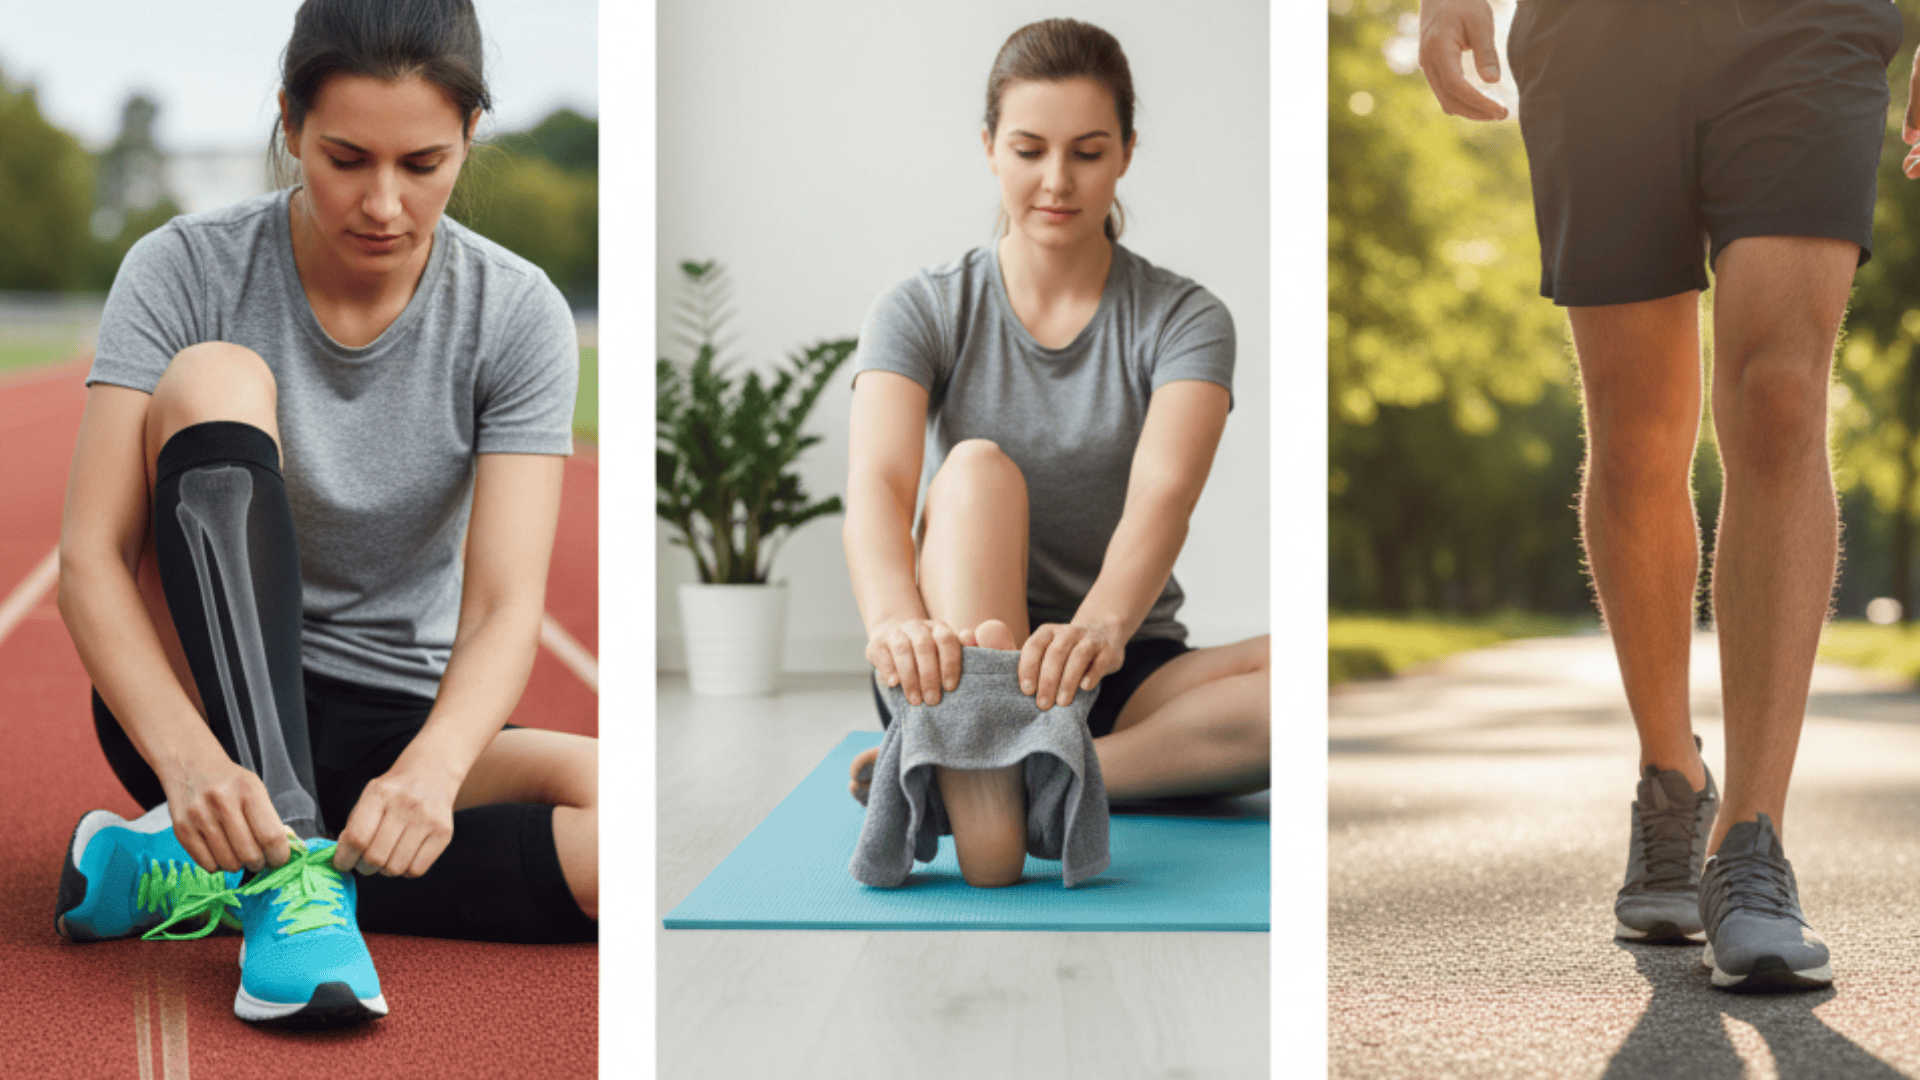
That nagging pain along your inner ankle isn’t going away on its own. Your arch feels like it’s collapsing with every step. Shin splints keep coming back, no matter how much you rest.
The tibialis posterior muscle, a small but mighty muscle running down the inside of your lower leg, might be the missing piece in your pain-free puzzle.
When this muscle is weak or injured, it affects everything from your arch support to your running form.
Most people have never heard of the tibialis posterior, yet it’s one of the most important muscles for foot stability and injury prevention.
In this guide, you’ll learn exactly where this muscle is located, why it matters so much, and three proven exercises that progress from basic activation to advanced strengthening.
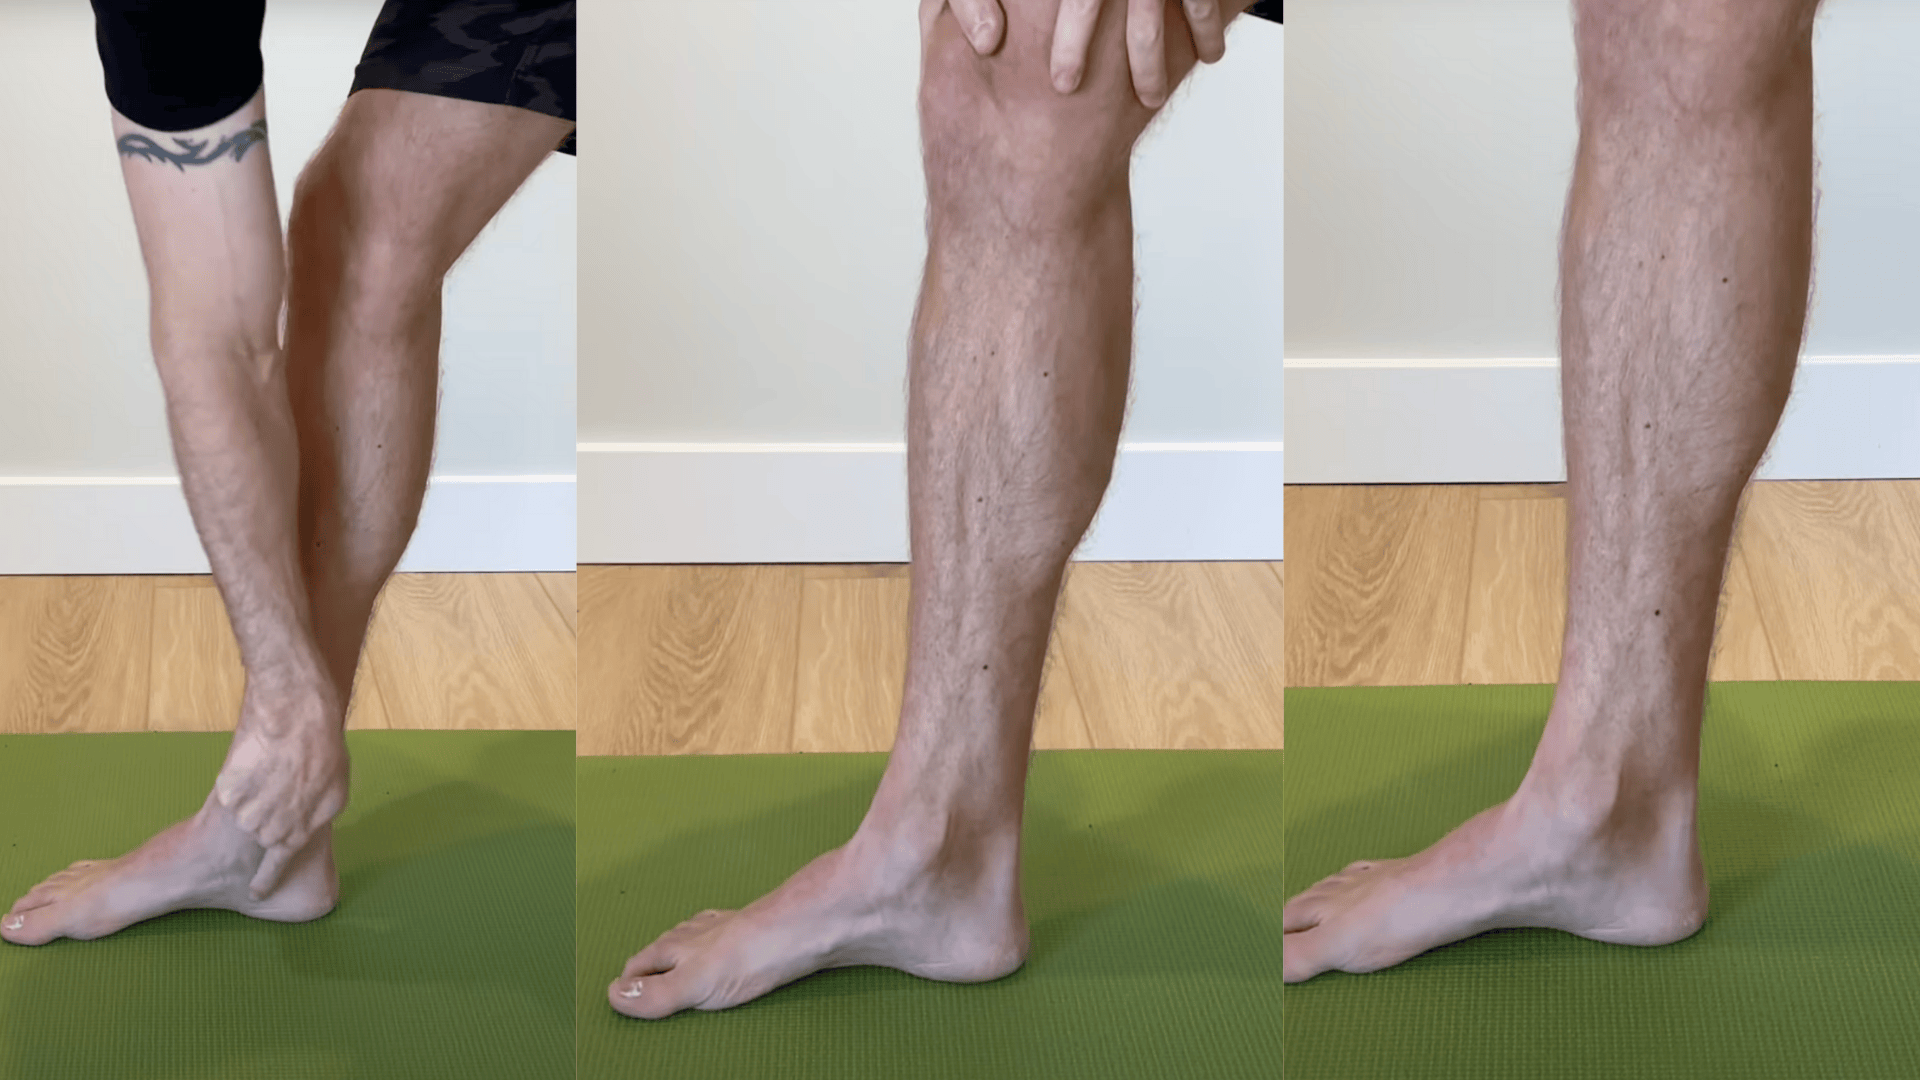
What Is the Tibialis Posterior Muscle?
The tibialis posterior muscle sits deep in your lower leg on the inner side. It runs down behind your ankle bone (medial malleolus) and connects to several bones in your foot.
This muscle has three main jobs: supporting your arch, pointing your foot downward (plantar flexion), and turning your foot inward (inversion).
Think of it as your foot’s natural support system that works behind the scenes every time you walk, run, or stand.
Why It Matters:
- Supports the medial arch: This muscle acts like a natural arch support, keeping your foot structure stable during movement.
- Prevents overpronation: It stops your foot from rolling too far inward when you land during walking or running.
- Reduces risk of injuries like shin splints and flat feet: A strong tibialis posterior protects against common foot and leg problems that sideline many athletes and active people.
Why Strengthening the Tibialis Posterior is Essential
Strengthening the tibialis posterior supports your arches, prevents shin splints, and improves foot stability for pain-free movement.
1. For Athletes
Strong tibialis posterior muscles act as your first line of defense against shin splints that keep coming back.
This muscle improves your stability during quick direction changes and high-impact activities. When it’s weak, your legs work harder to compensate, which can lead to overuse injuries.
Athletes who strengthen this muscle report fewer lower leg problems and better performance consistency.
2. For Active Individuals
If you deal with arch pain or tibialis posterior tendonitis, targeted strengthening can be a game-changer.
This muscle supports your arch during daily activities, such as hiking, walking, or standing for extended periods.
Weak tibialis posterior muscles force other structures to compensate, often resulting in painful inflammation. Regular strengthening helps distribute the workload more evenly across your foot and ankle.
3. For Everyday Health
Your tibialis posterior plays a crucial role in normal walking and running patterns that most people take for granted.
When this muscle is strong, your foot strikes the ground properly and pushes off efficiently. Weakness here can throw off your entire movement chain, affecting your knees, hips, and even your back.
Simple daily activities become easier and more comfortable with proper muscle function.
3 Key Tibialis Posterior Exercises
These exercises follow a smart progression system that takes you from basic muscle activation to advanced load-bearing strength.
Begin with activation exercises to awaken the muscle, then progress to targeted strengthening, and finally transition to functional load-bearing movements.
This approach ensures your tibialis posterior develops properly and safely.
Exercise 1: Arch Doming
Keep your heel, ball of your big toe, and pinky toe firmly planted on the floor; this creates your “tripod foot” position.
Now, lift your arch by squeezing your tibialis posterior muscle without allowing those three contact points to move. Imagine you’re trying to “crunch” or shorten your foot from heel to toe.
Hold this position for 5-10 seconds, then relax and repeat.
Benefits: This exercise improves muscle activation and strengthens the small intrinsic muscles in your feet. It teaches your brain how to properly engage the tibialis posterior on command.
Many people have never consciously activated this muscle, so arch doming serves as an important foundation exercise.
Tip: Be patient with this one; it takes time to learn and may feel awkward at first. Some people need weeks of practice before they can do it well.
Focus on quality over quantity, and don’t get frustrated if it doesn’t click right away.
Exercise 2: Theraband Plantar Flexion + Inversion
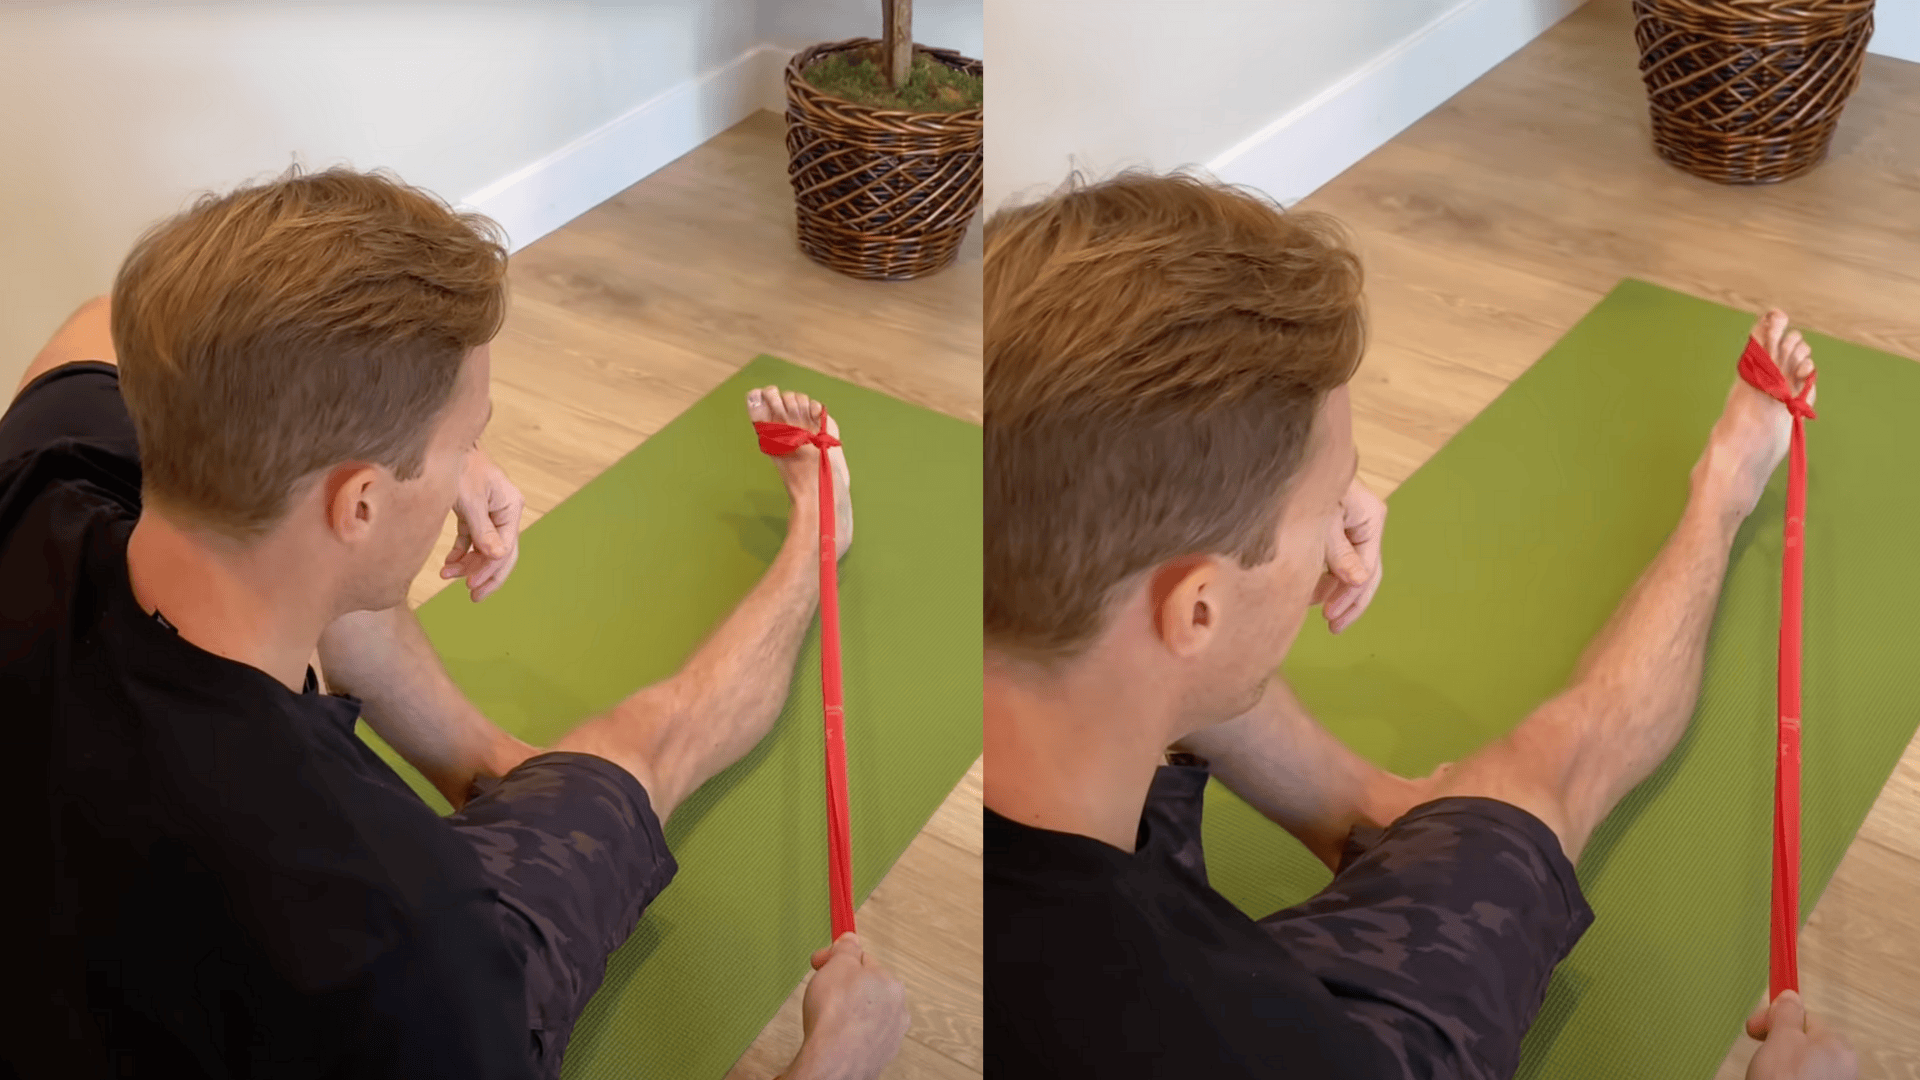
Loop a resistance band around the front of your foot while sitting in a chair. Anchor the other end of the band at an outward angle; you can tie it to a table leg or have someone hold it.
Point your foot down and inward simultaneously (plantar flexion + inversion) against the band’s resistance. Control the return movement slowly – don’t let the band snap your foot back to the starting position.
Benefits: This exercise targets the specific strength of your tibialis posterior muscle. The combination movement of pointing down and turning inward aligns perfectly with what this muscle naturally does.
Using a band provides consistent resistance throughout the entire range of motion.
Tips: Keep all the movement happening at your ankle joint only. Avoid rotating your hip or turning your whole leg; the work should stay isolated in your foot and ankle.
Start with light resistance and focus on smooth, controlled movements.
Exercise 3: Calf Raises with Ball Squeeze
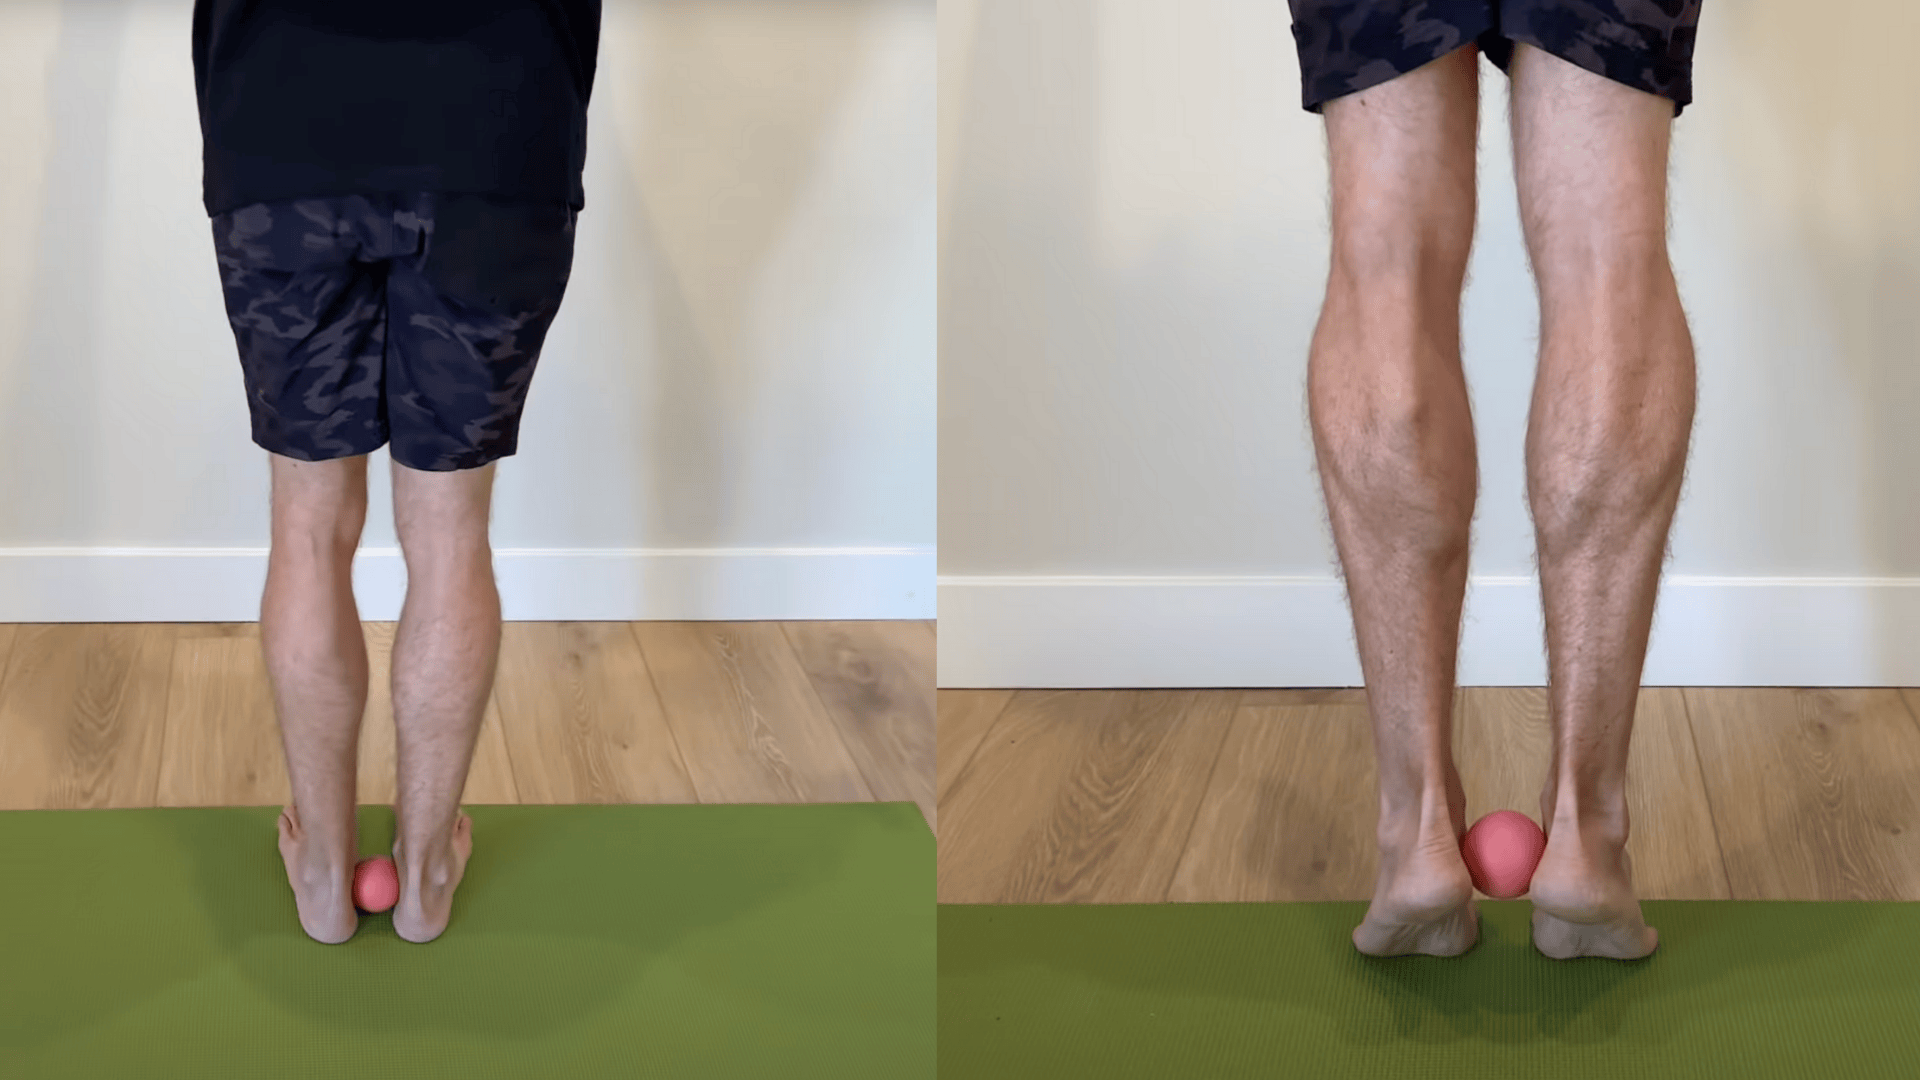
Place a small ball (a tennis ball or a lacrosse ball works great) between your heels while standing. Hold onto a wall for balance if needed.
Squeeze the ball firmly between your heels while performing calf raises, focusing on pushing up and forward over your big toe. Lower down slowly while maintaining the ball squeeze throughout.
When you can do 3 sets of 20-25 reps easily, progress to single-leg calf raises.
Benefits: This exercise strengthens your tibialis posterior, as well as your calf muscles, in a functional way.
The ball squeeze activates the inversion component while the calf raise works on plantar flexion. This combination closely mimics how these muscles work together during walking and running.
Tips: Aim for 3 sets of 20-25 reps before progressing to the single-leg version. Quality matters more than speed – focus on controlled movements up and down.
The ball squeeze is crucial, so don’t let it become loose during the exercise.
Video Tutorial
Special thanks to Rehab Science for providing valuable insights in their video, which I referenced while creating this guide.
Precautions & When to Seek Help
Know when to pause your routine and seek professional guidance to avoid worsening pain or injury.
- Stop if pain increases or swelling worsens: Exercise should help reduce your symptoms, not make them worse. Any increase in pain or swelling means you need to back off immediately.
- Consult a physical therapist if tendonitis symptoms persist: If your tibialis posterior tendonitis isn’t improving after 2-3 weeks of consistent exercise, it’s time to get professional help.
- Avoid overtraining and allow for recovery between sessions: Your muscles need 24-48 hours to recover and rebuild, so refrain from doing these exercises every single day.
Conclusion
Your tibialis posterior muscle is the unsung hero of foot stability and arch support.
These three exercises, arch doming, Theraband work, and calf raises with a ball squeeze, provide a comprehensive system for strengthening this crucial muscle.
Begin with activation exercises and gradually progress to load-bearing movements. Consistency beats intensity every time.
A few minutes several times per week will protect you from shin splints, arch pain, and tendonitis better than any expensive shoe insert.
Remember to stop if pain increases and seek professional help if symptoms persist. Your feet carry you through life; they deserve this investment.