You lose 3% of your arm muscle every decade after 60, according to Harvard Medical School research.
That’s not just a statistic; it explains why your arms look different now and why lifting groceries feels harder than it used to. It’s the reason you avoid sleeveless shirts.
Tufts University researchers found that by age 70, most people have lost 12% of their muscle mass. But here’s what matters: this loss can be reversed.
You don’t need a gym membership or complex equipment. Simple arm exercises done at home can rebuild strength and firmness. Even if you have arthritis or joint pain.
This guide shows you safe, proven exercises for flabby arms over 60. You’ll get step-by-step movements, a 4-week program, and modifications for any fitness level.
Your arms can get stronger starting today.
Let’s start with understanding why this happens in the first place.
Why Arms Change After 60?
Your body goes through specific changes that affect arm muscles.
As you age, your testosterone and growth hormone levels naturally decline – Cleveland Clinic research confirms this happens to everyone. These hormones help build and maintain muscle tissue, so when they drop, your arms lose firmness.
Nerve cells also weaken. They send signals from your brain to your muscles, telling them to move. WebMD reports that fewer nerve signals reach your arms after 60. This causes strength loss even if muscle size looks the same.
Your body stops converting protein to energy efficiently. The protein you eat doesn’t build muscle like it used to.
Fat tissue replaces lost muscle fibers. This creates a soft, loose appearance under your skin.
Inactivity speeds up all these processes. The less you use your arms, the faster they weaken. But staying active can slow or reverse these effects. That’s why targeted exercises work so well.
Understanding these changes isn’t about accepting defeat. It’s about knowing exactly what you’re working against. And that makes your training strategy much more effective.
Before you start rebuilding that lost muscle, let’s make sure you’re training safely.
Safety Considerations Before Starting
Talk to your doctor before starting if you have heart disease, diabetes, or take blood pressure medication. The NHS recommends medical clearance for anyone inactive for over a year.
Start with light weights or bodyweight only. Your muscles need gradual adaptation time.
Prepare your body with gentle movement first. Stop immediately if you feel chest discomfort, dizziness, or sharp joint sensations during activity.
1. When to Consult a Doctor?
Harvard Health Publishing advises seeing your physician if you have chronic conditions or recent injuries.
The American College of Sports Medicine says sedentary people need approval beforehand. Sudden activity increases cardiac risk in inactive adults over 50.
Check with professionals if you take heart pills, diabetes drugs, or have arthritis. Family Doctor recommends evaluation for osteoporosis patients too.
2. Protecting Joints and Warming Up
SilverSneakers research shows 10-15 minute preparation prevents injury in older adults.
Walk in place for five minutes to increase blood flow. Do arm circles forward and backward for 30 seconds each direction.
Roll shoulders up, back, down in controlled motions. The Arthritis Foundation confirms that gentle movements lubricate areas before strength work begins.
Never skip this step in cold weather.
3. Pain vs Discomfort
Good sensations feel like muscle burning or dull aching. This signals strength building and adaptation.
Bad feelings are sharp, stabbing, or shooting. PT Health states joint problems are never normal during workouts.
Mild soreness 24-48 hours later is expected from new exercises. Lingering issues past three days need professional evaluation immediately.
Now that you know how to stay safe, let’s talk about what you’ll need to get started.
Equipment You Need
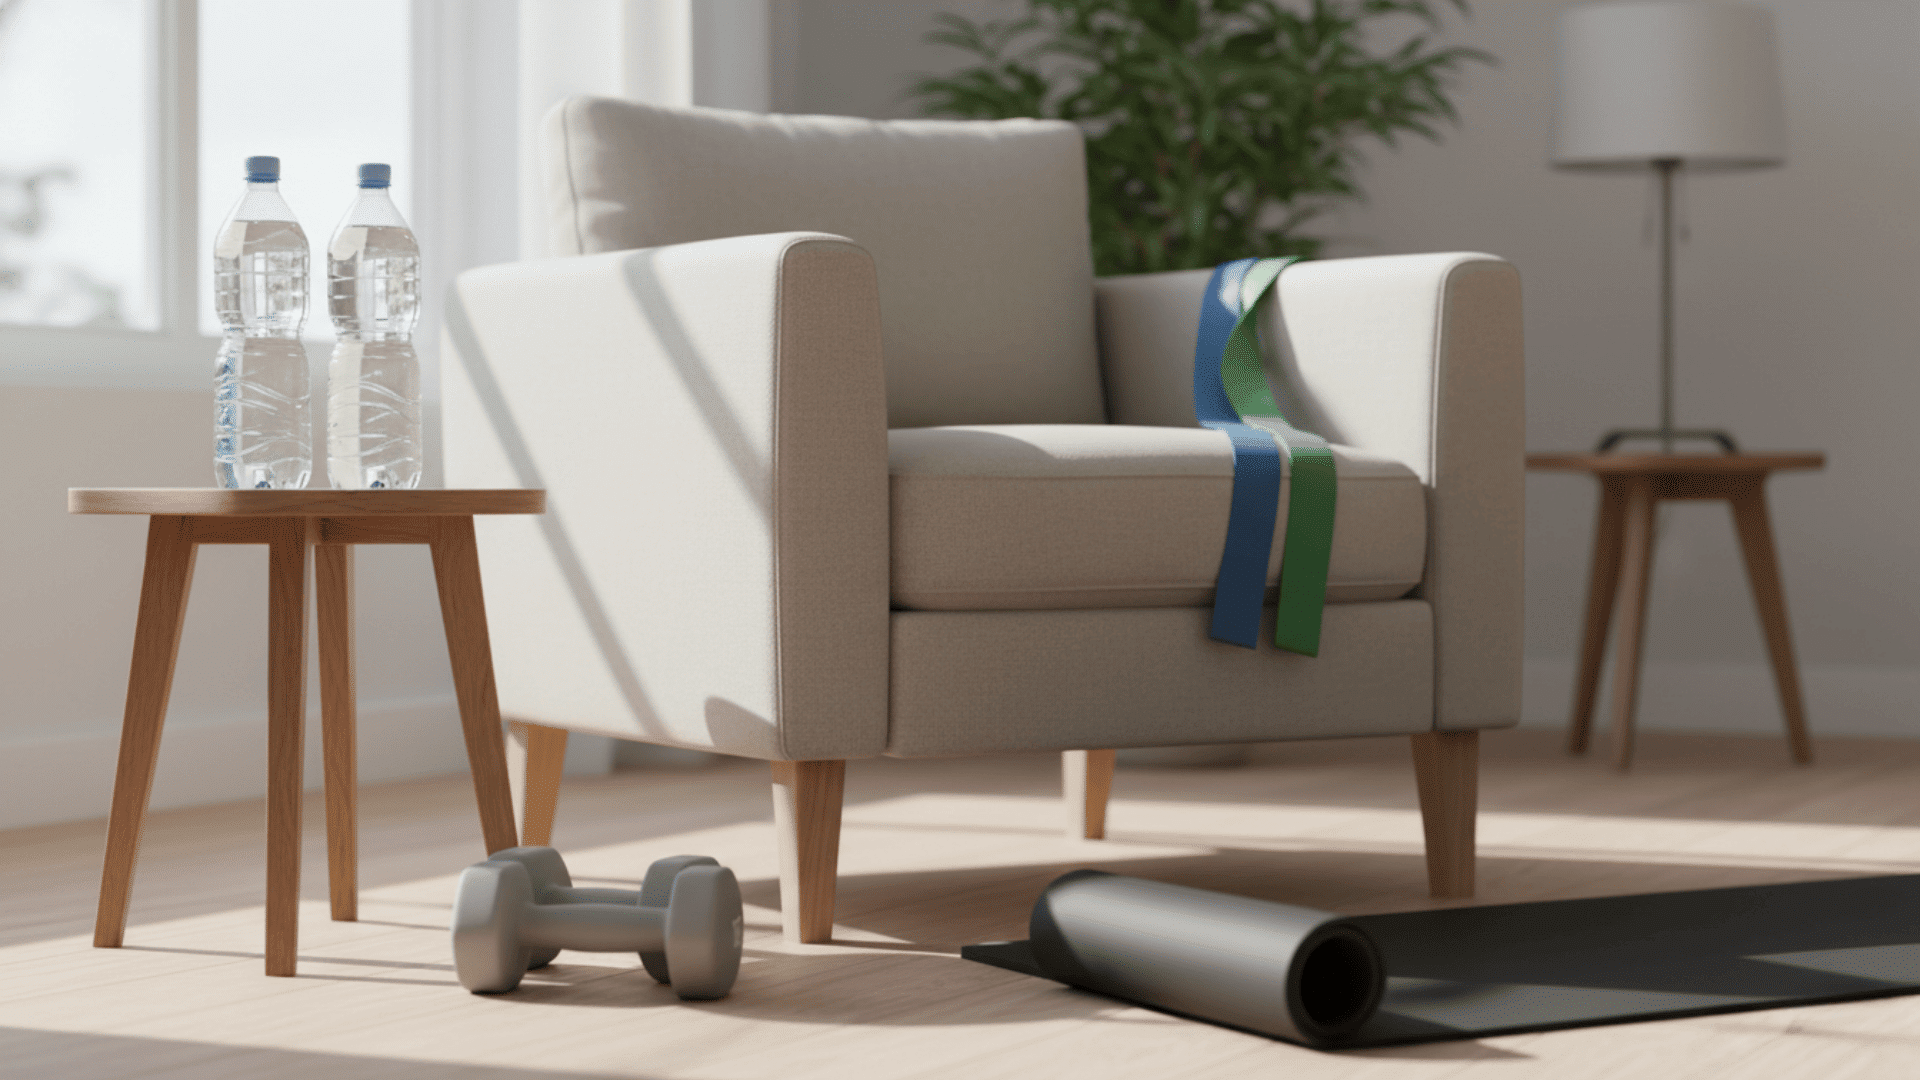
You don’t need expensive gear or a gym membership. Most of these exercises use basic items you already own.
For Beginners:
- 2-3 lb dumbbells (or two water bottles filled with water)
- Sturdy chair without wheels (kitchen or dining chair works best)
- Wall space for push-ups (any flat wall with 3 feet of clearance)
As You Get Stronger:
- 5-8 lb dumbbells (add these after 4-6 weeks)
- Resistance bands with light to medium tension
- Exercise mat (optional, for floor exercises)
Budget-Friendly Alternatives:
Don’t want to buy dumbbells? Use these household items:
- Water bottles = 1-2 lbs each (16-32 oz bottles)
- Canned soup or vegetables = 1 lb each
- Bag of rice or beans = adjustable weight (hold in one hand)
- Laundry detergent bottle = 3-5 lbs when full
Start with what you have at home. You can always upgrade later as you get stronger.
What NOT to Use: Avoid items that are hard to grip or unbalanced. Don't use glass bottles, ceramic items, or anything that could slip from your hands.
With your equipment ready and safety guidelines in mind, here are the five exercises that deliver the best results.
Exercises for Flabby Arms Over 60
These five movements target different arm muscles. Do them 2-3 times weekly for best results.
1: Bicep Curls

Stand or sit with weights hanging at your sides, palms facing forward like you’re about to shake hands. Slowly curl the weights toward your shoulders.
Take a full 2 seconds to get there. Hold at the top for 2 seconds. This pause doubles muscle activation.
Lower for 3 seconds. Keep elbows pinned to ribs; don’t let them drift forward.
The Squeeze Test: You should feel burning in the front of your upper arms, not your forearms or shoulders.
2: Tricep Kickbacks

Hinge forward slightly, holding light weights. Bend elbows to 90 degrees, upper arms parallel to your back.
Straighten arms behind you. Breathe out as you extend, in as you bend. Your upper arm stays frozen. Only your forearm moves.
Master this move by keeping constant tension in the back of your arm throughout the entire movement
Common mistake: Swinging the weight makes this useless for toning.
3: Overhead Tricep Extensions

Hold one weight with both hands overhead. Keep your elbows close to your ears.
Lower weight behind your head until forearms touch biceps. Raise back up.
Caution: Skip this exercise if you have shoulder pain. Tricep kickbacks work the same muscles without overhead stress.
Feel it in the back of your upper arms.
4: Lateral Arm Raises
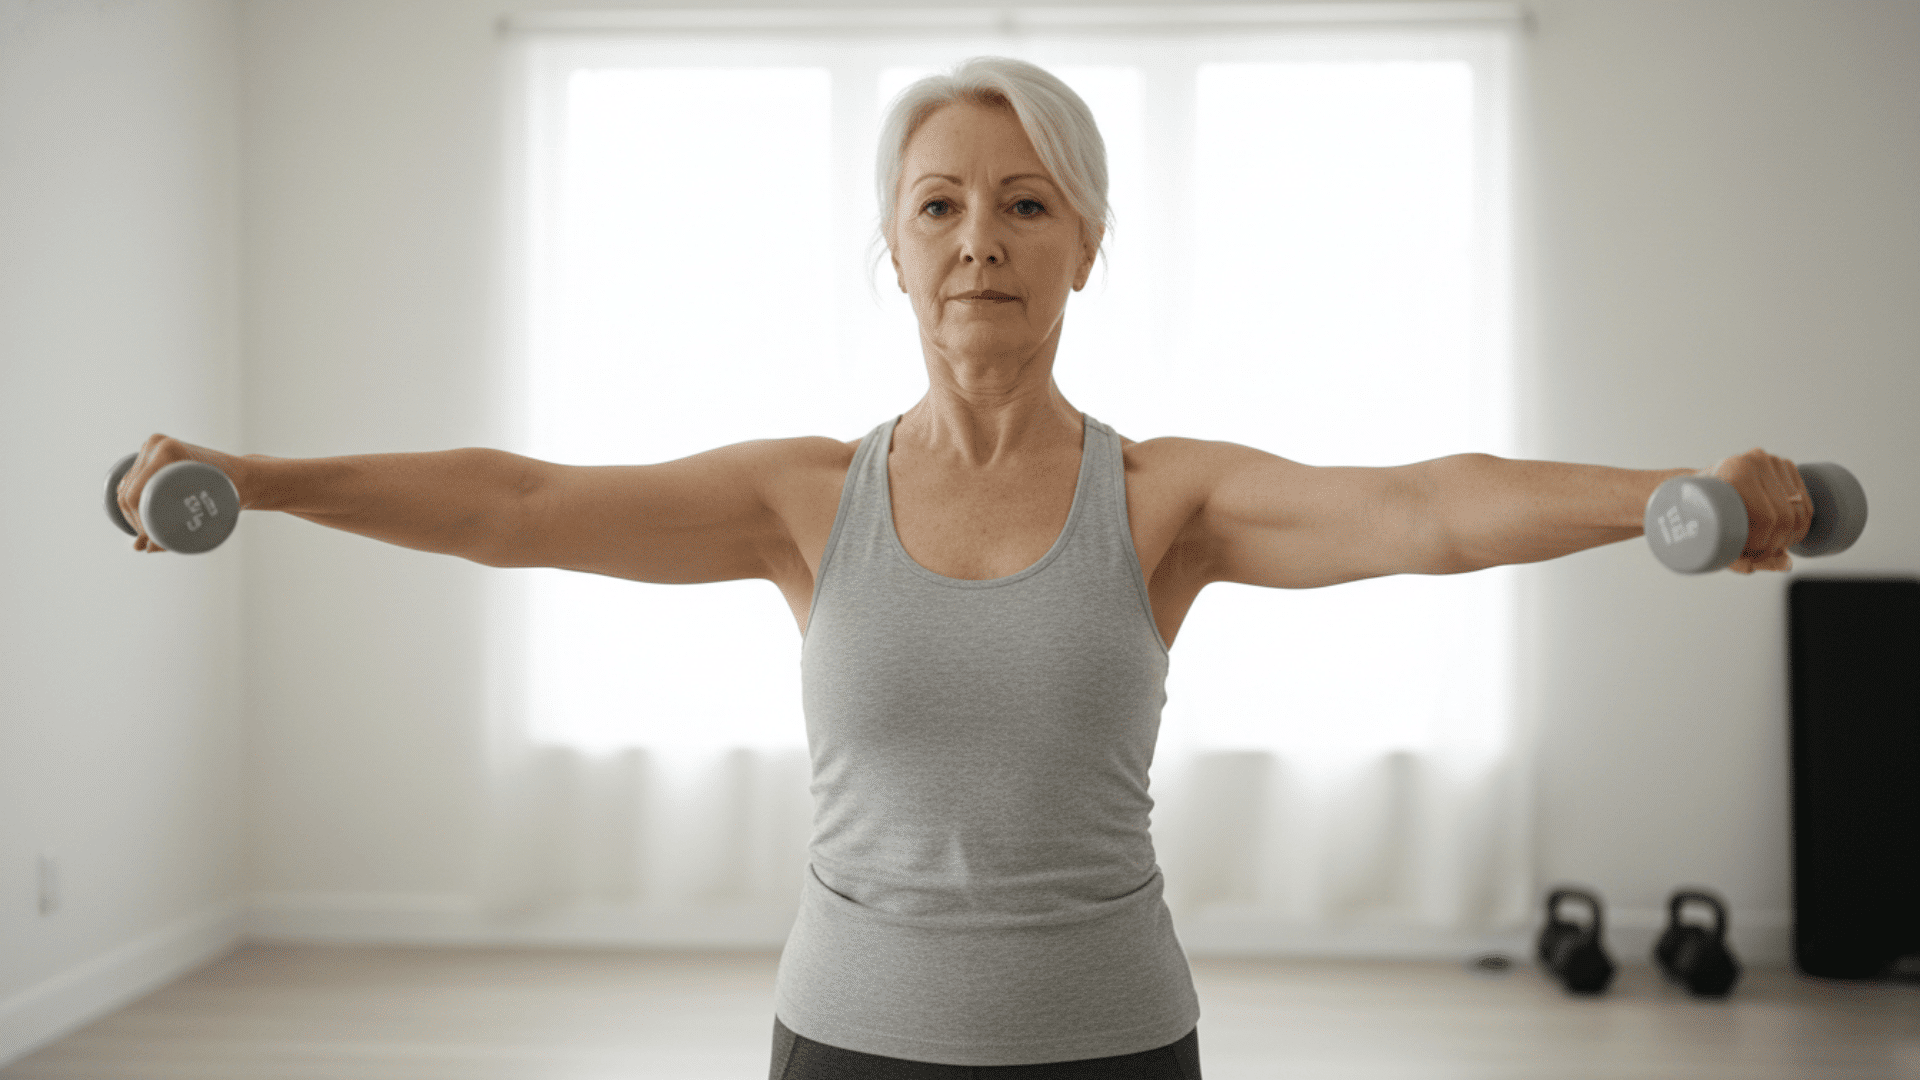
Hold light weights (1-3 pounds) at your sides. Lift arms out to sides until shoulder height, elbows slightly bent. Stop at shoulder level. Going higher pinches the shoulder joints. Lower slowly for 3 seconds.
You should feel this in the outer shoulders, not your neck.
Start light on this one. Most people overestimate how much weight they can lift to shoulder height with good form.
5: Wall Push-Ups

Stand at arm’s length from a wall. Place hands flat at shoulder height, slightly wider than shoulders.
Bend your elbows and lean toward the wall until your nose nearly touches it. Push back.
Move your feet farther from the wall as you get stronger. Feel it in the chest, shoulders, and arms. Not your lower back.
This exercise engages your entire upper body. It’s the most functional movement in this routine because it mimics daily activities like pushing open heavy doors.
If standing exercises feel too challenging or you have balance concerns, these seated versions work just as well.
JUMP TO MODIFICATIONS FOR ARTHRITIS AND JOINT PAIN
Seated and Low-Impact Arm Exercises
Sitting removes balance challenges. You can focus completely on proper form and muscle engagement.
1: Chair-Based Bicep Curls
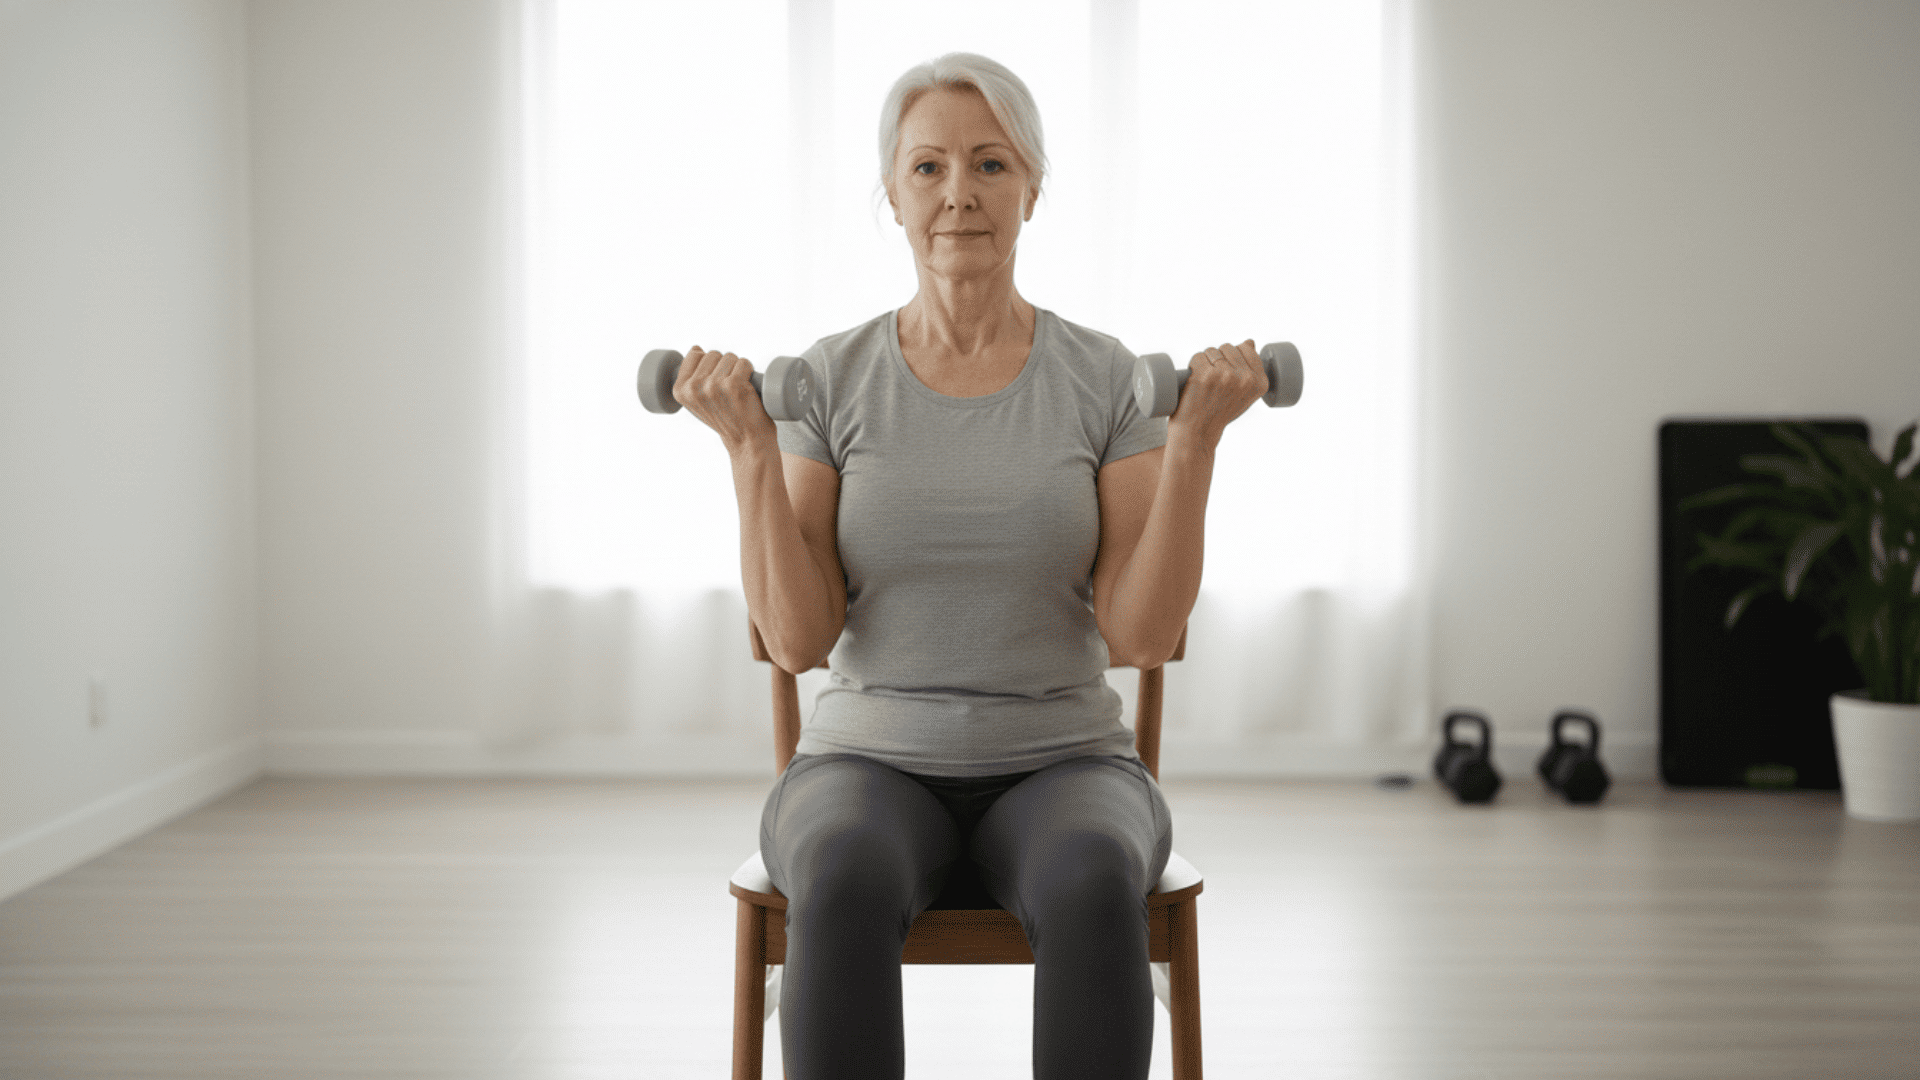
Sit tall in a sturdy chair with both feet flat on the floor. Hold weights at your sides with palms facing forward. You should feel stable and balanced before you begin.
Curl weights toward the shoulders. Keep both feet pressed firmly into the ground. This foot pressure activates your core and prevents body sway.
Lower for 3 seconds. Your elbows never leave your rib cage.
The Chair Advantage: Sitting eliminates momentum. You can’t cheat by rocking your body backward.
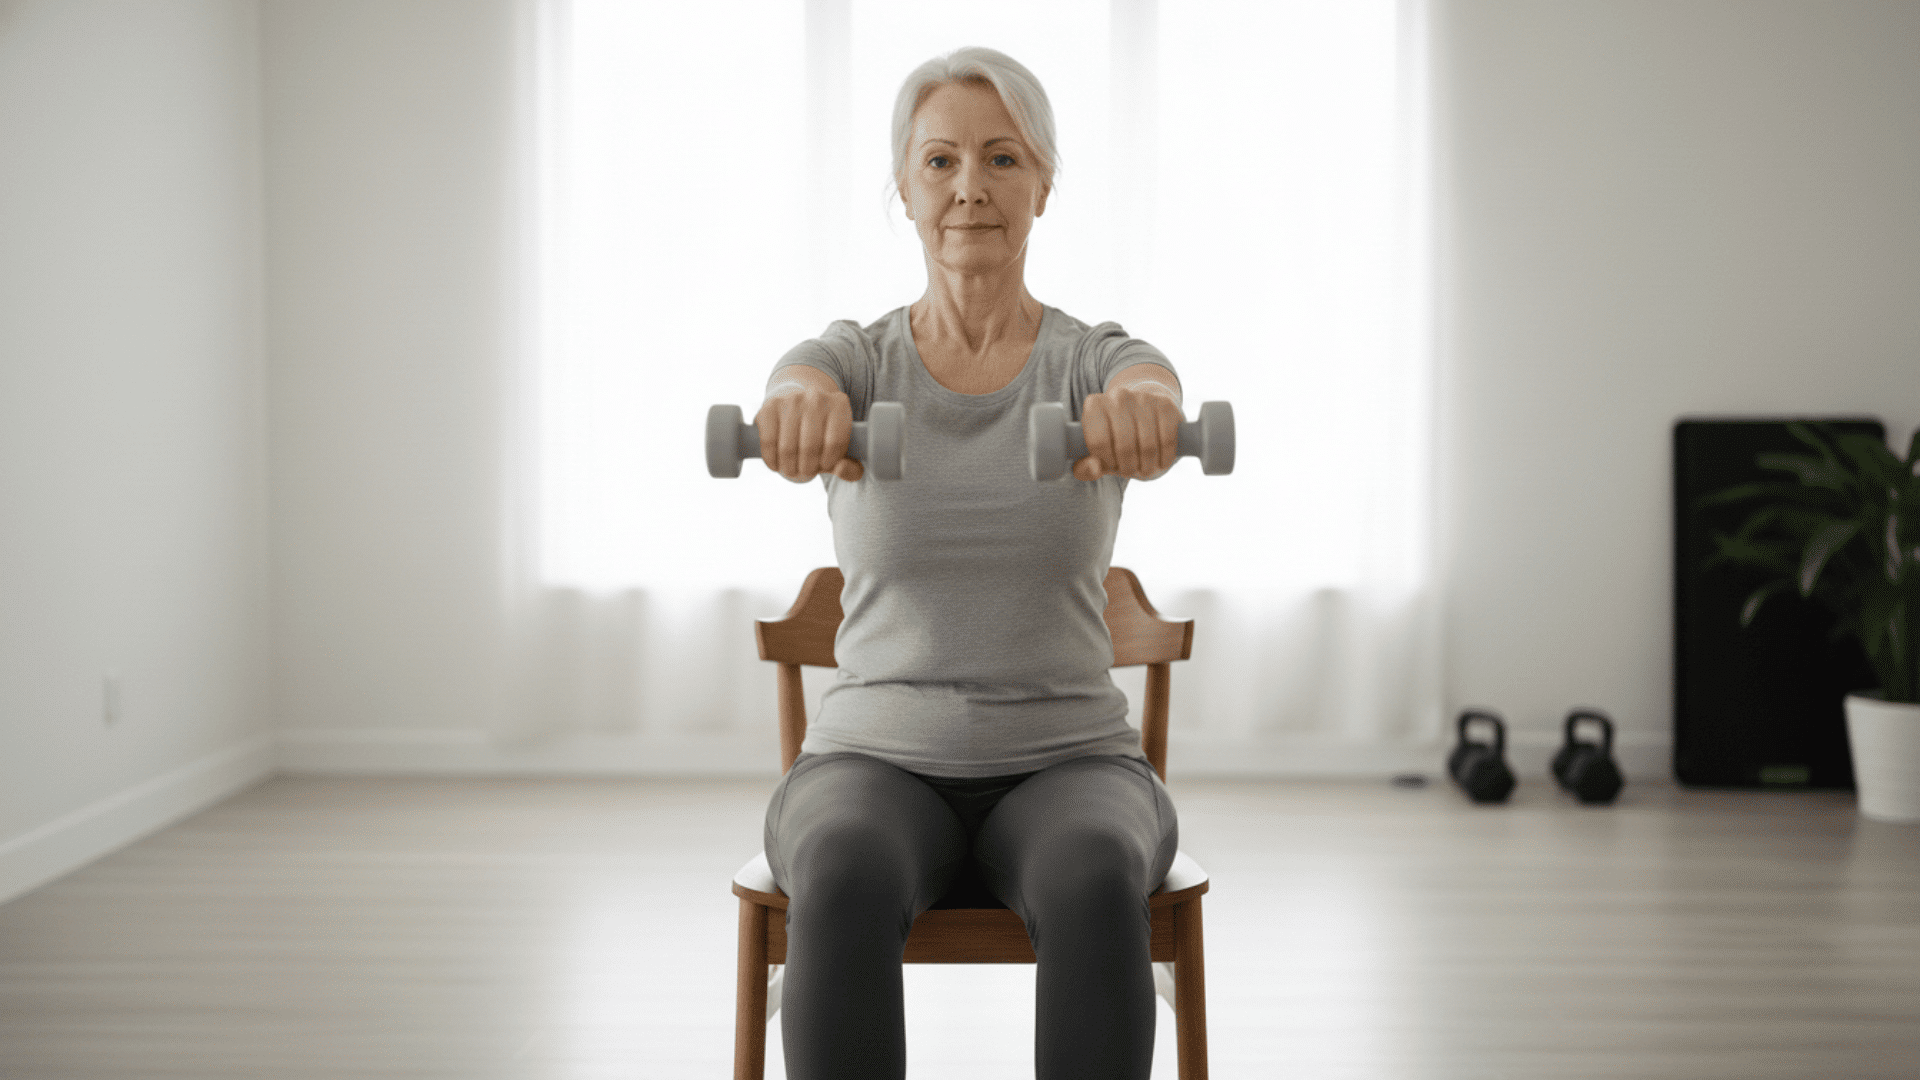
2: Seated Tricep Extensions

Hold one weight with both hands overhead. Elbows point forward, close to your ears.
Lower weight behind your head. Stop when your forearms touch your biceps.
Press back up, but don’t lock your elbows at the top. Locked elbows shift tension from muscles to joints.
Feel the burn in the back of your arms, not your shoulders or neck.
3: Front Arm Raises While Seated
Sit with weights resting on your thighs. Palms face down.
Lift arms straight forward to shoulder height. Exhale as you raise the weights. This breath timing tightens your core and protects your lower back.
Lower slowly for 3 seconds. Breathe in as you lower.
Stop at shoulder level. Going higher strains the rotator cuff.
Your shoulders stay relaxed and down. Never shrug them toward your ears during any part of this movement.
These seated variations give you the same strength benefits without the balance challenge. Now let’s talk about how often you should do them.
Weekly Training Schedule
Here’s something that surprises most people: your muscles grow during rest, not during workouts. Training too often actually prevents growth.
1: How Often to Train Arms
Train arms 2-3 times per week on non-consecutive days. Research published in the National Institutes of Health databaseshows seniors need 48-72 hours between sessions for full recovery
Monday and Thursday work well. So does Tuesday, Thursday, and Saturday.
Never train the same muscles two days in a row. Your muscles rebuild and strengthen during the 48 hours after your workout, not during it.
The Frequency Rule: More than three arm sessions weekly provides no extra benefit. You’ll just feel tired and sore.
2: Rest Days and Recovery
Take at least 2-3 complete rest days each week. Seniors need more recovery time than younger adults because muscle repair slows with age.
Light walking or stretching on rest days is fine. Just avoid lifting weights or doing arm exercises.
Sleep 7-9 hours per night. Your body repairs muscle tissue while you sleep, especially during deep sleep stages.
The Soreness Signal: Mild soreness for 24-48 hours is normal. Pain lasting 3+ days means you trained too hard or too frequently.
As you follow this schedule over the weeks, you’ll naturally get stronger. Here’s how to know when you’re ready to increase the weight.
How to Increase Weights Safely?
Progress slowly. Adding weight too fast causes injury and setbacks.
1: Signs You Are Ready to Progress
You can complete 12 reps with good form and still feel strong. The last two reps should feel challenging but not impossible.
You finish your sets thinking you could do 2-3 more reps. This means your muscles adapted to the current weight.
Your form stays perfect throughout all reps. No swinging, leaning, or using momentum to lift the weight.
The Two-Week Rule: If you hit 12 clean reps for two sessions in a row, add weight next time.
2: Recommended Weight Increases
Add 1-2 pounds for arm exercises. Small increases matter more than you think.
Cleveland Clinic research shows seniors should never increase by more than 10% weekly. A 5-pound weight should only go up to 5.5 pounds maximum.
Use half-pound or one-pound increments if available. Most gyms have these smaller plates.
The Plate Math: Adding just 1 pound every two weeks equals 26 pounds more in one year. That’s huge progress for arms over 60.
3: When to Reduce Load
Drop weight immediately if you feel sharp pain during any movement. Sharp pain signals injury, not muscle work.
Your form breaks down before reaching 8 reps. This means the weight is too heavy for safe training.
You feel exhausted or sore for more than 3 days after workouts. This indicates overtraining or too much weight too soon.
Reduce by 20-30% and rebuild slowly. Going backward temporarily prevents major setbacks from injury.
Expected Results Timeline
Progress happens in stages, and understanding this timeline prevents discouragement. Your nervous system adapts first, usually within 2 weeks. Then your strength increases.
Finally, visible muscle changes appear. Real changes take 9-12 weeks of consistent work.
Here’s exactly what to expect at each stage:
| Timeline | What You’ll Notice | Why It Happens |
|---|---|---|
| After 2 Weeks | Exercises feel easier. You lift groceries more easily. No visible size changes yet. | Your nervous system adapts first. Brain-to-muscle communication improves before muscles grow. This is called neuromuscular adaptation. |
| After 4 Weeks | Slight firmness appears when you flex. You can lift 2-3 pounds more than in week one. Arms feel less jiggly during movement. | Muscle protein synthesis increases. Your body builds new muscle fibers to handle the training stress. Initial muscle growth begins. |
| After 6 Weeks | Small changes are visible in the mirror. Strength increases by 15-20% from the starting point. You complete 3-4 more reps with the same weight. | Consistent training triggers early muscle growth. Muscle fibers thicken. The fat layer above the muscle reduces due to increased calorie burn. |
| After 9-12 Weeks | Visible muscle definition when arms hang relaxed. Strength increases by 30-40% from the starting point. Arms look noticeably firmer. Friends notice the change. Shirts fit better around the upper arms. | Real muscle growth becomes visible. Muscle fibers have thickened and multiplied. The fat layer reduces substantially. Skin appears tighter as muscle fills the space beneath. |
| The Reality Check: Most people quit before week 6. Those who push through see the biggest changes between weeks 9 and 12. |
What This Means for You:
- Take photos at week 0, week 6, and week 12
- Don’t expect visible changes before week 6-8
- Focus on strength gains (more reps, heavier weights) as early progress
- Results vary based on starting fitness level, nutrition, and consistency
These timelines assume consistent training and proper nutrition. If you have arthritis or joint pain, here’s how to adjust the exercises.
Modifications for Arthritis and Joint Pain
Living with arthritis doesn’t mean giving up arm training. Smart modifications let you build strength while protecting your joints.
1. Grip and Equipment Adjustments
Thick foam grips reduce hand strain by 40% compared to bare metal. Wrap a pool noodle foam around dumbbell handles or buy commercial grip padding.
Use wrist straps for pulling exercises. These transfer the load from arthritic fingers to your forearms, letting you work your biceps without hand pain.
Switch to hexagonal dumbbells instead of round ones. They won’t roll if you need to set them down mid-set during a pain flare.
2. Resistance Band Alternatives
Bands eliminate the hardest part of each lift: the bottom position where joints compress most. Tension builds gradually as you move.
Choose bands with handles, not loops. Start with light resistance (usually yellow or red bands) providing 5-15 pounds at full stretch.
Anchor bands at chest height for rows and presses. This keeps your shoulders in their most comfortable mid-range position.
A study in the Journal of Physical Therapy Science found that elastic band resistance training effectively reduced pain and improved function in elderly patients with degenerative knee arthritis after just 4 weeks.”
3. Range of Motion Adjustments
Work within your pain-free zone only. If tricep extensions hurt past 90 degrees, stop there. Partial reps still build strength without damaging joints.
Use a chair with arms for seated exercises. Push down on the armrests to unload your shoulder joints during overhead movements.
Reduce range by 30-50% on bad pain days. Doing 6 half-range bicep curls beats skipping the workout entirely.
Rate your joint pain from 1-10 before starting. Above 5, reduce the range by half and cut the weight by 30%. Above 7, switch to bands or skip that day.
These modifications help you work around pain. But even with perfect adaptations, watch out for these common mistakes that slow your progress.
Common Mistakes to Avoid
Small errors derail your progress and increase injury risk. Here are the three biggest mistakes people over 60 make with arm training.
Training Too Frequently
1. Muscles need 48-72 hours between sessions: Daily training prevents growth and causes constant soreness.
2. Stick to 2-3 sessions per week maximum: Monday and Thursday work well. Tuesday, Thursday, and Saturday are also effective.
3. More workouts don’t equal faster results: Three weekly sessions build the same strength as five with less fatigue.
4. Watch for overtraining signs: Soreness beyond 72 hours, declining strength, sleep trouble, or post-workout exhaustion.
Lifting Too Heavy
1. Start lighter than you think necessary: First two weeks should feel almost too easy for proper form.
2. Complete 12 reps with 2-3 left in reserve: If you can’t reach 8 clean reps, the weight is too heavy.
3. Never increase by more than 10% weekly: A 5-pound dumbbell should only jump to 5.5 pounds maximum.
4. Sharp pain means stop immediately: Muscle burn is normal. Stabbing sensations signal injury, not progress.
Skipping Warm-Ups
1. Walk in place for 5 minutes first: This increases blood flow and raises muscle temperature.
2. Add 30 seconds of arm circles in each direction: Keep movements controlled and smooth throughout.
3. Finish with 10 slow shoulder rolls: This lubricates joints before strength work begins.
4. Never skip in cold weather: Muscles contract in cold weather and need extra preparation time.
With proper form, smart progression, and consistency, you have everything you need to see real results.
Medical Disclaimer
This article provides general information about arm exercises for educational purposes only. It is not intended as medical advice or a substitute for professional healthcare guidance.
Always consult your physician before starting any new exercise program, especially if you have existing health conditions, take medications, or have been inactive for an extended period.
Stop exercising immediately and seek medical attention if you experience chest pain, dizziness, shortness of breath, or unusual discomfort. Individual results may vary based on age, health status, and adherence to proper form.
Conclusion
Your arms can get stronger at any age. The science is clear: consistent training 2-3 times weekly rebuilds muscle lost to aging.
Start today with bodyweight exercises or light weights. Follow the program and track your progress. Most people see noticeable strength gains within two weeks and visible firmness by week six.
Remember the key principles: warm up every session, use proper form over heavy weights, and allow adequate recovery time between workouts.
Joint pain or arthritis doesn’t have to stop you. Use the modifications provided to train safely while protecting your body.
The difference between staying weak and growing stronger is simple: taking action today. Pick one exercise from this guide. Do 10 reps right now. That’s how transformation starts.
What’s working for you? Share your favorite arm exercise in the comments below, or tell us which challenge you’re facing.
Frequently Asked Questions
Can You Really Tone Arms After 60?
Yes. Targeted strength training combined with proper nutrition rebuilds lost muscle and reduces arm flab. Consistency over 6-12 weeks produces visible firmness and definition.
How Long Does It Take To See Results From Arm Exercises After 60?
Strength improves in 2 weeks. Slight firmness appears by week 4. Visible muscle definition and reduced jiggle become noticeable after 6 weeks of consistent training.
Do I Need Gym Equipment, or Can I Do Arm Exercises At Home?
Home exercises work perfectly. Use light dumbbells, resistance bands, or household items like water bottles. Wall push-ups and chair dips require no equipment at all.
How Often Should I Do Arm Exercises At 60 To See Results?
Train arms 2-3 times weekly on non-consecutive days. Muscles need 48-72 hours of recovery between sessions. More frequent training prevents growth and increases injury risk.