Flabby arms are a common concern for many people, particularly as they age. The natural loss of muscle mass that occurs with aging can make it even harder to maintain toned and firm arms.
But what if you could fight back against this “flabbiness” without risking injury or needing a gym membership? This article shares some of the best arm exercises specifically designed for individuals.
By the end, you will have an easy-to-follow routine that will help you build strength, improve mobility, and reduce arm flabbiness.
You’ll also learn the importance of proper warm-ups and cool-downs to keep you safe and consistent.
Why Seniors Struggle with Flabby Arms?
Aging brings natural changes to our bodies, and one common concern is the development of “flabby arms.” This is often due to a process called sarcopenia, which is the age-related loss of muscle mass.
After the age of 30, a person can lose anywhere from 3% to 5% of their muscle mass per decade, and for seniors, this process can accelerate.
A decline in physical activity, which is common among older people, can also contribute to this issue.
When you’re less active, your metabolism becomes less efficient, making it harder to maintain muscle tone, especially in areas like the triceps.
The combination of reduced muscle mass and a less efficient metabolism can lead to that loose skin, or what some people call “bat wings,” under the arms.
However, with the right exercises, you can combat these effects and build strength to tone your arms.
10 Minute Arm Toning Workout Routine
To help you get started, here are some effective arm exercises you can do. You’ll only need a light set of hand weights, such as three pounds, or even water bottles if you’re just starting.
| Warm Up Before Workout
Before you begin your arm exercises, it’s important to warm up to get your blood flowing and prepare your muscles.
|
The workout is divided into three blocks, each comprising several different exercises. The goal is to do about 10 repetitions of each exercise to help tone your arms.
Block 1: Hammer Curls & Shoulder Holds
1. Hammer Hold
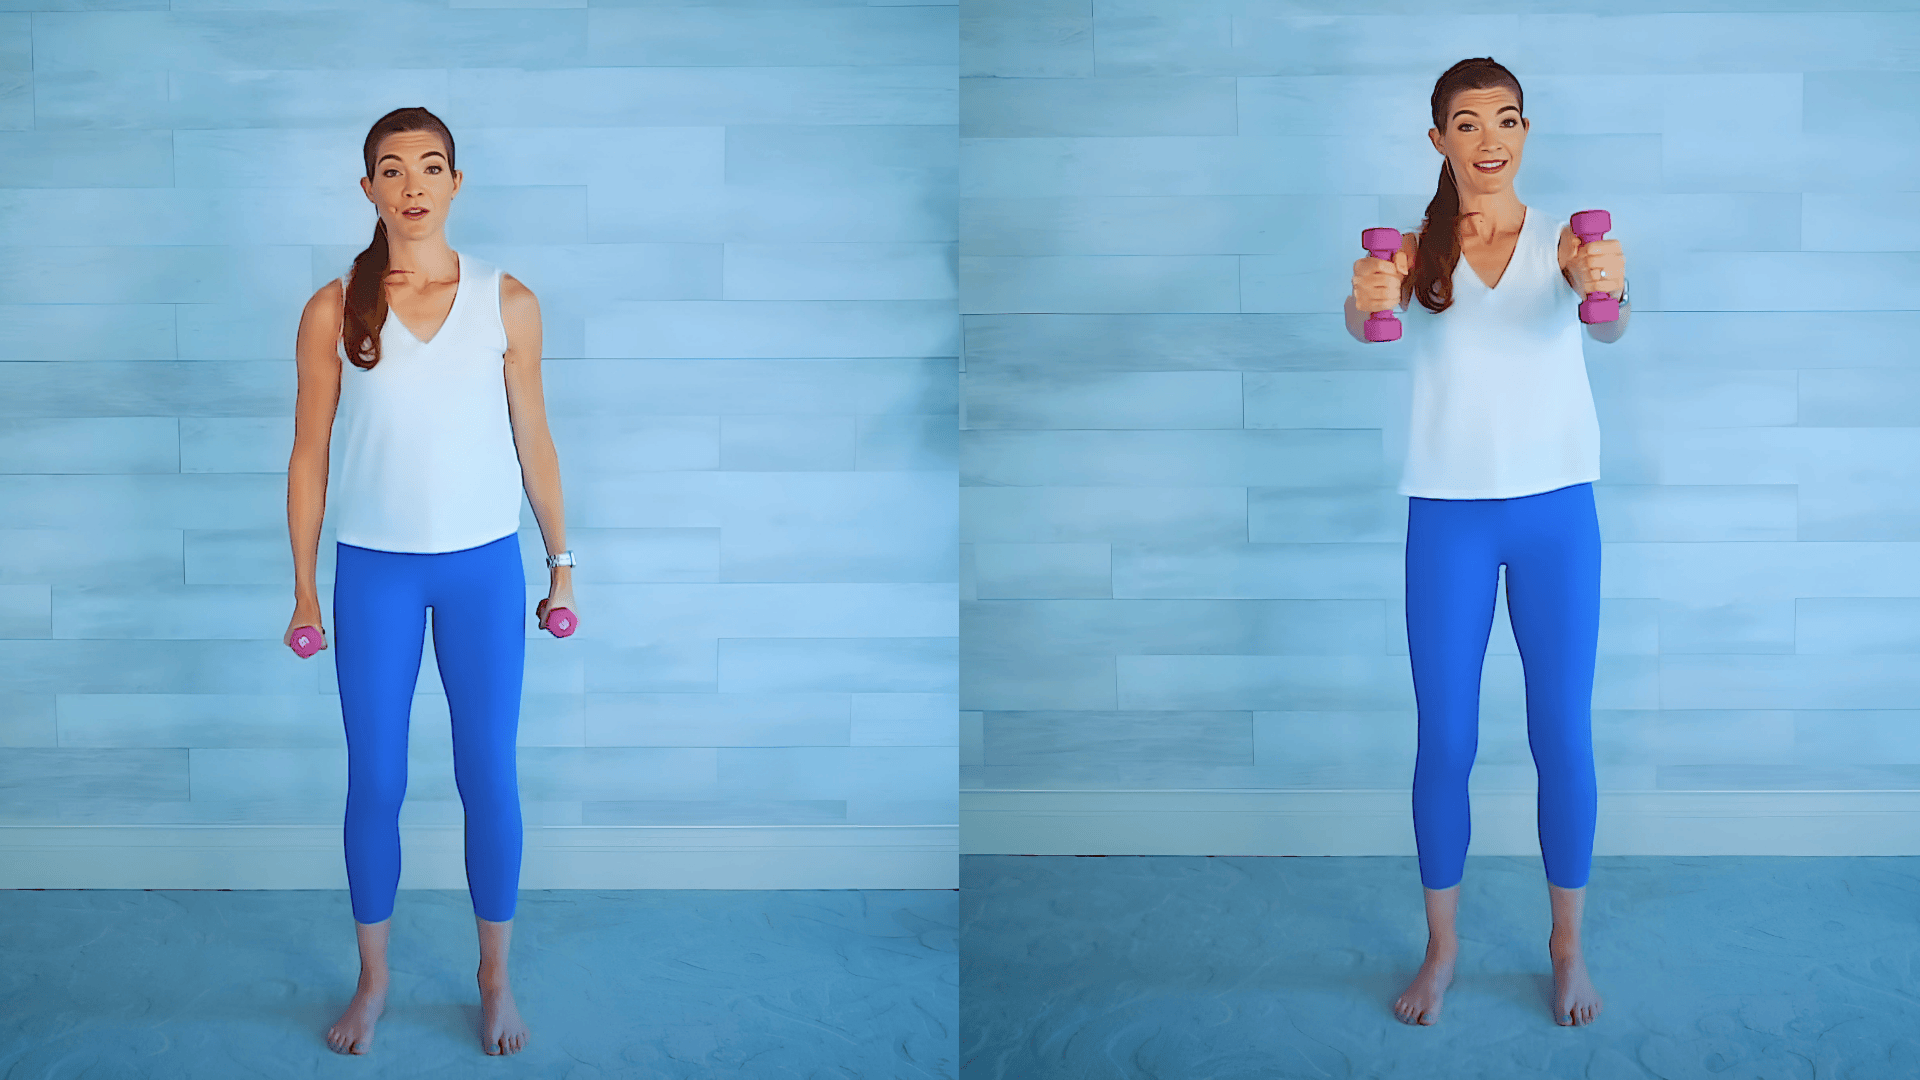
Stand with your feet under your hips, with a slight bend in your knees, and your palms facing each other.
Roll your shoulders down and back, then lift the weights straight up to shoulder height with a small bend in your elbows. You should aim for about 10 repetitions.
2. Isometric Hold
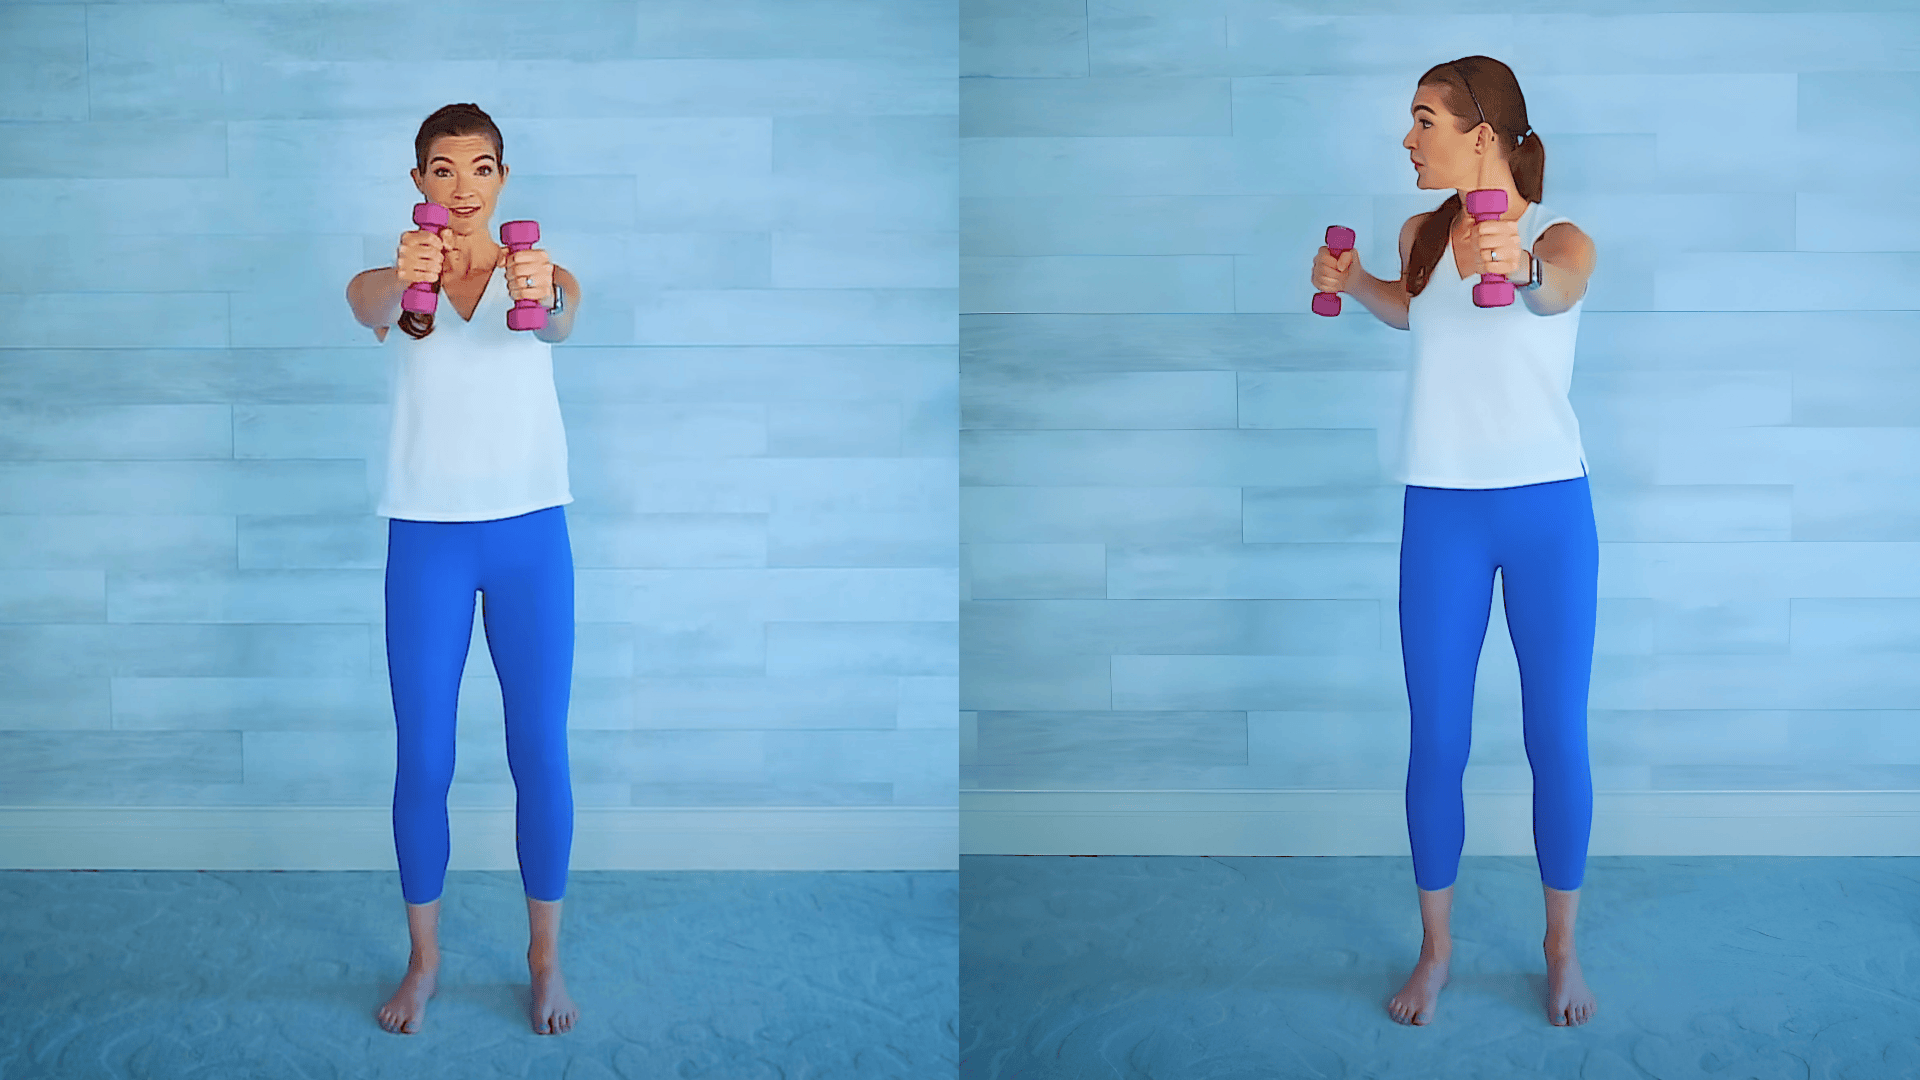
While holding one arm at shoulder height, pull the other arm back to the center of your body. Keep the elbow high to feel the tension in your shoulder. You can always drop the arm or take a break if needed.
3. Bicep Curls
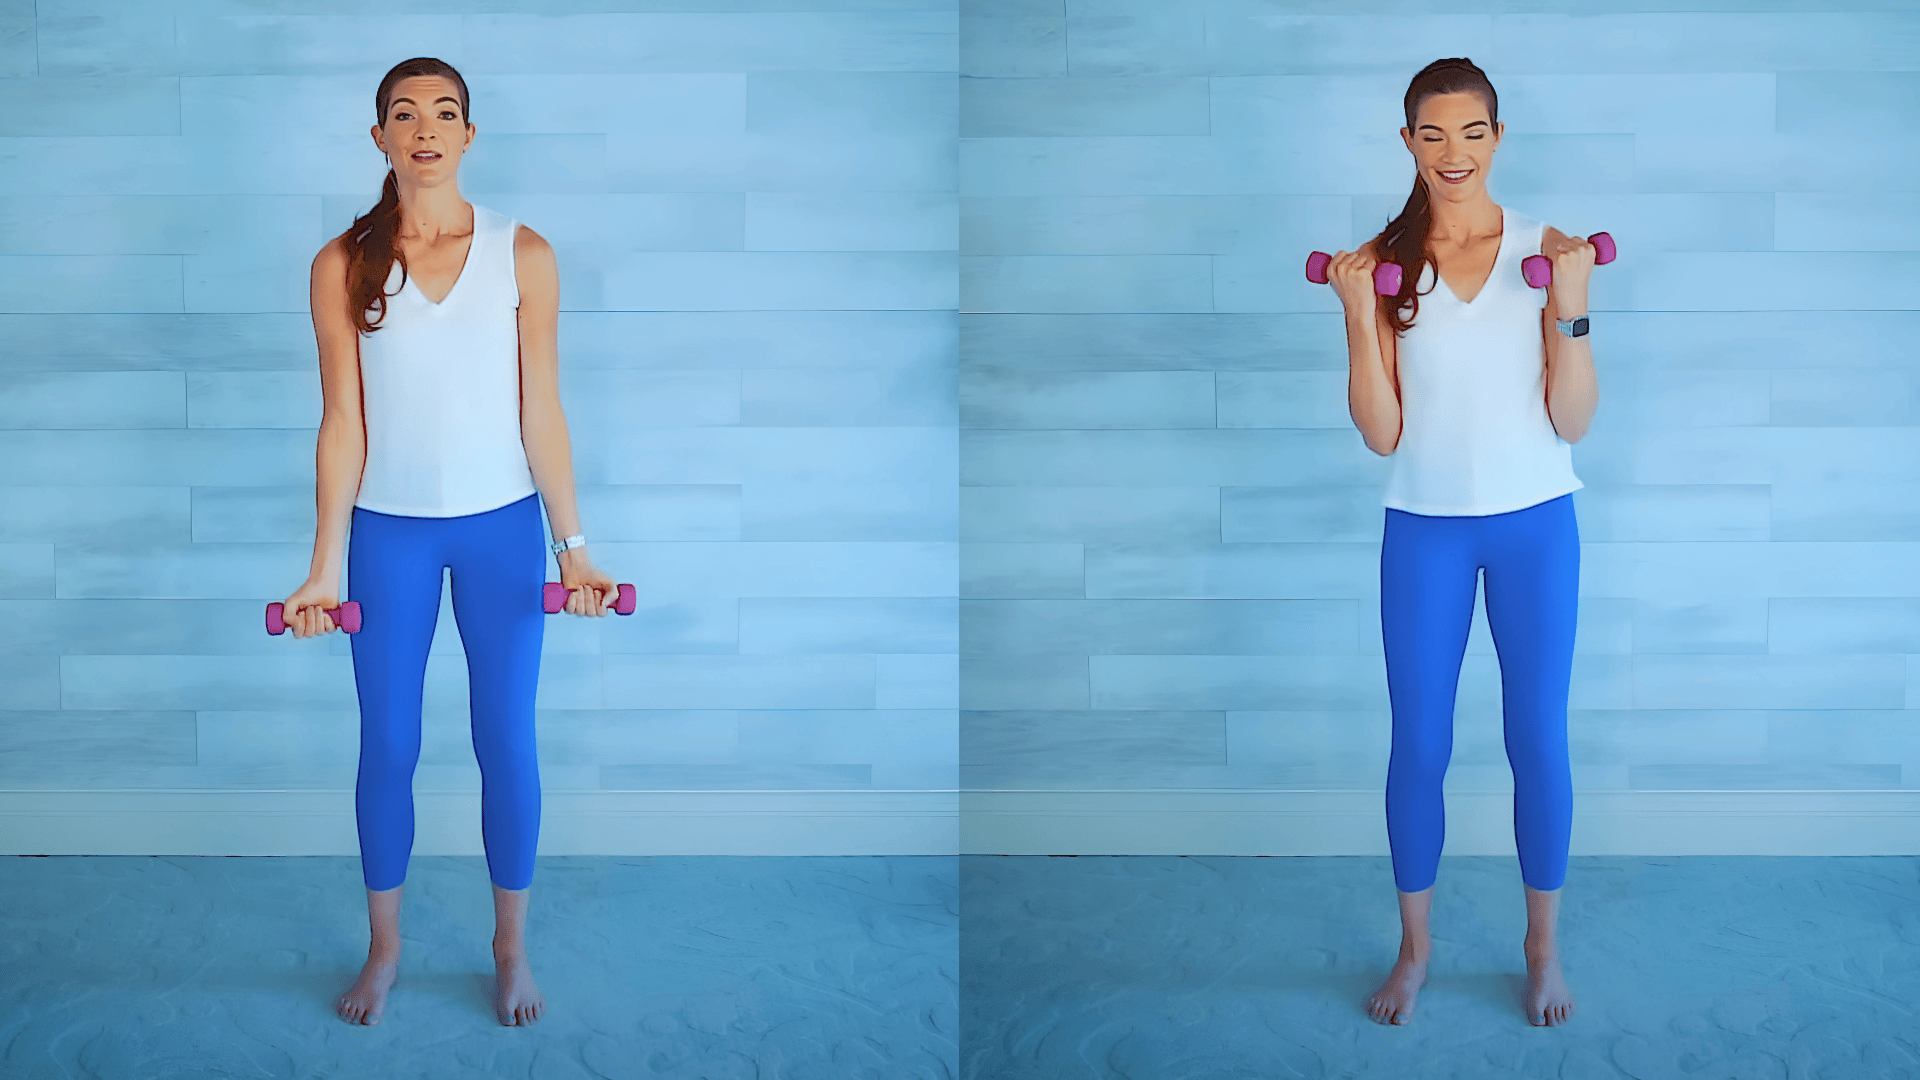
Flip your palms to face forward. Keep your elbows tucked close to your sides and perform bicep curls with a full range of motion. For added resistance, squeeze the muscle as you curl.
4. Side Swoops
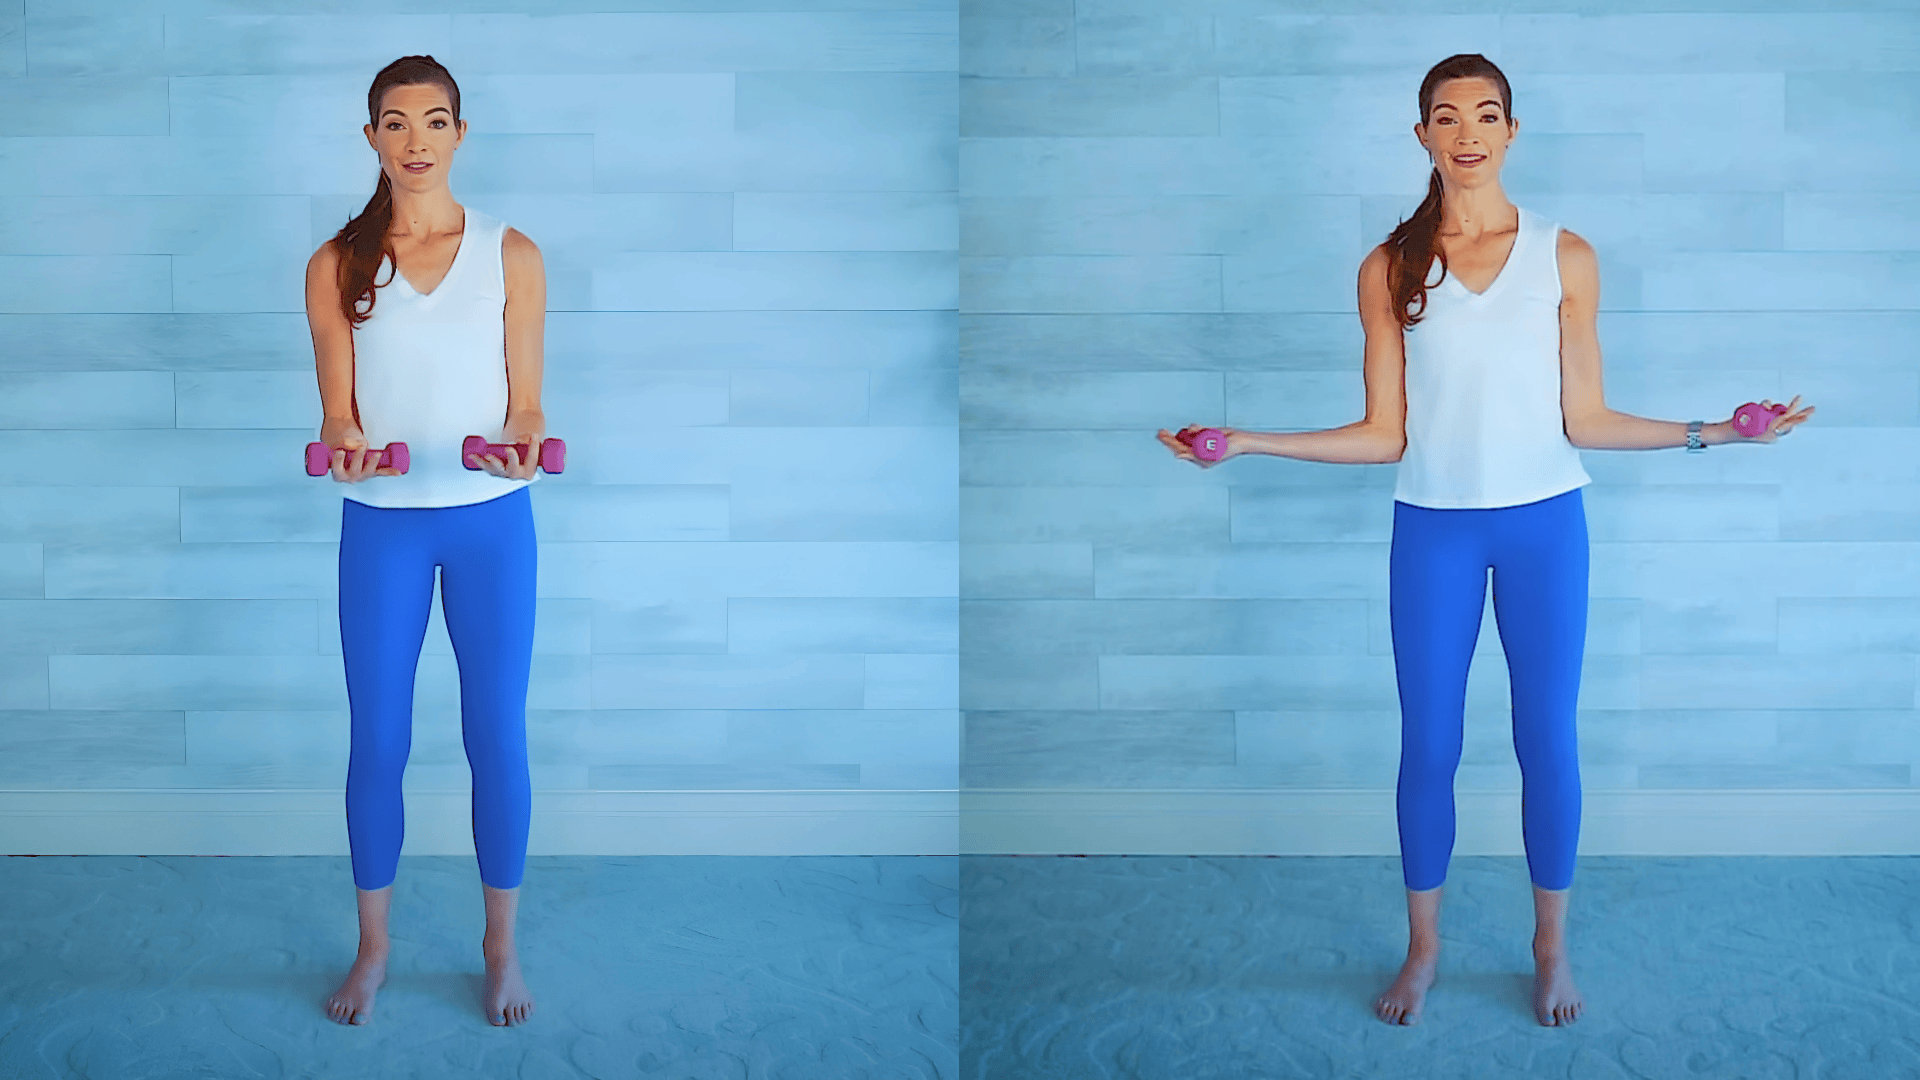
From the halfway down position of a bicep curl, elbows tucked, move your forearms out to the side and back to the center.
5. Elbow Bends with Weights
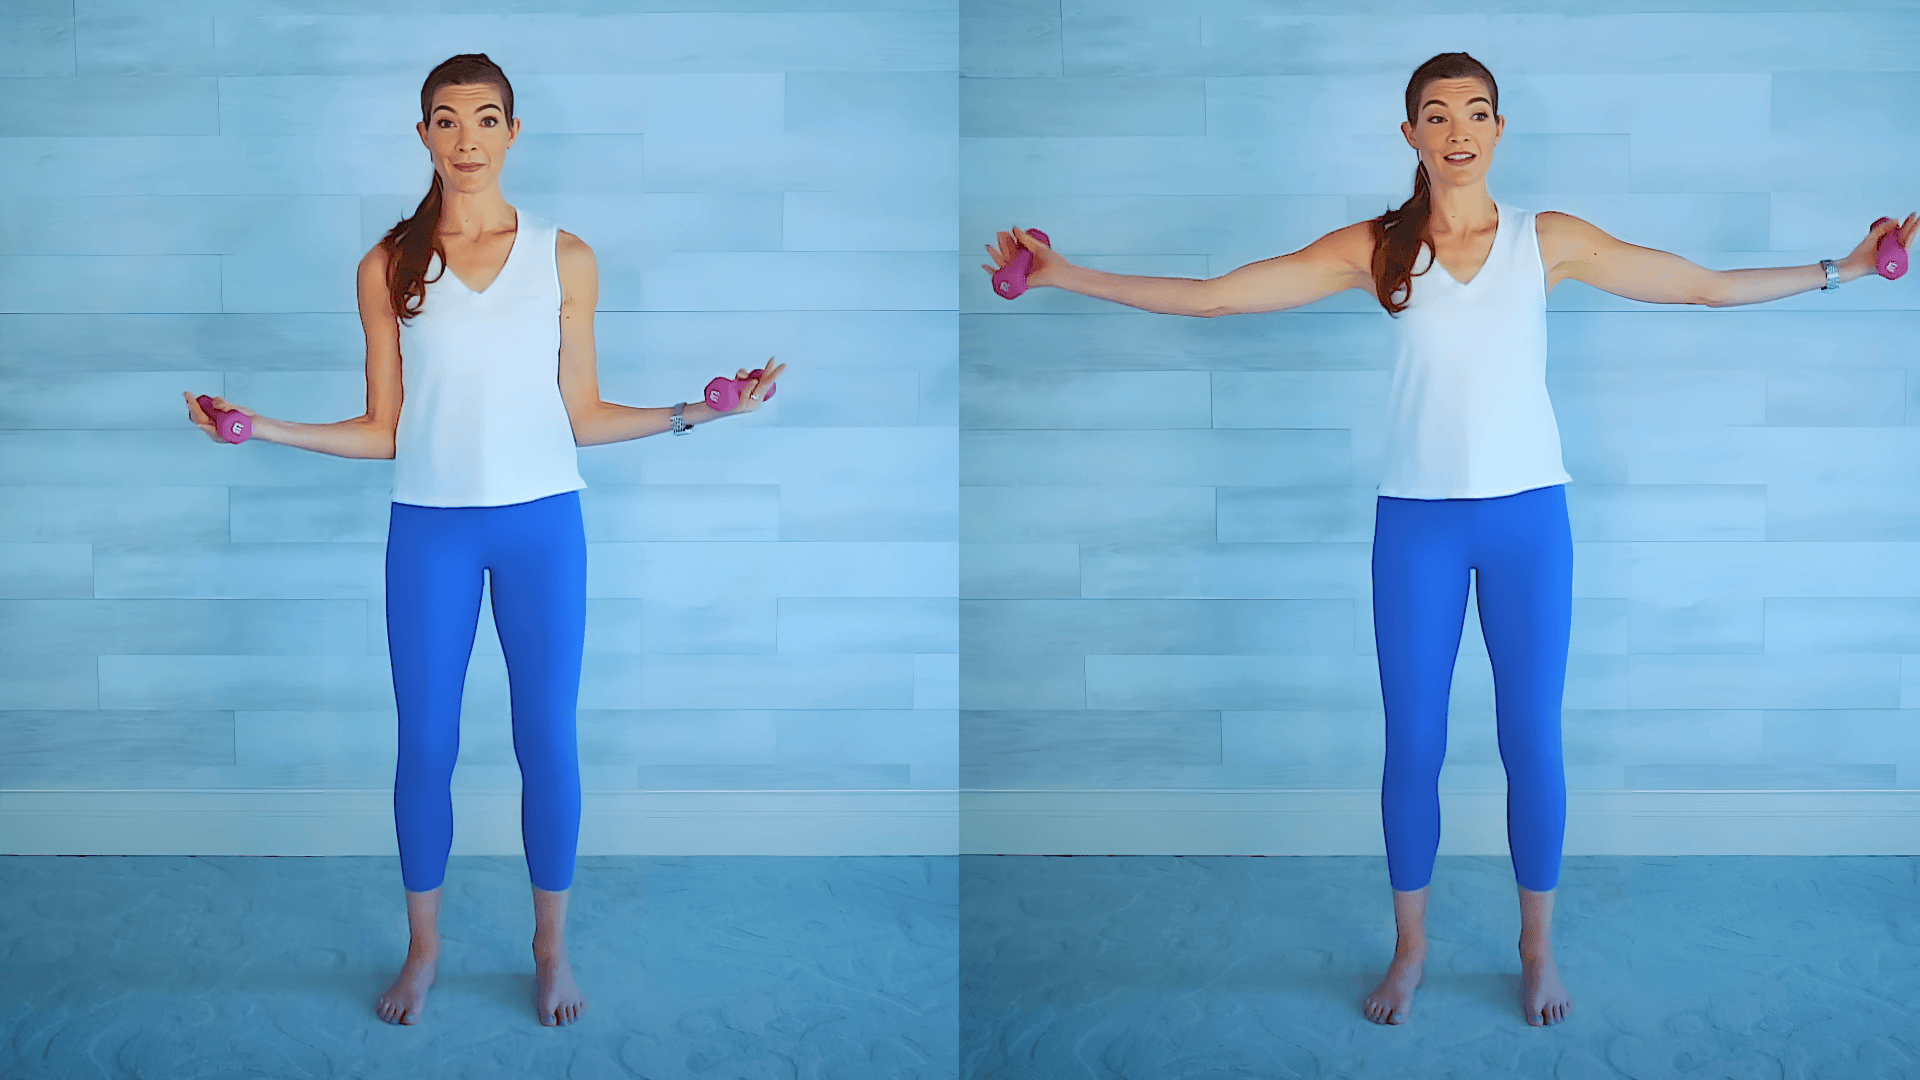
Start with your arms out to the side, then straighten your arms and bend your elbows back to your waist.
6. Palms Up/Down
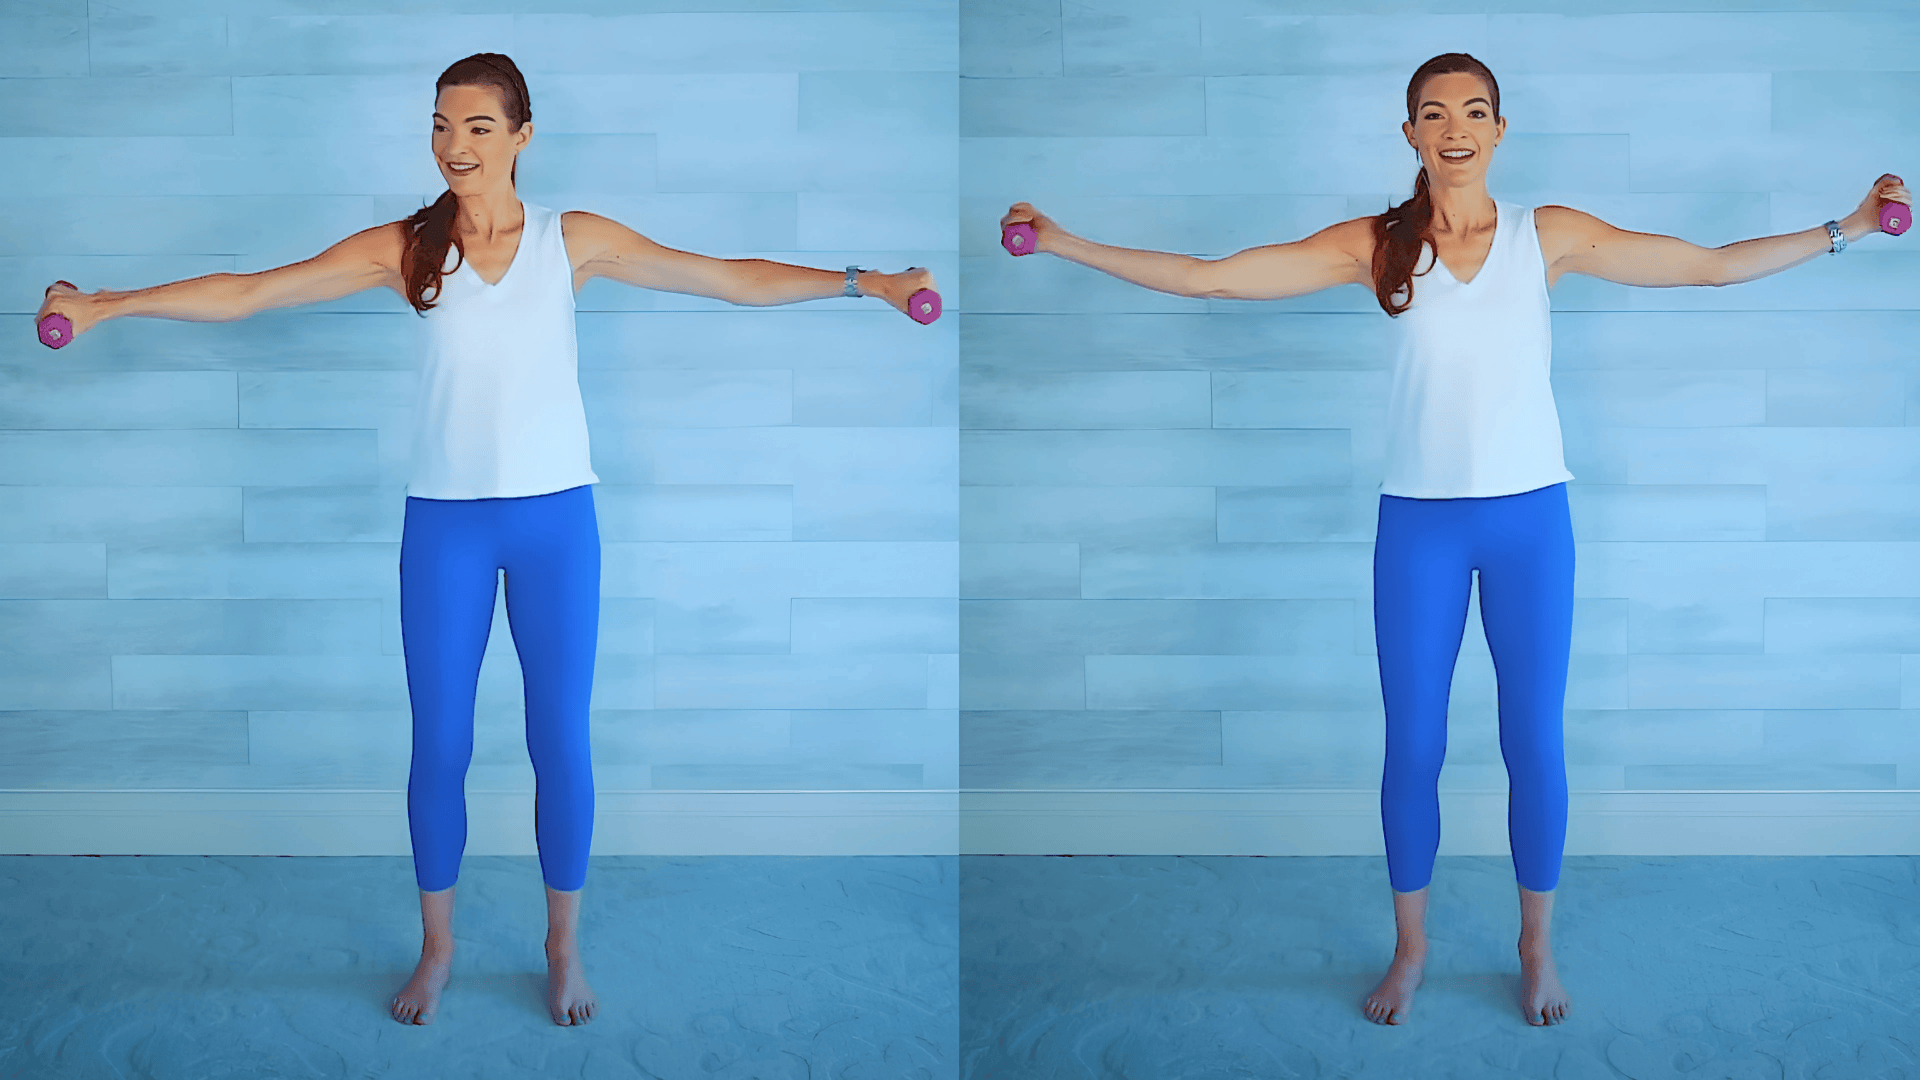
Hold your arms out to the side, then flip your palms up and down, rotating all the way from the shoulders.
Block 2: Triceps & Back of the Arm
7. Bent-Over Rows
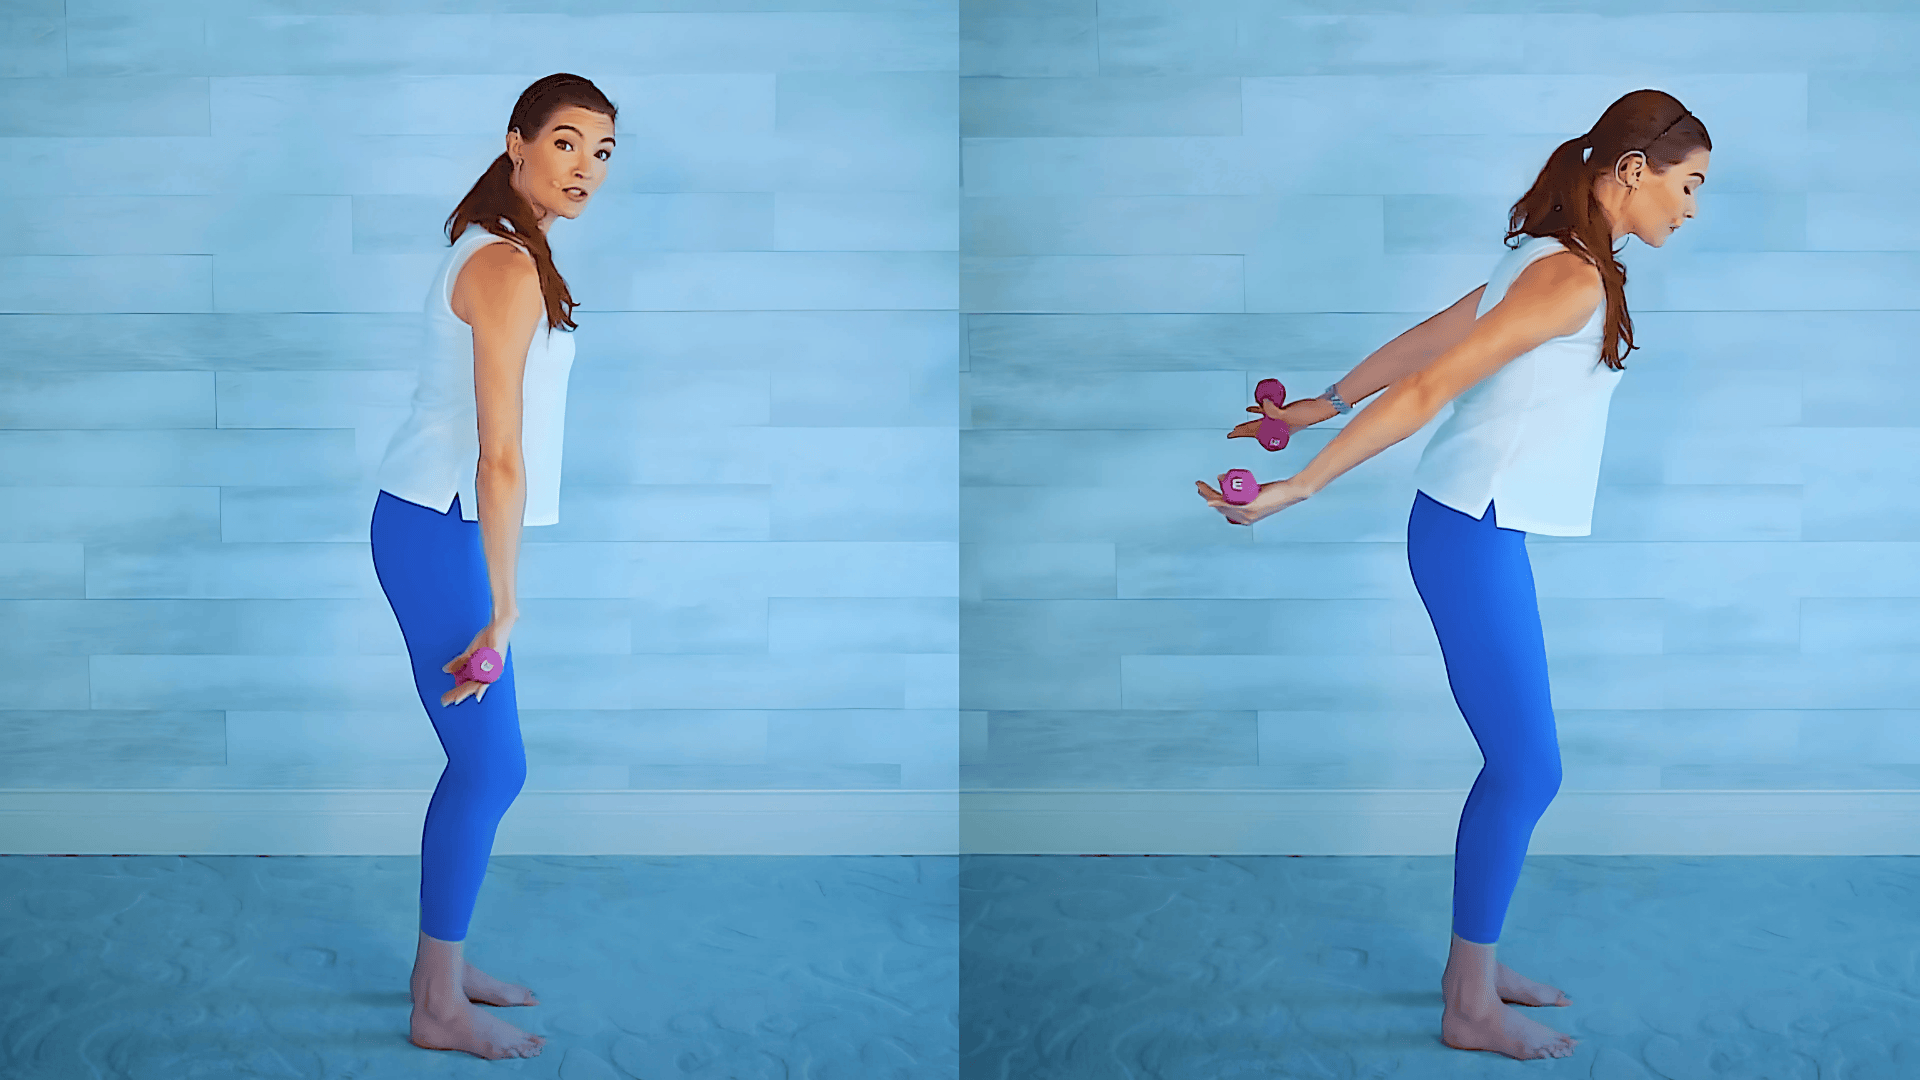
With a slight bend in your knees and a hinge forward, hold your arms straight with your palms facing up. Lift your arms back as if you’re trying to “high five the ceiling” and slowly lower them down.
It is important to keep your neck in line with your spine and your elbows straight. You can also try various modifications of bent-over rows by pressing your arms towards your back.
8. Elbow Bends
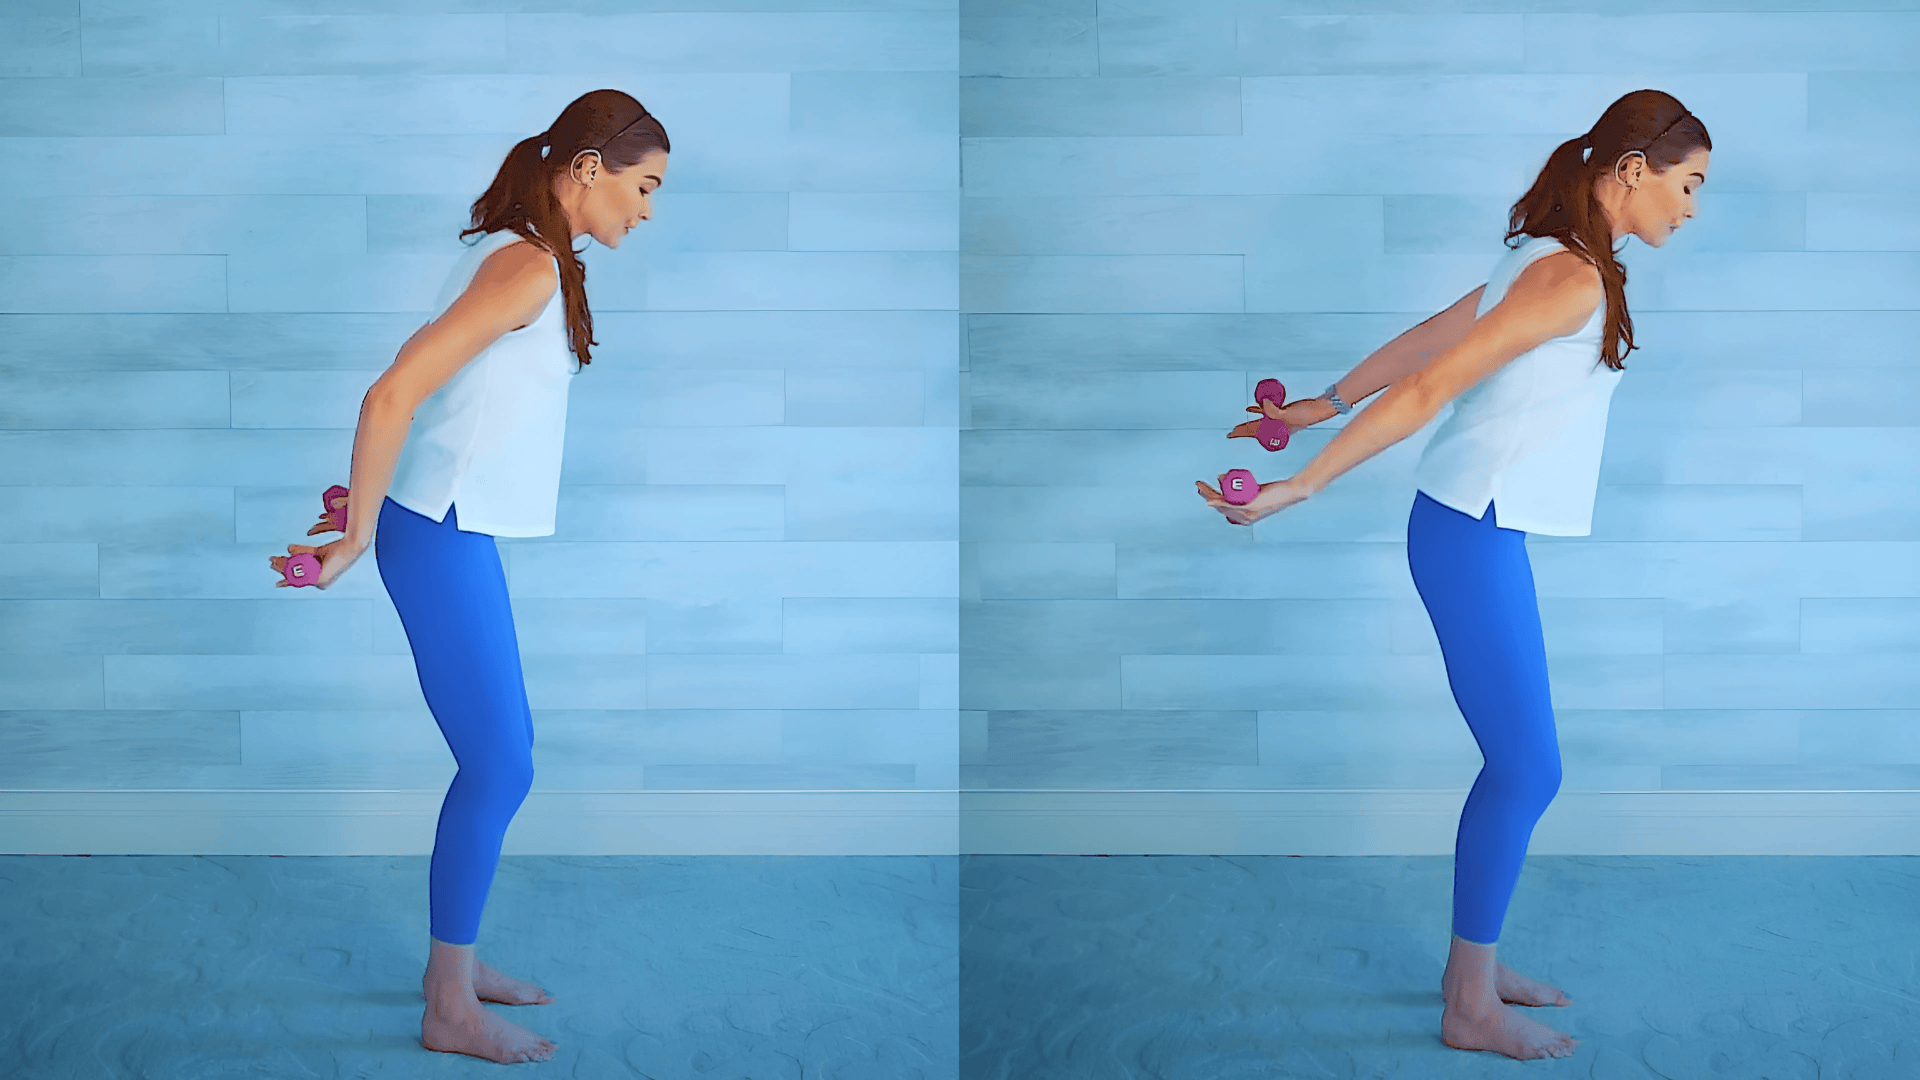
While holding your arms high behind you, slightly bend and straighten your elbows.
Block 3: Shoulders & Upright Rows
9. Lateral Raises
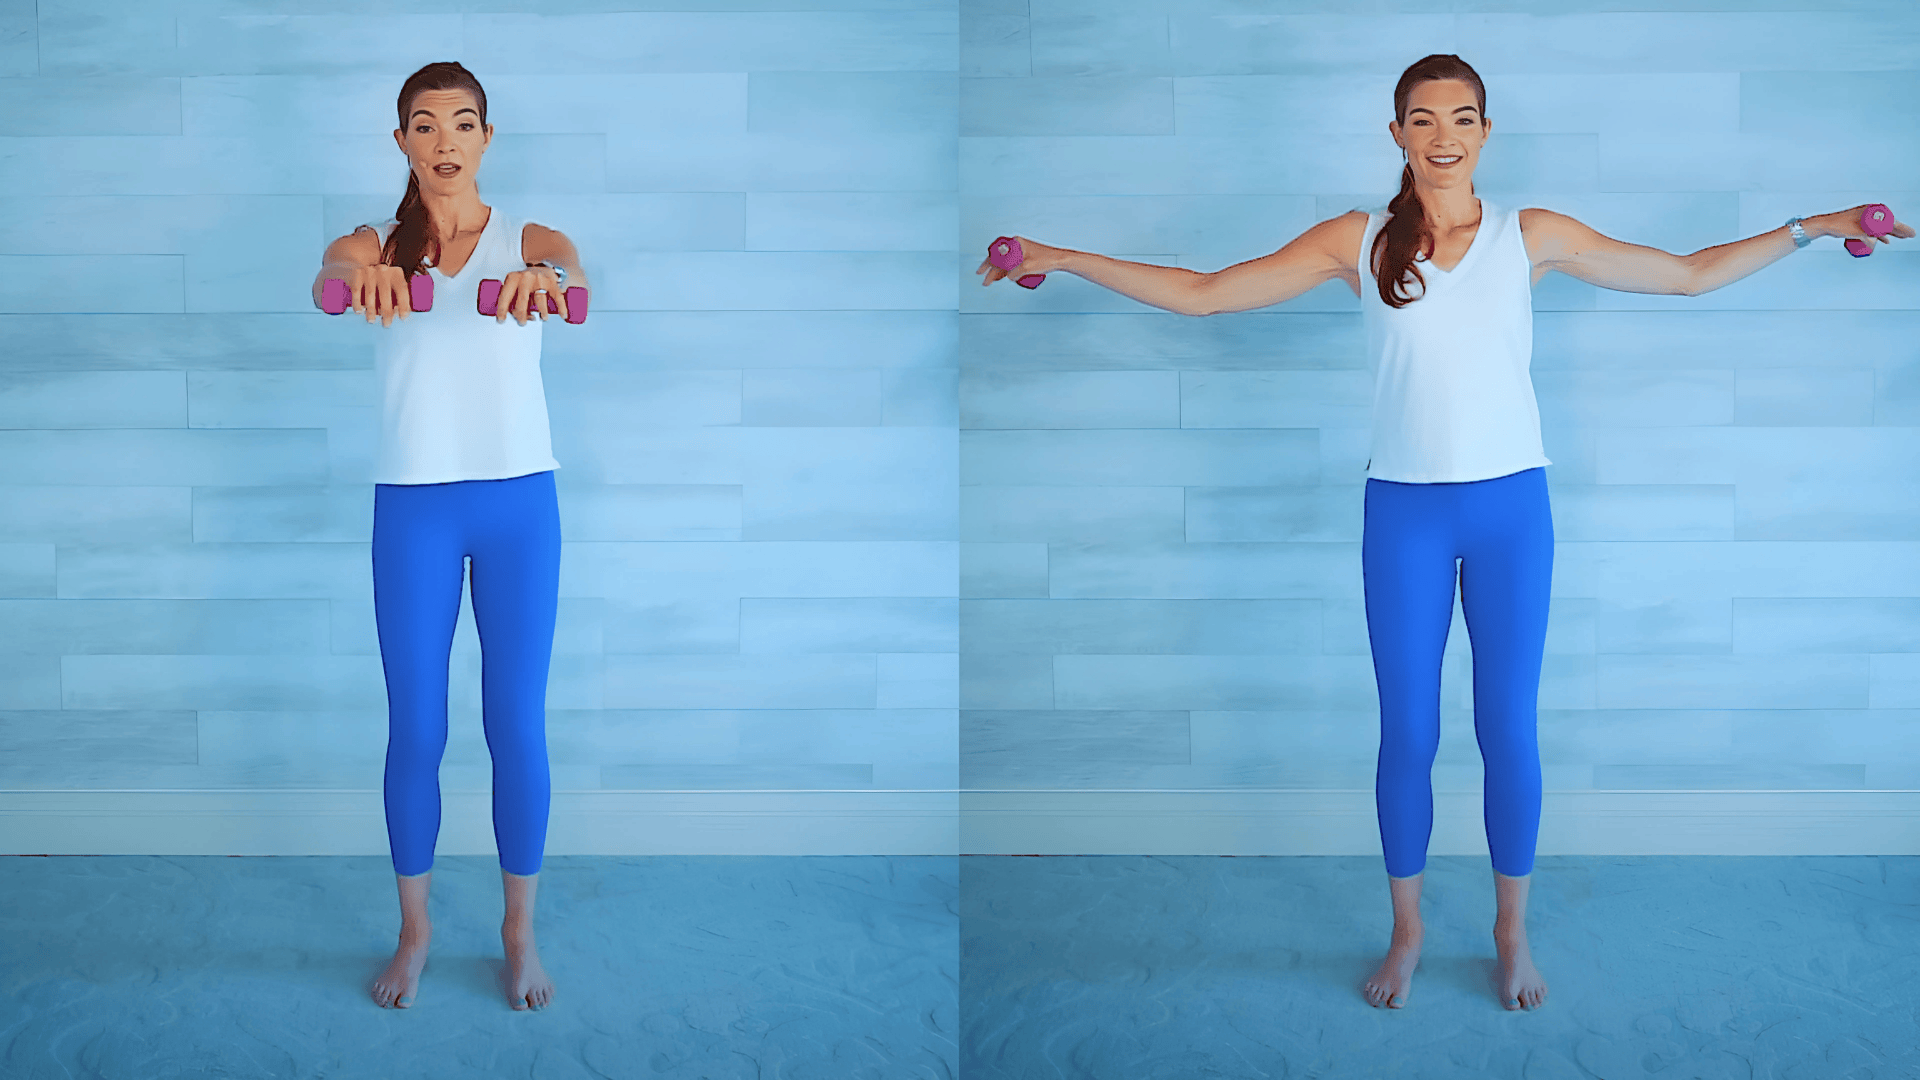
With your palms facing down, lift the weights straight out to the side and then slowly lower them with control. Keep a slight bend in your elbows and think about reaching with your arms.
10. Upright Rows
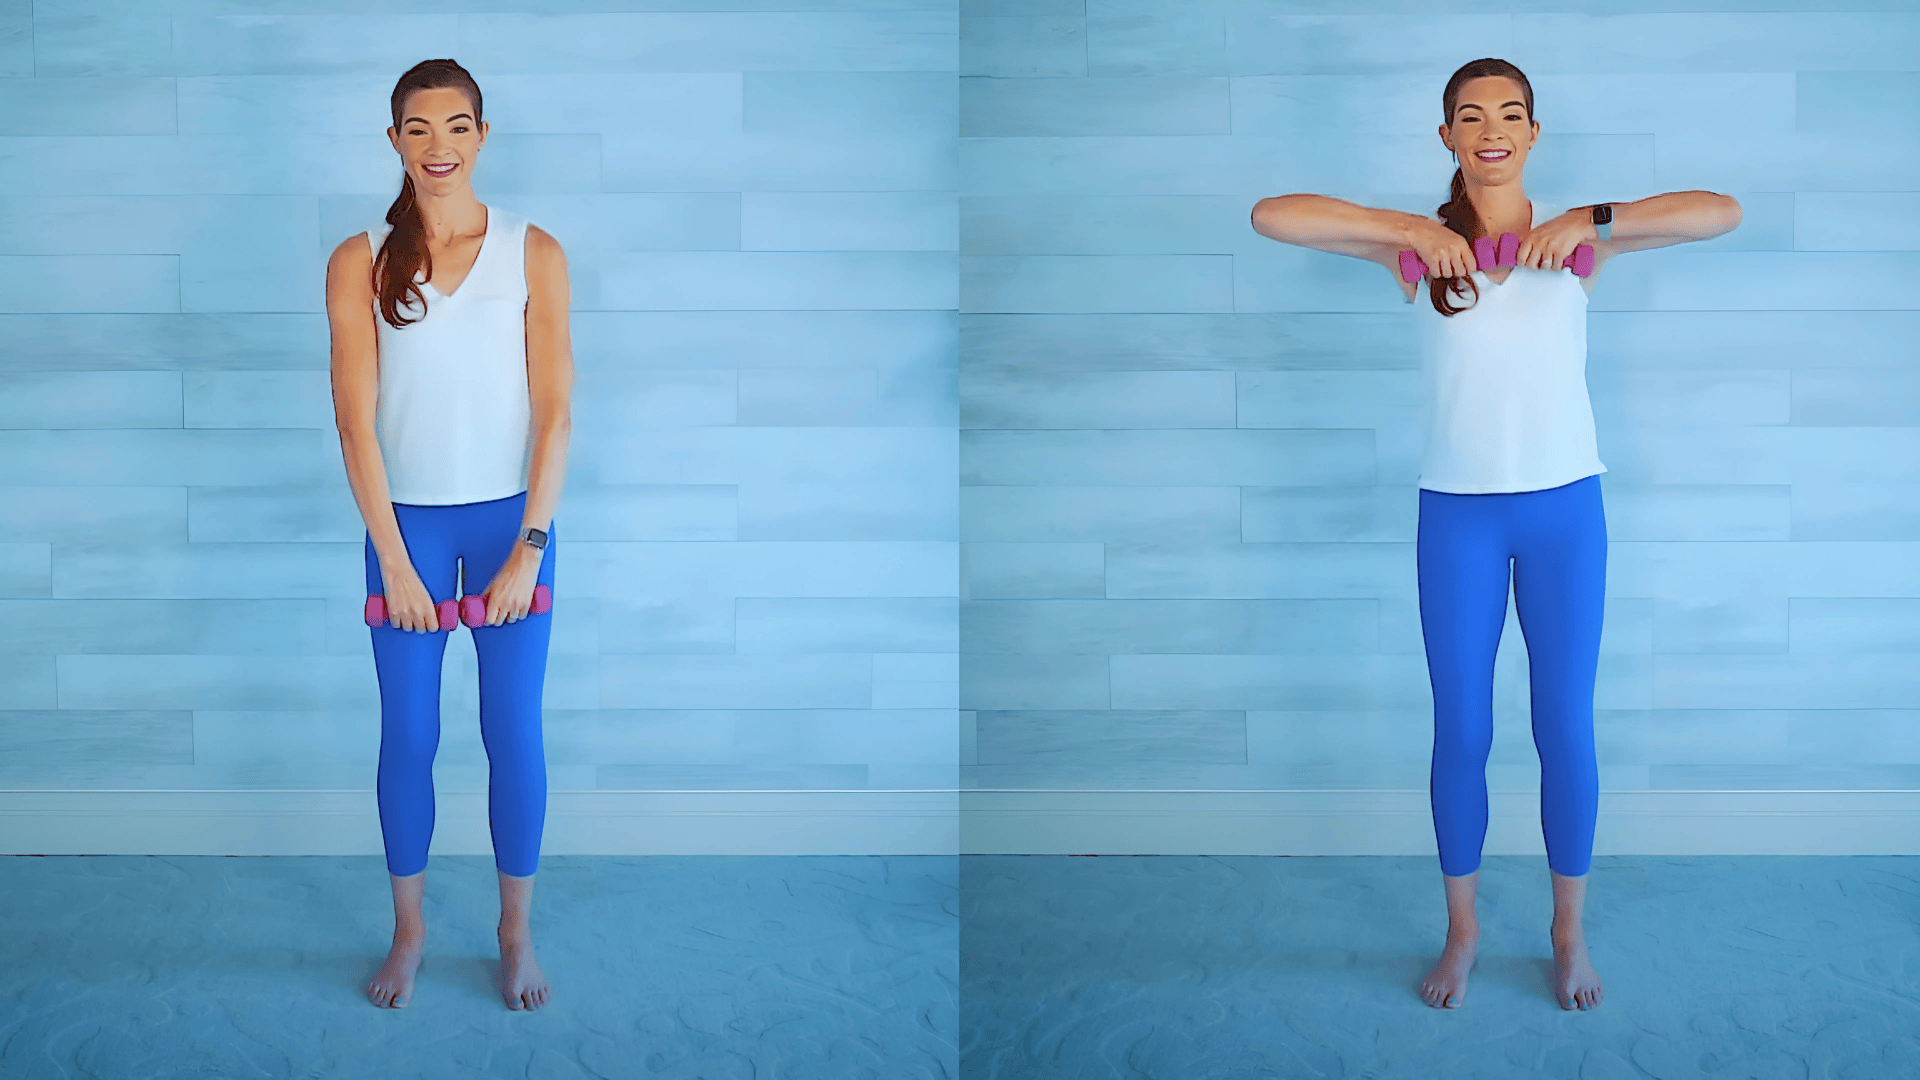
With your elbows to your sides and palms facing in, bring the weights up toward your chin. Make sure your elbows go wide out to the side. Maintain good posture, with your core engaged and your knees slightly bent.
Video Tutorial
Special thanks to SeniorShape Fitness for providing valuable insights in their video, which I referenced while creating this guide.
| Cool Down After Workout
After your workout, these cool-down stretches will help reduce muscle soreness and improve flexibility.
|
Tips for Safe Progression of Exercises
As you begin your way to toned arms, keep these tips in mind to ensure a safe and effective routine.
- Start with light weights: Even a light set of weights, like two or three pounds, can feel heavy when you’re doing a lot of repetitions. If you’re new to this, using water bottles is a great way to start.
- Listen to your body: It’s okay to drop your weights or take a break if you need to; there is no shame in it.
- Focus on your form: Prioritize doing the exercises correctly over lifting heavier weights. Engaging your core can help protect your lower back and improve your stability.
- Remember to breathe: Don’t hold your breath during the exercises, as your muscles need oxygen.
- Consistency is key: A regular, consistent routine will be more effective in the long run than an intense but infrequent one.
Final Thoughts
Toning your arms is a process, and every step is a victory.
The exercises shared in this guide are designed to help you build strength and combat the natural loss of muscle mass that comes with aging.
By committing to a consistent routine, you can not only reduce arm flabbiness but also improve your overall mobility and confidence.
This is about feeling strong, capable, and comfortable in your own skin as you get older.
Now that you have a routine, why not try a few of these moves and see how you feel? We would love to hear about your experience or any questions you have in the comments below!

