Tired of skipping yoga because you lack time or space?
Most people abandon their yoga practice when life gets busy. Finding time to roll out a mat, clear floor space, and dedicate an hour feels impossible with packed schedules.
Many give up on yoga entirely, missing out on its stress-relief and strength-building benefits.
A standing yoga sequence solves all these problems in very little time. No mat required, no floor space needed, and you can practice anywhere from your office to a hotel room.
This complete article shows exactly how to perform poses that build strength, improve balance, and increase flexibility while standing upright.
Perfect for busy lifestyles that need yoga on the go.
Why Standing Sequences Matter?
A standing yoga sequence is a series of yoga poses performed while standing upright. These sequences are perfect for busy schedules because you don’t need a yoga mat or special equipment.
You can practice in your living room, office, or even outdoors with just enough room to step your feet apart and reach your arms overhead.
Standing yoga works for beginners and experienced practitioners alike. New yogis can start with basic poses and use a wall for support.
More advanced students can hold poses longer or add challenging variations. The beauty of standing sequences lies in their adaptability to match your current ability level.
Benefits of Standing Yoga Sequences
- Functional Strength: Builds functional strength that you use in daily activities like climbing stairs and lifting objects.
- Better Balance: Improves balance and stability as you learn to hold poses on one or both feet.
- Enhanced Flexibility: Increases flexibility in your hips, hamstrings, and spine through various stretching movements.
- Mental Focus: Boosts mental focus as you concentrate on maintaining proper form and breathing.
- Full-Body Toning: Tones your entire body by engaging multiple muscle groups simultaneously.
- Improved Posture: Develops better posture for everyday activities through core strengthening and spinal alignment.
15-minute Standing Yoga Sequence
This 15-minute standing yoga flow can be practiced with or without a yoga mat. Whether you’re a beginner or an experienced yogi, this sequence adapts to your level. Follow these steps exactly:
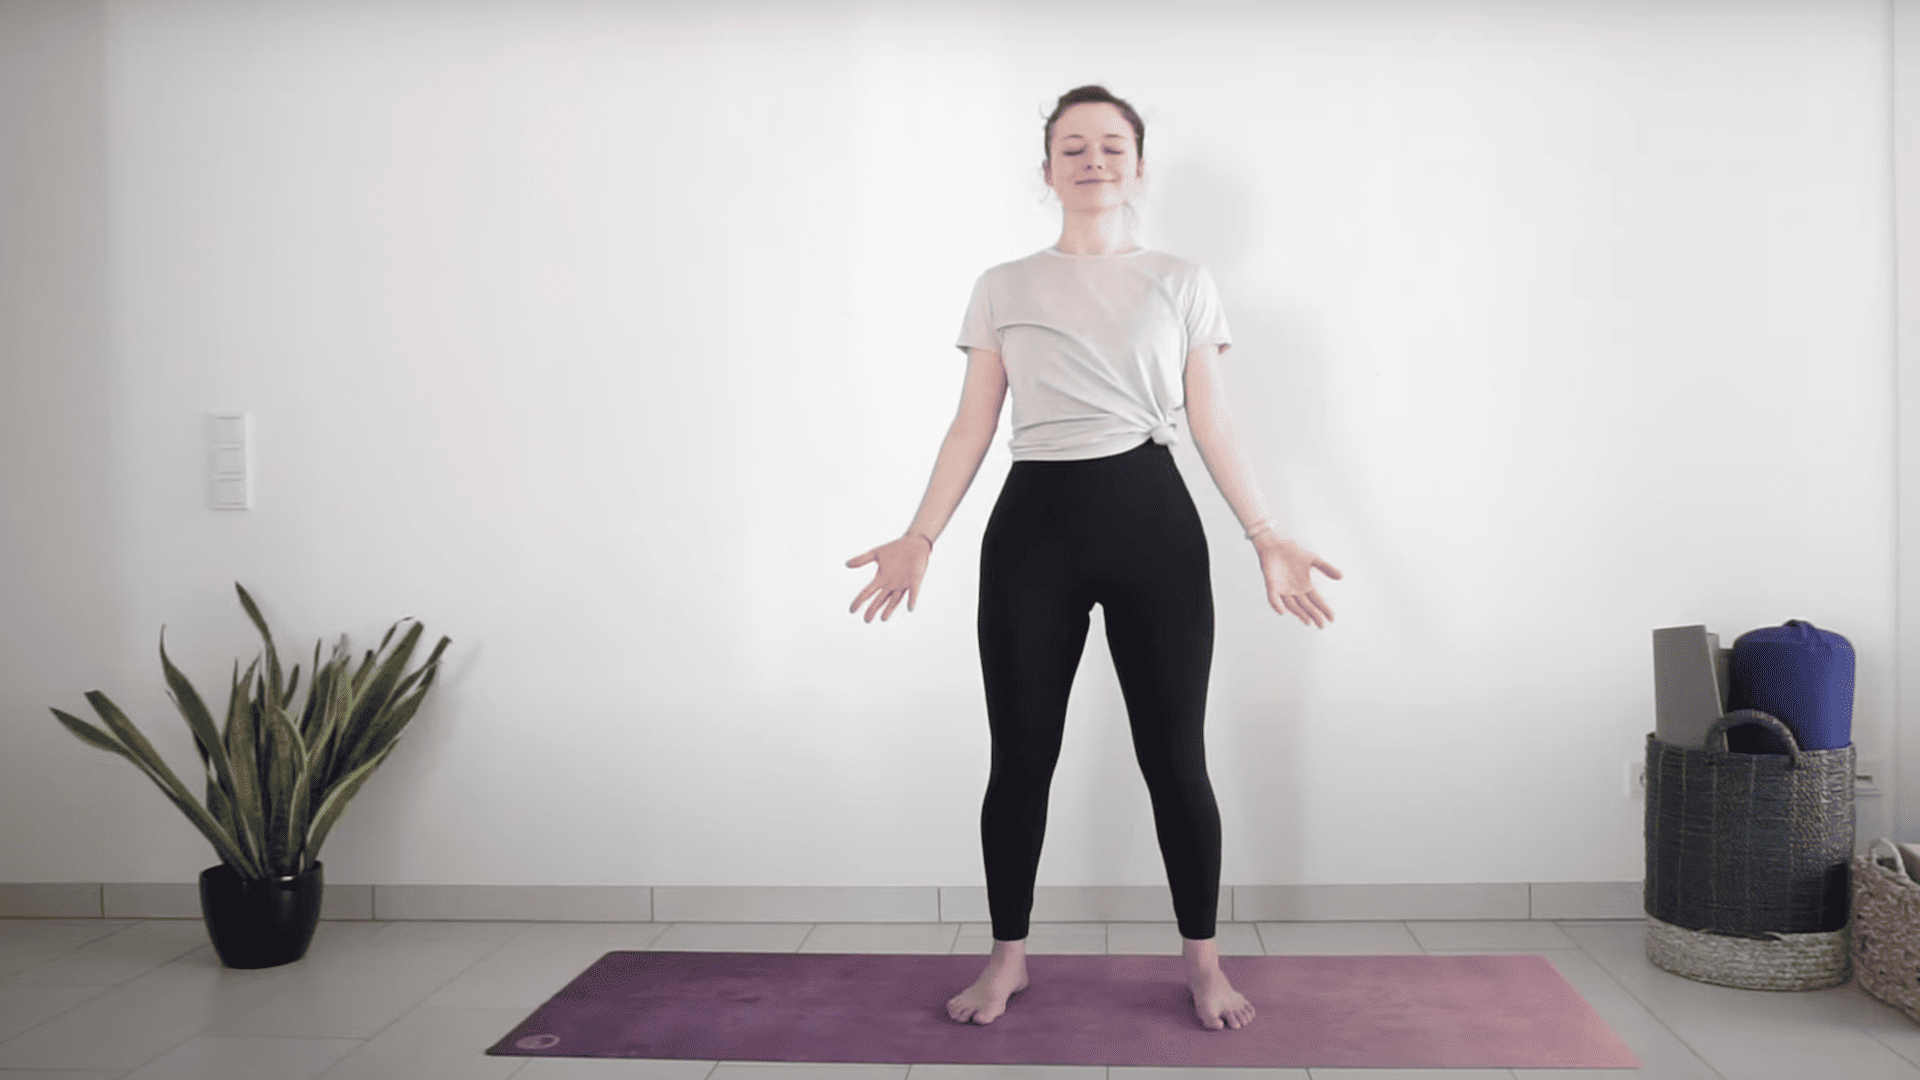
Step 1: Starting Position and Breathing
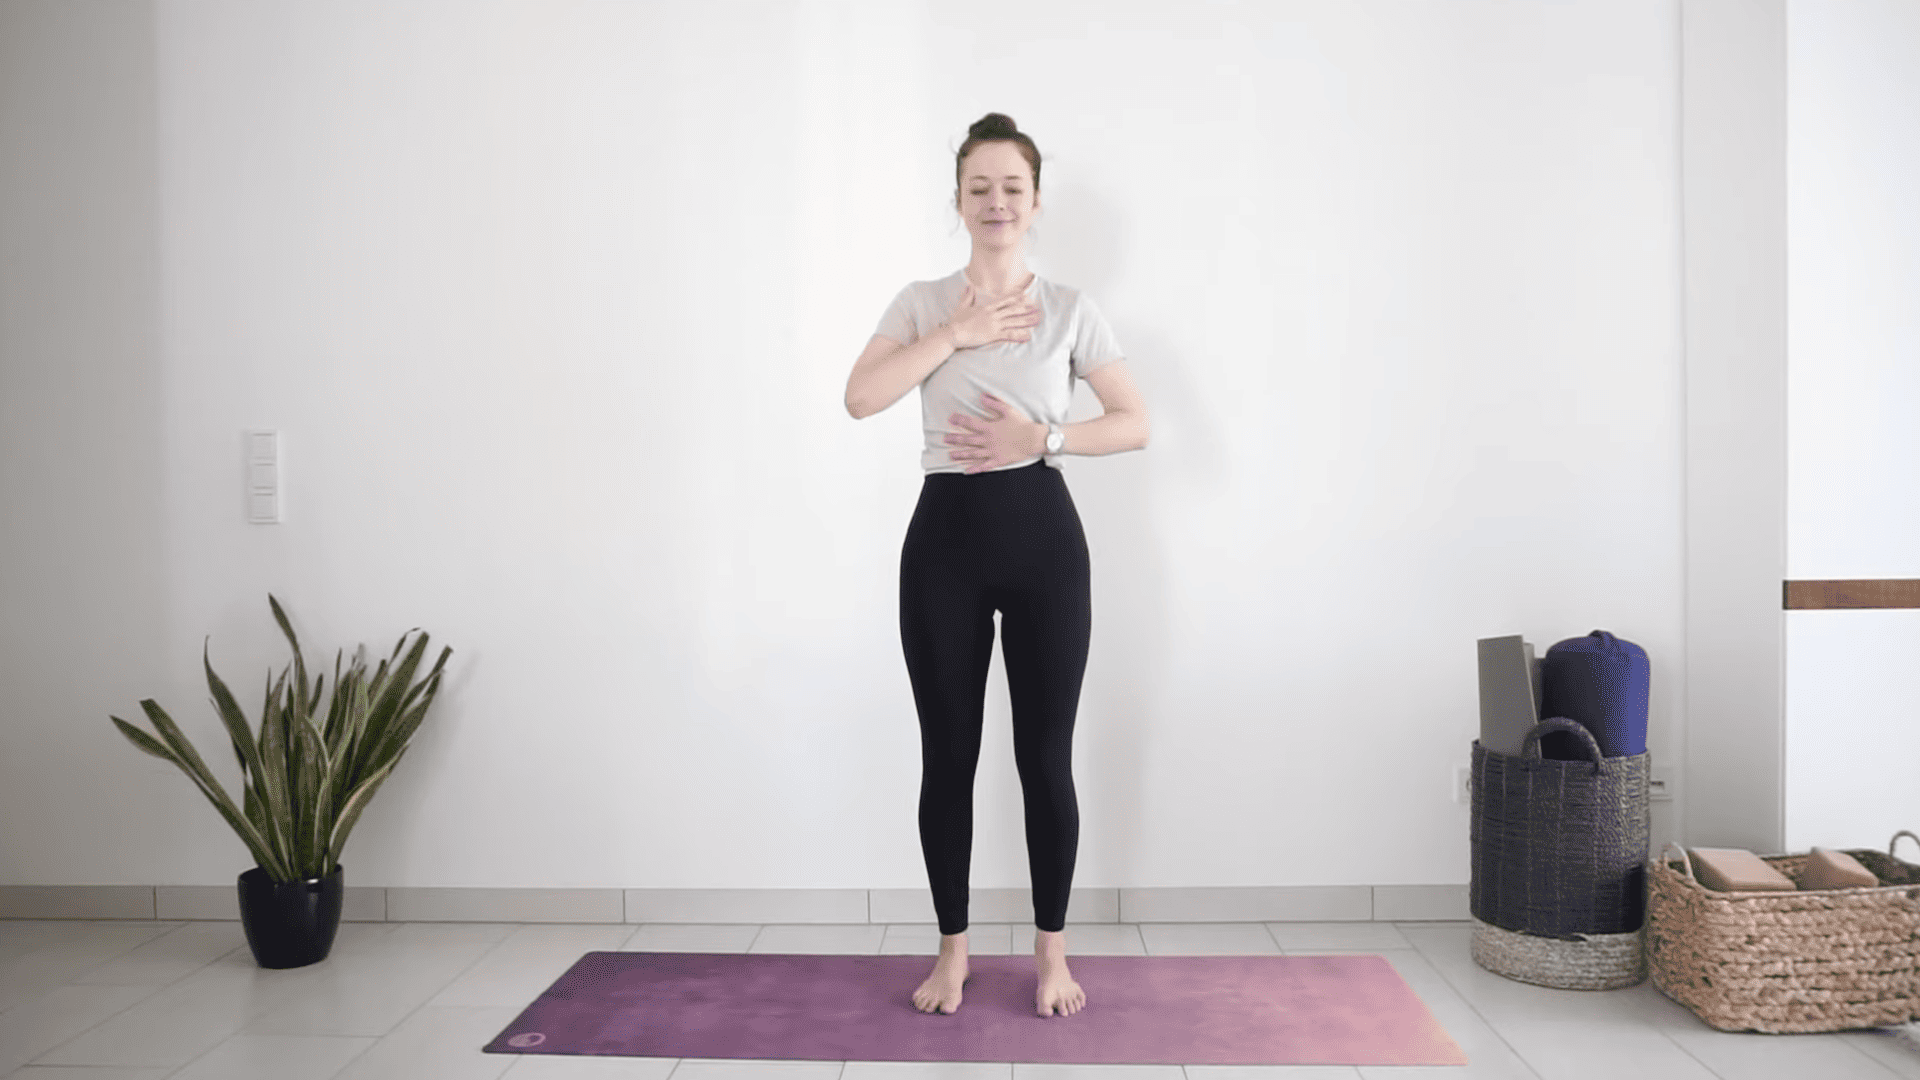
Begin with feet hip distance apart. Place one hand on your chest, another on your belly. Close your eyes if it’s comfortable. Breathe deeply through your nose. Feel your belly expand on inhale, contract on exhale. Slowly open your eyes.
Step 2: Side Stretches
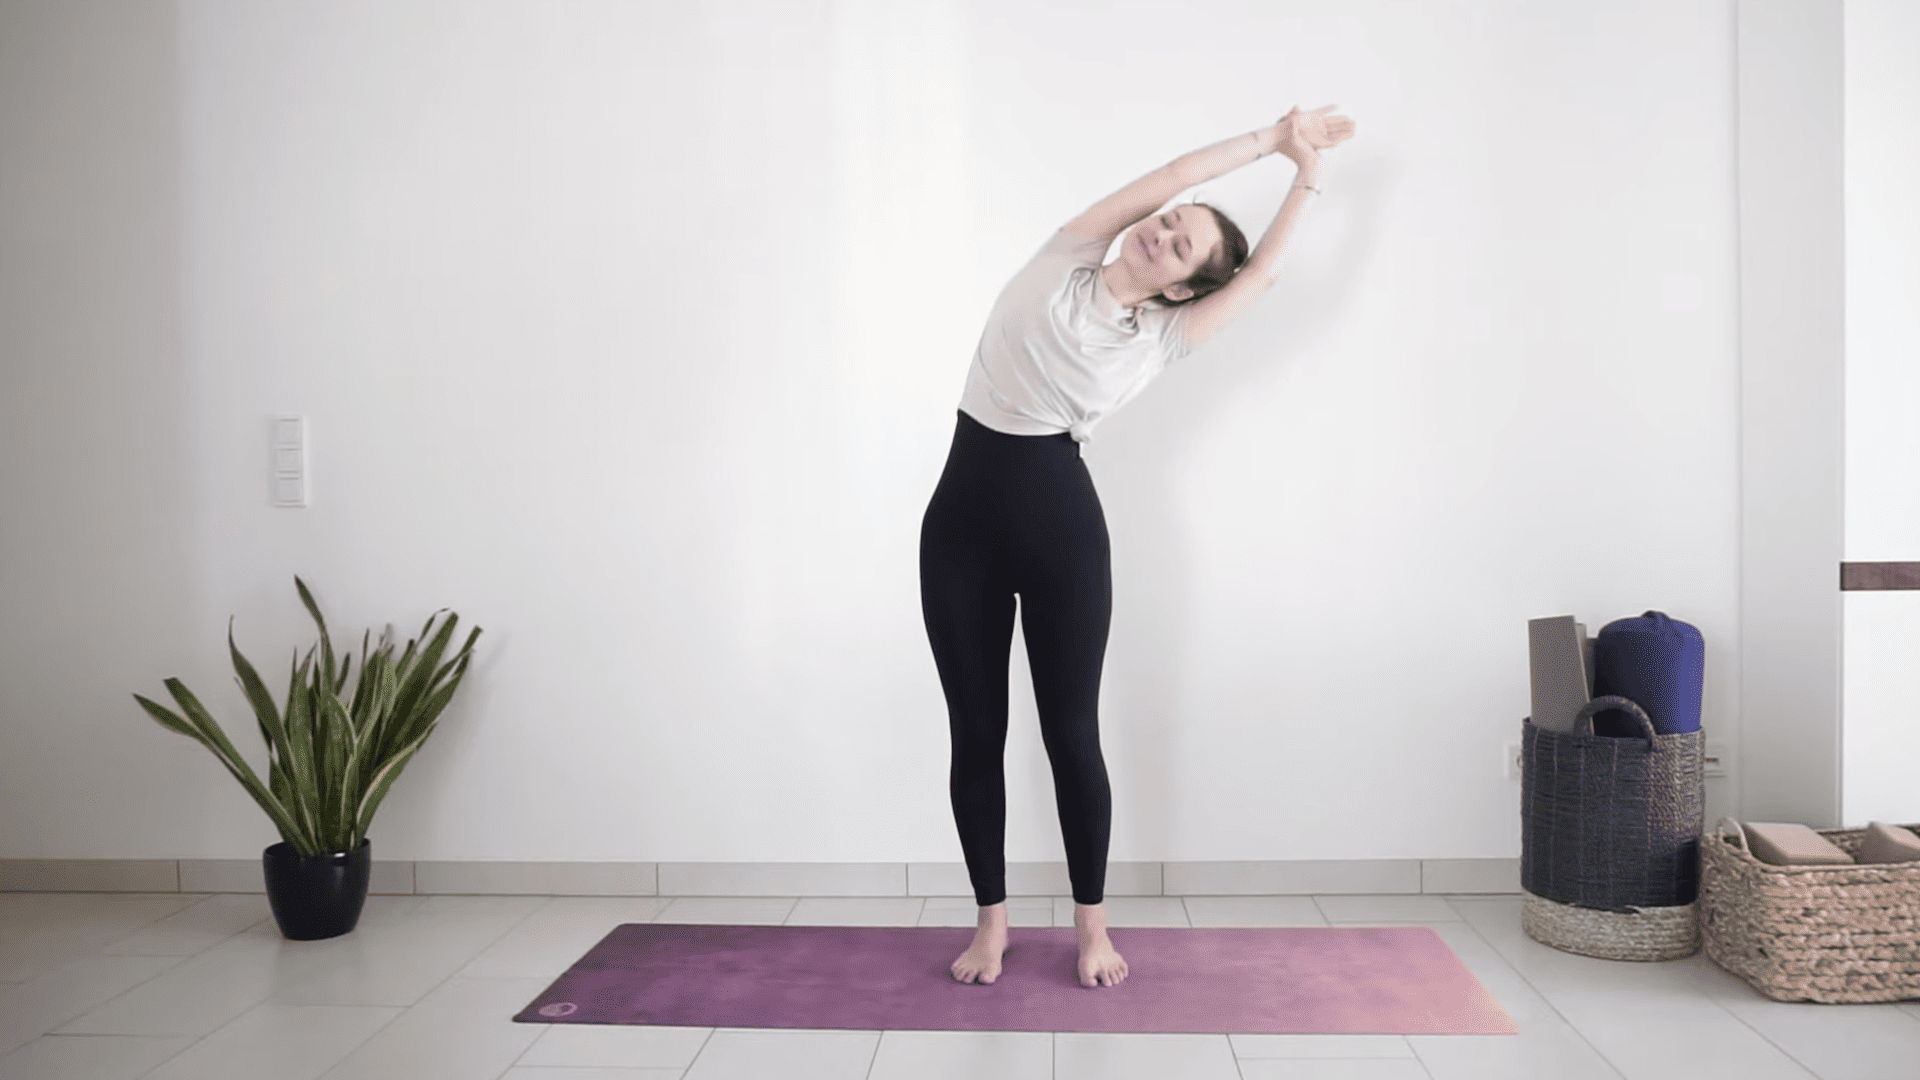
Reach arms up to the sky. Grab your left wrist and bend to the right. Breathe into your left ribs. Return to center. Switch grip and bend to the left. Return to center.
Step 3: Standing Back Bend
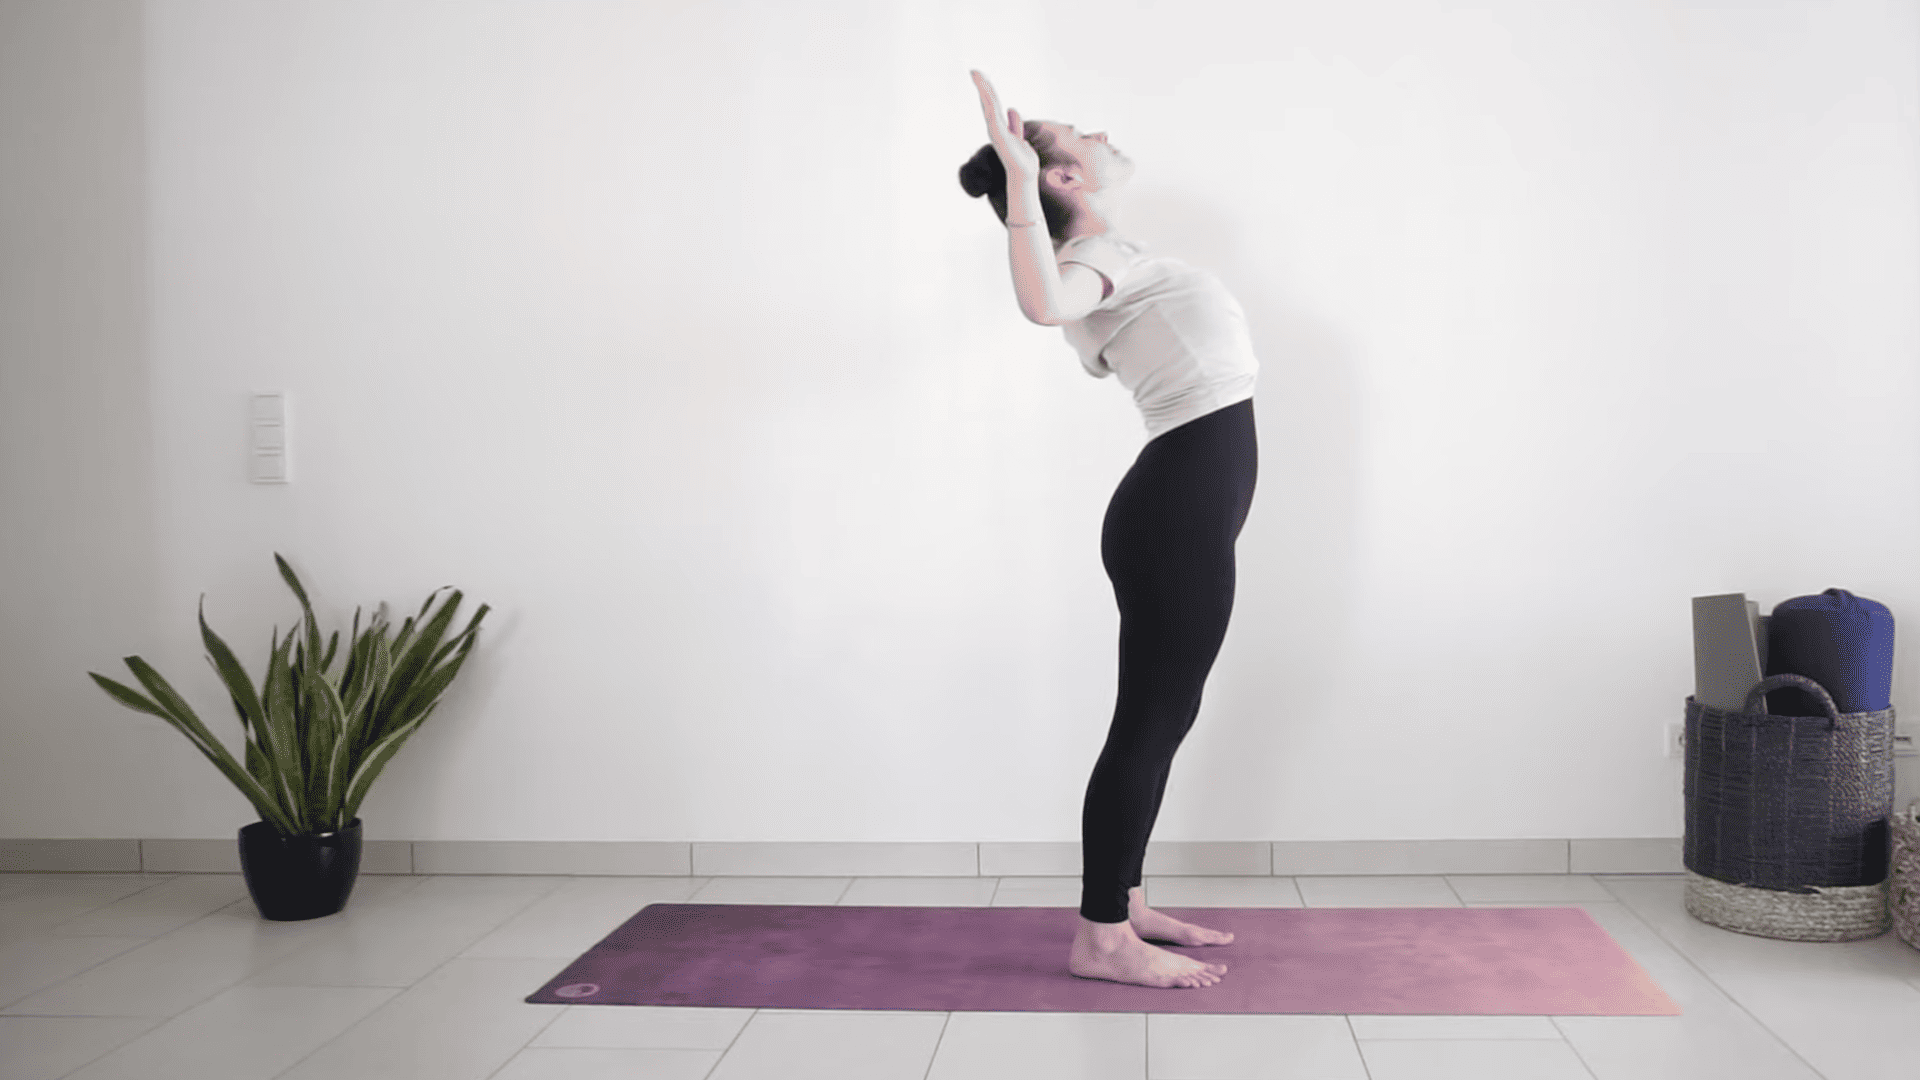
Cactus your arms. Lift your chest and lean back gently. Keep lifting your chest higher with each breath. Take one more deep inhale.
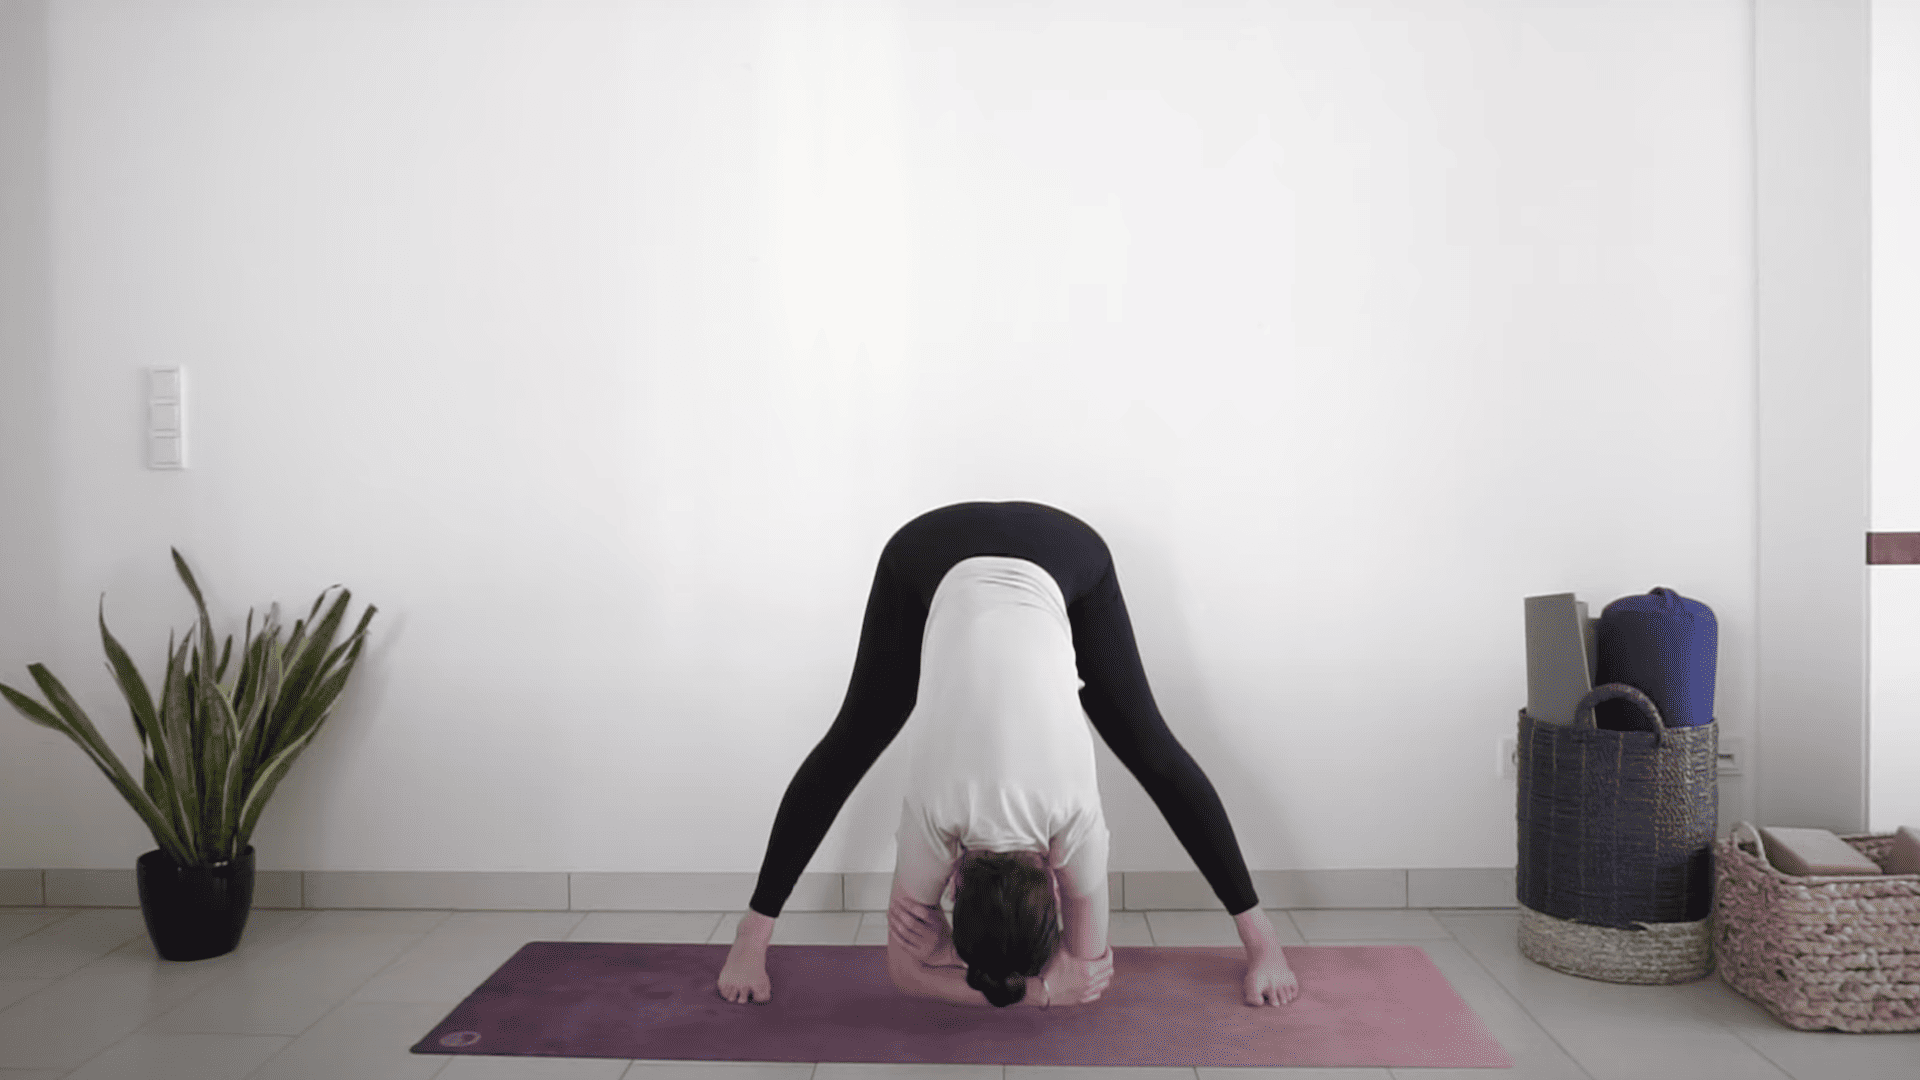
Step 4: Standing Forward Fold
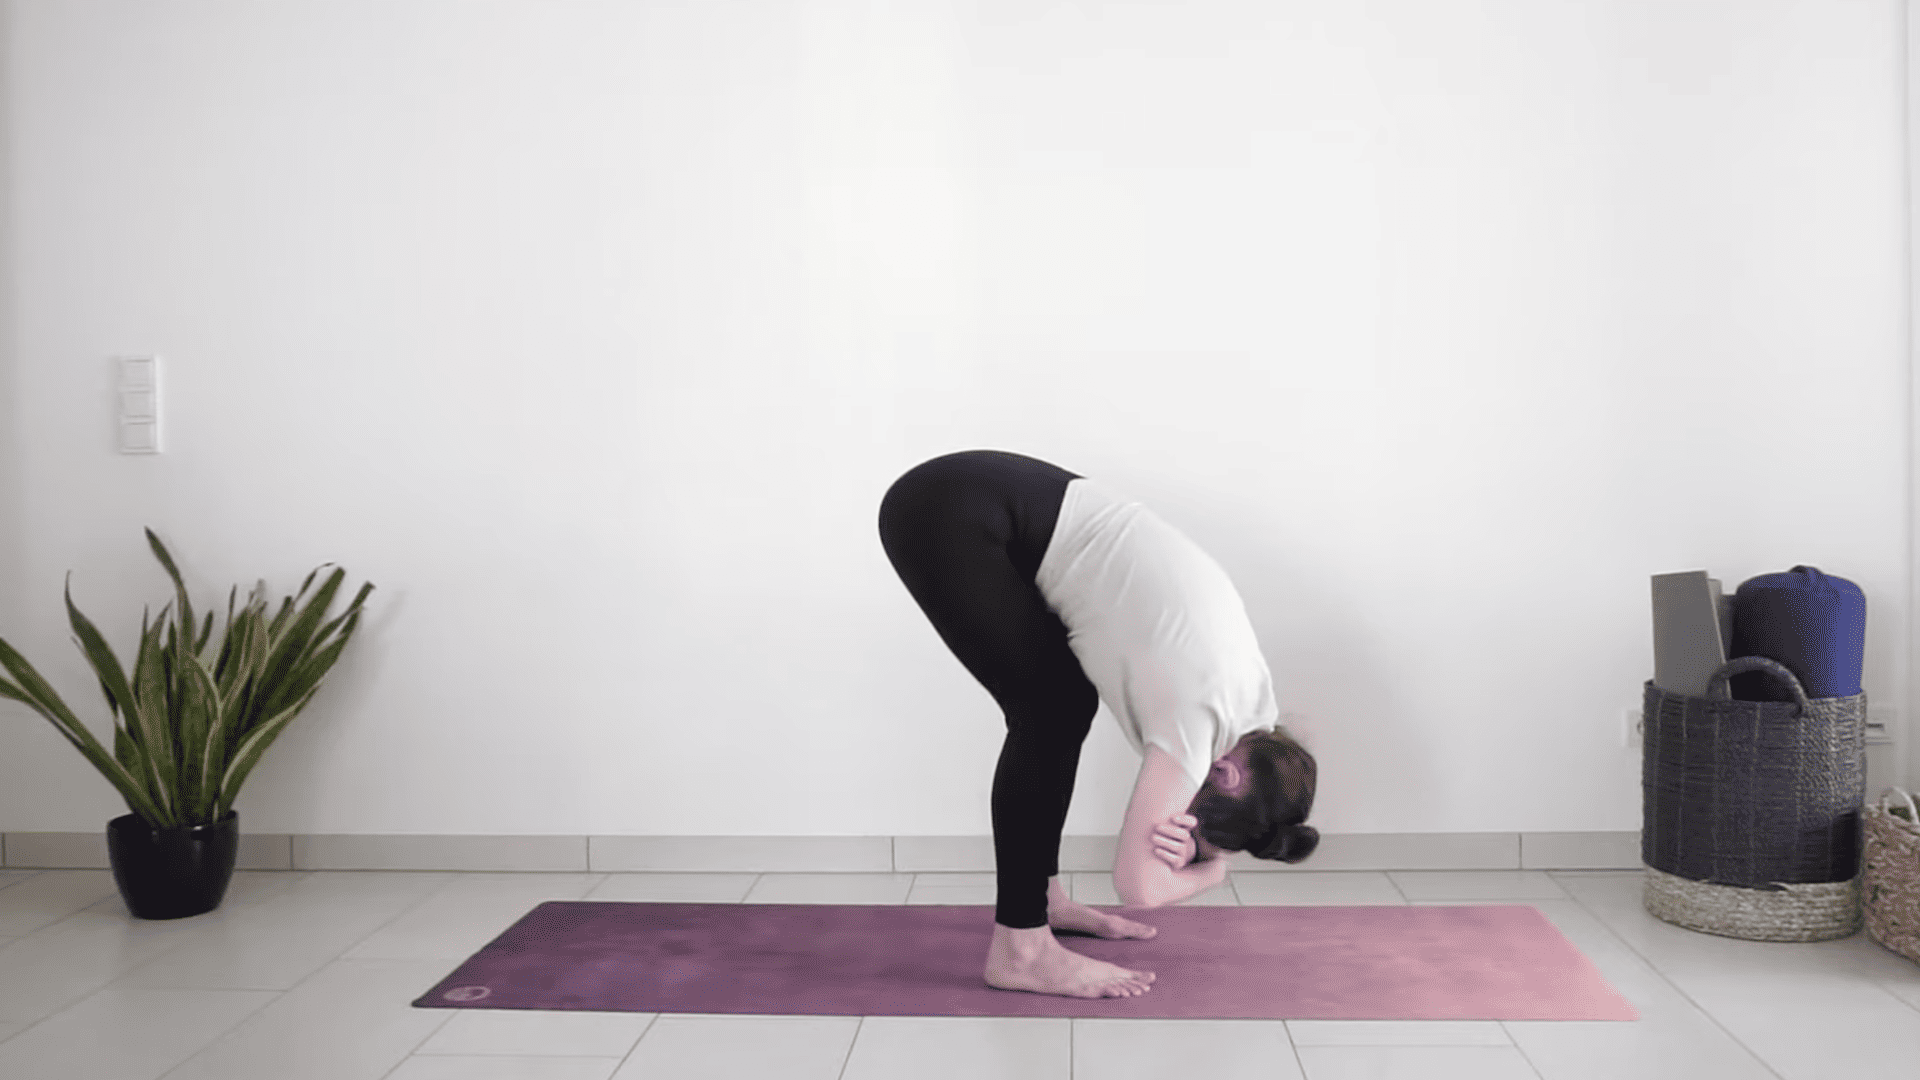
Exhale and bend forward with slightly bent knees. Let your upper body hang heavy. Grab opposite elbows and rock side to side. Take a big inhale through your nose, and exhale through your mouth. Roll up slowly to standing.
Step 5: Chair Pose
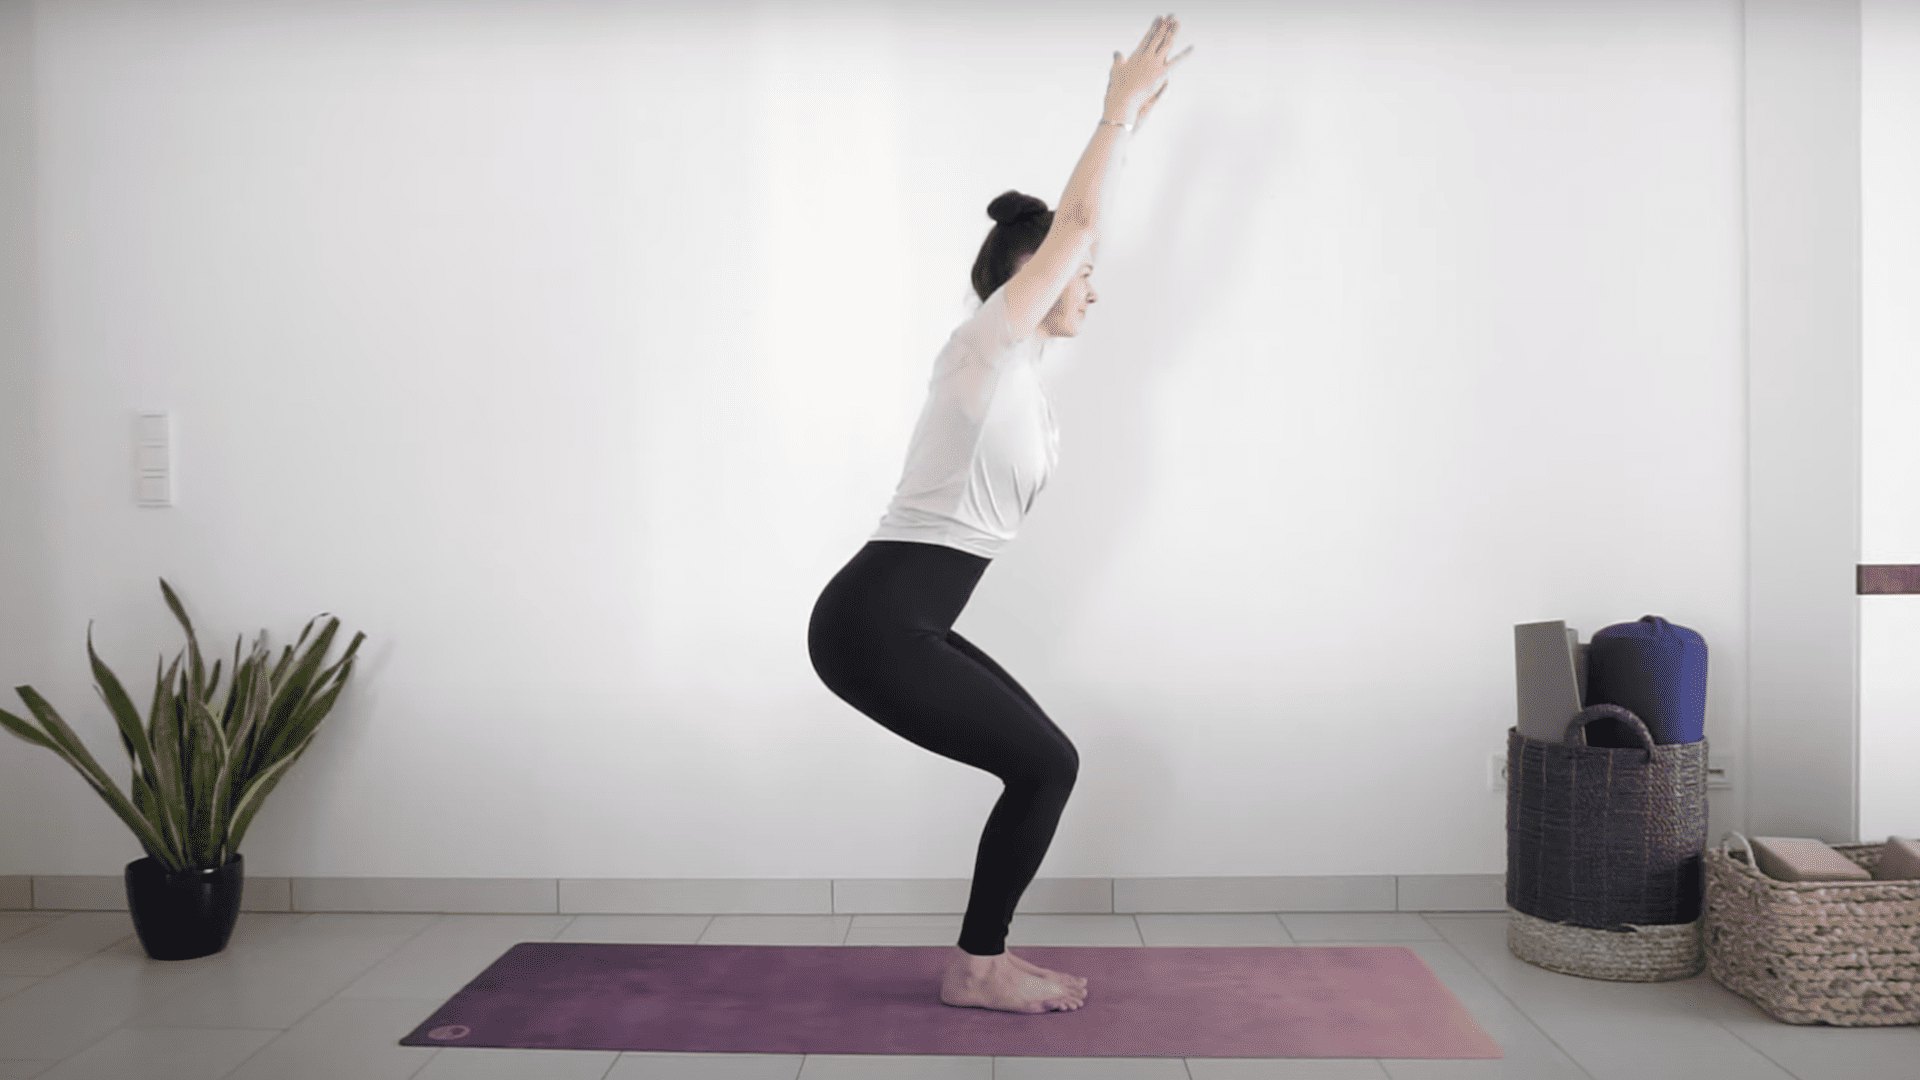
Bring feet closer together, big toes touching. Bend your knees like sitting in a chair. Lift arms in line with ears. Breathe in and lengthen through your sides. Breathe out and engage your core.
Step 6: Forward Fold with Bind
Bring arms back and interlace fingers. Lift chest, then fold forward with straight legs. Pull hands away from the back to stretch shoulders and hamstrings. Breathe deeply, then release and roll up.
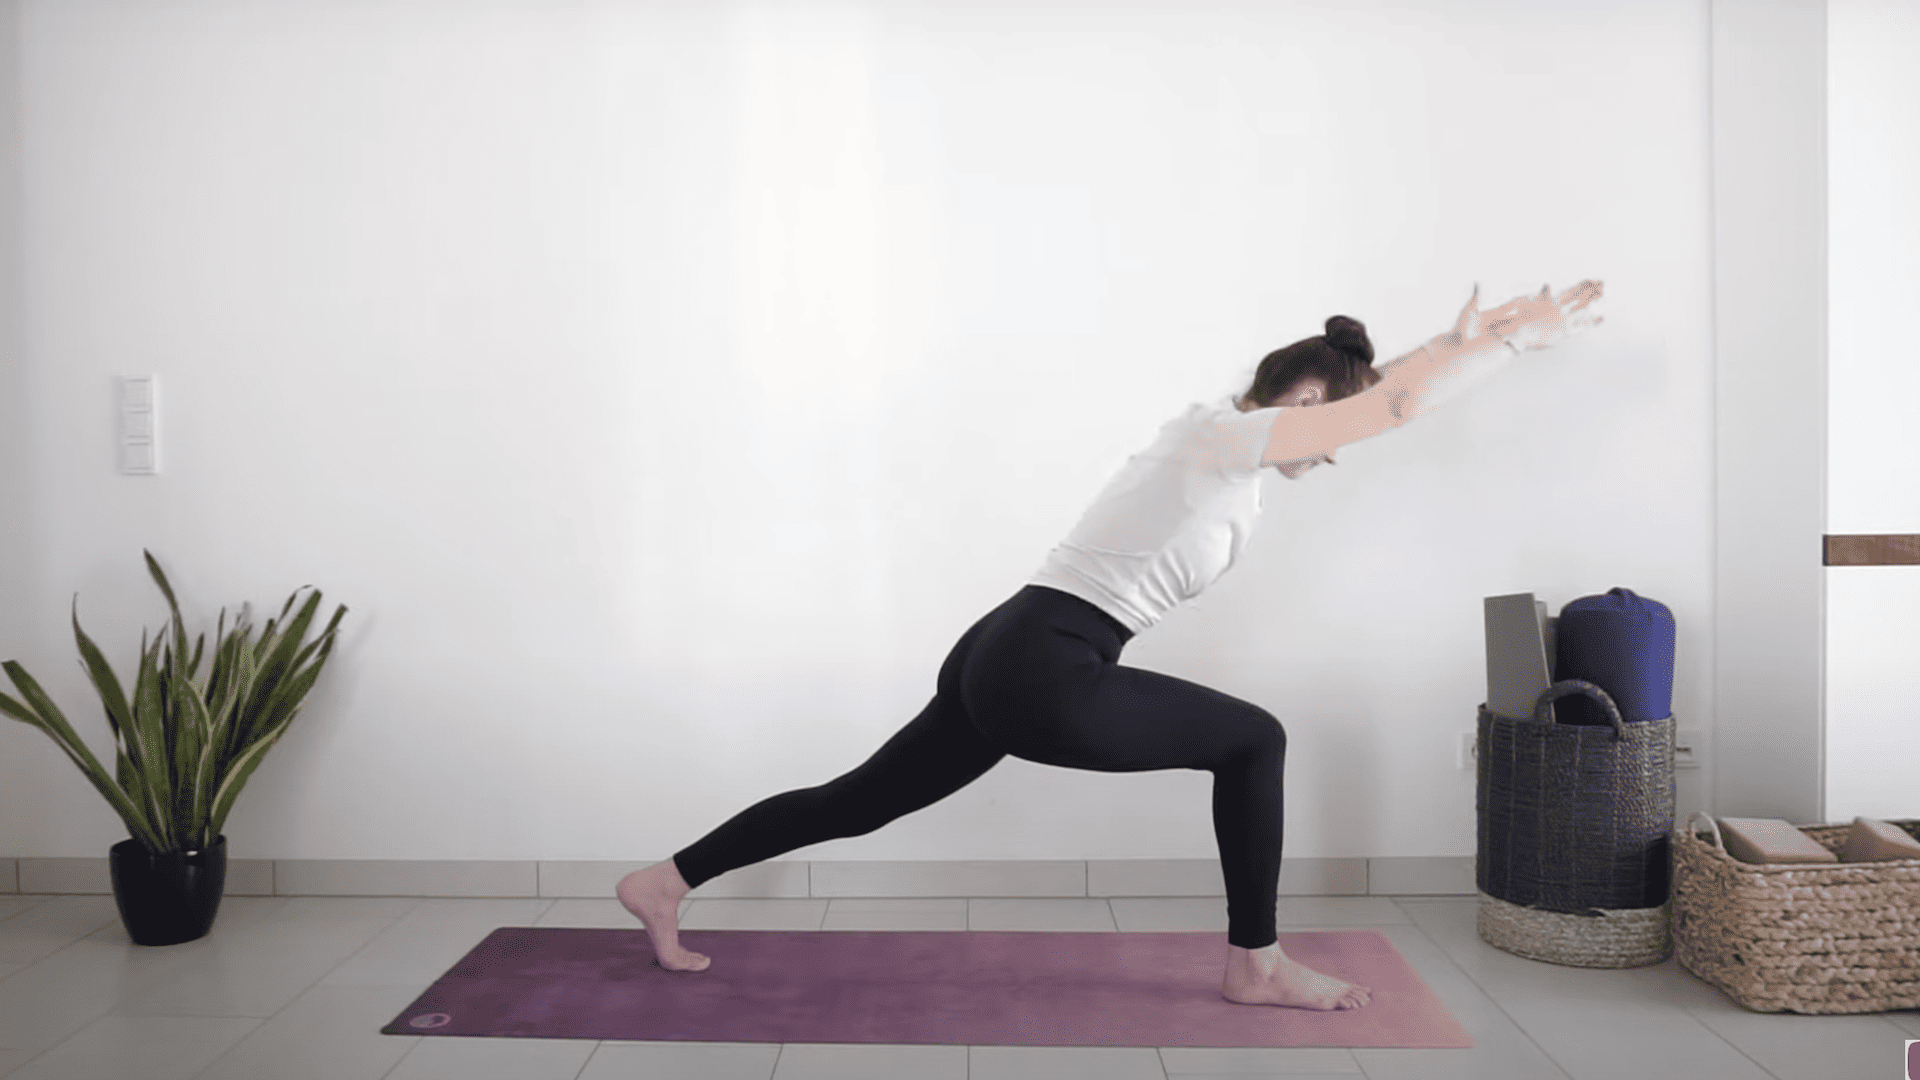
Step 7: Right Side Warrior Sequence
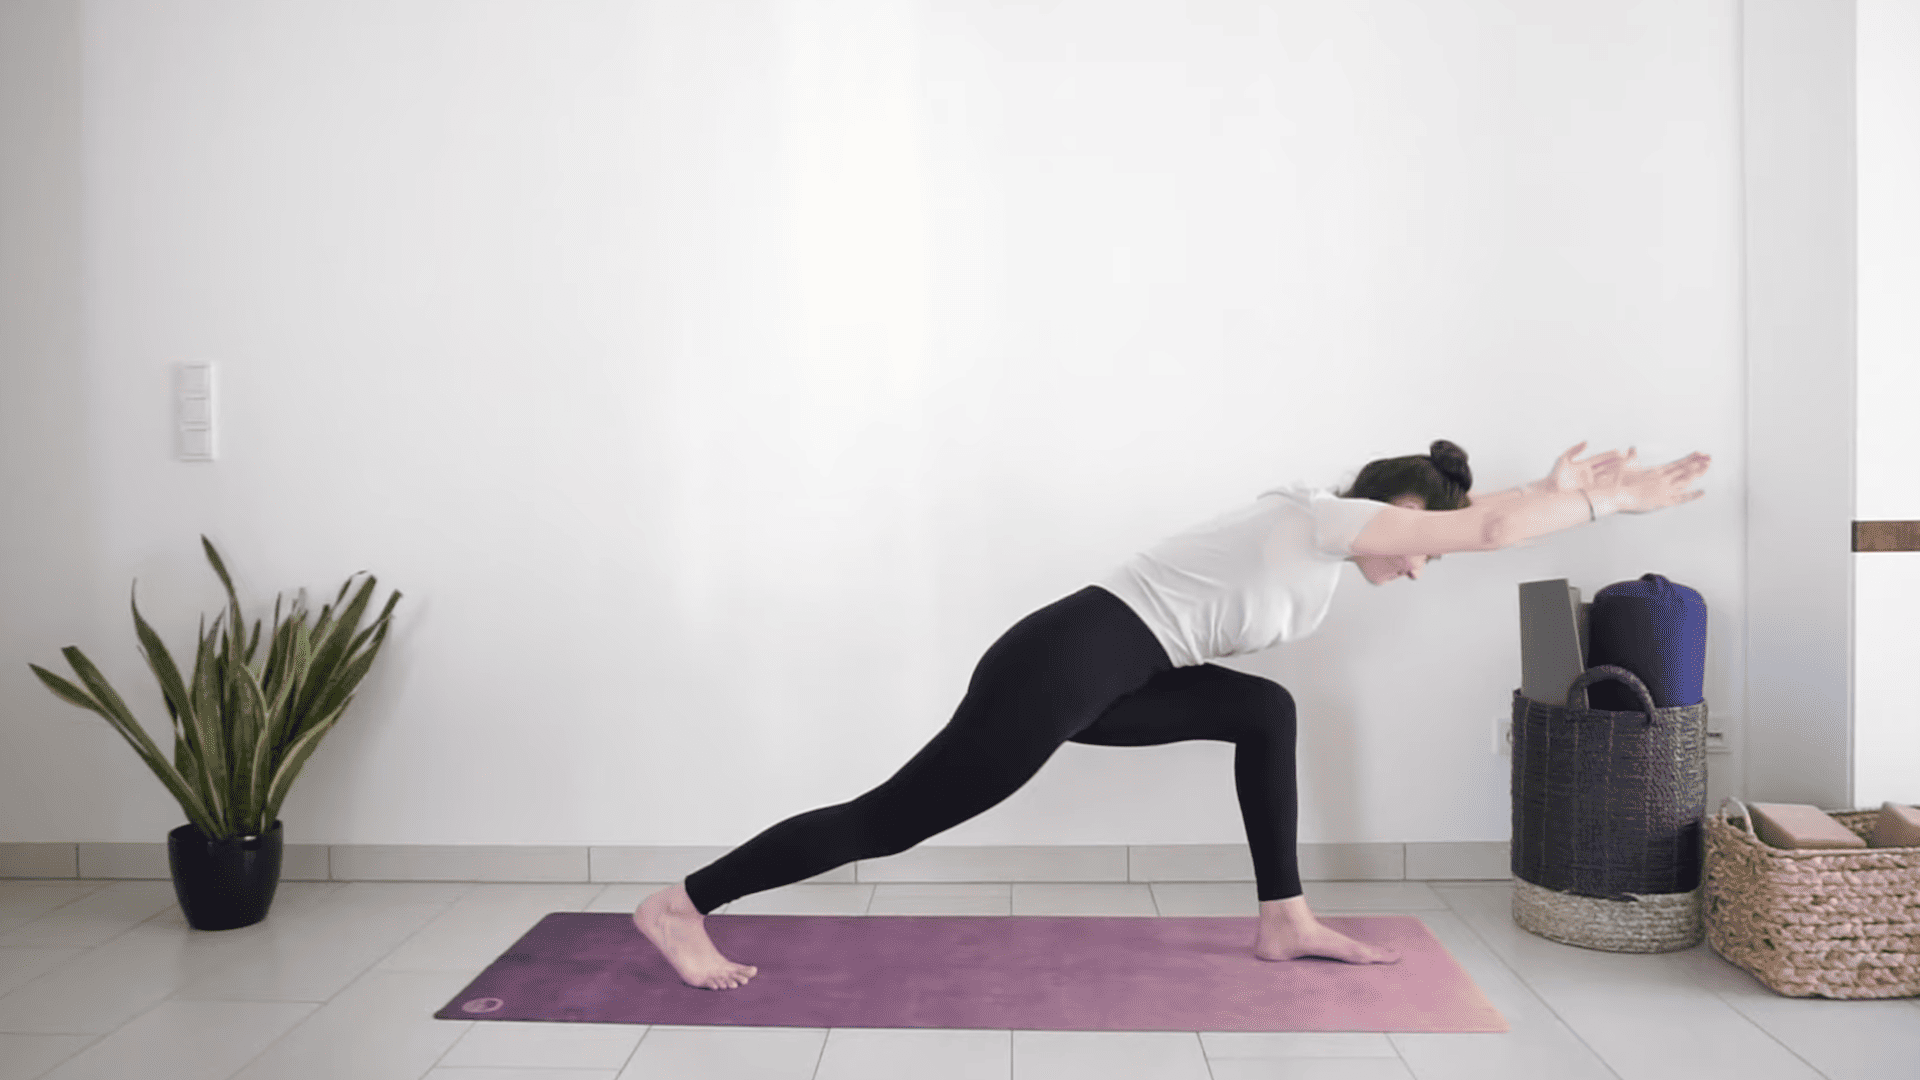
Step right foot back for high lunge. Bend the left knee over the ankle. Reach arms up and breathe. Slowly fold forward to the front leg, then return to the lunge. Place the right heel down and open arms for warrior two.
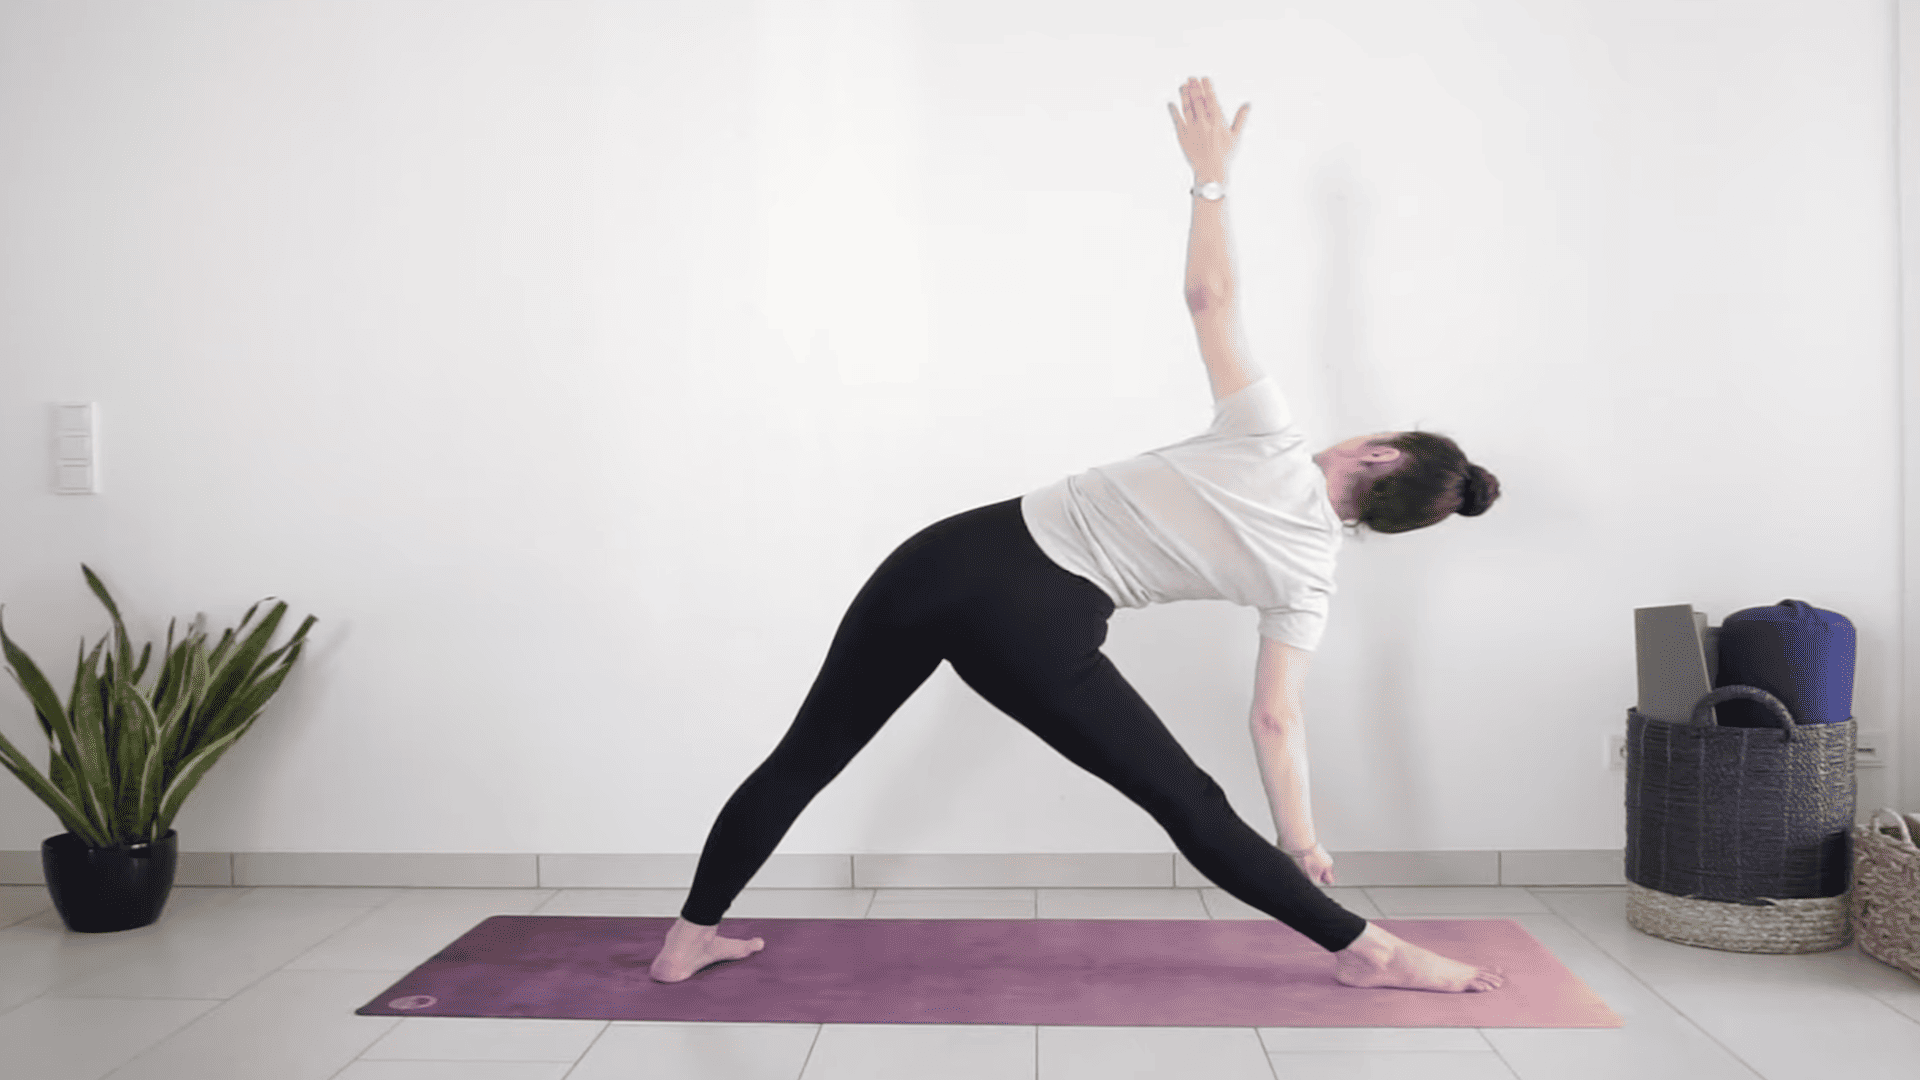
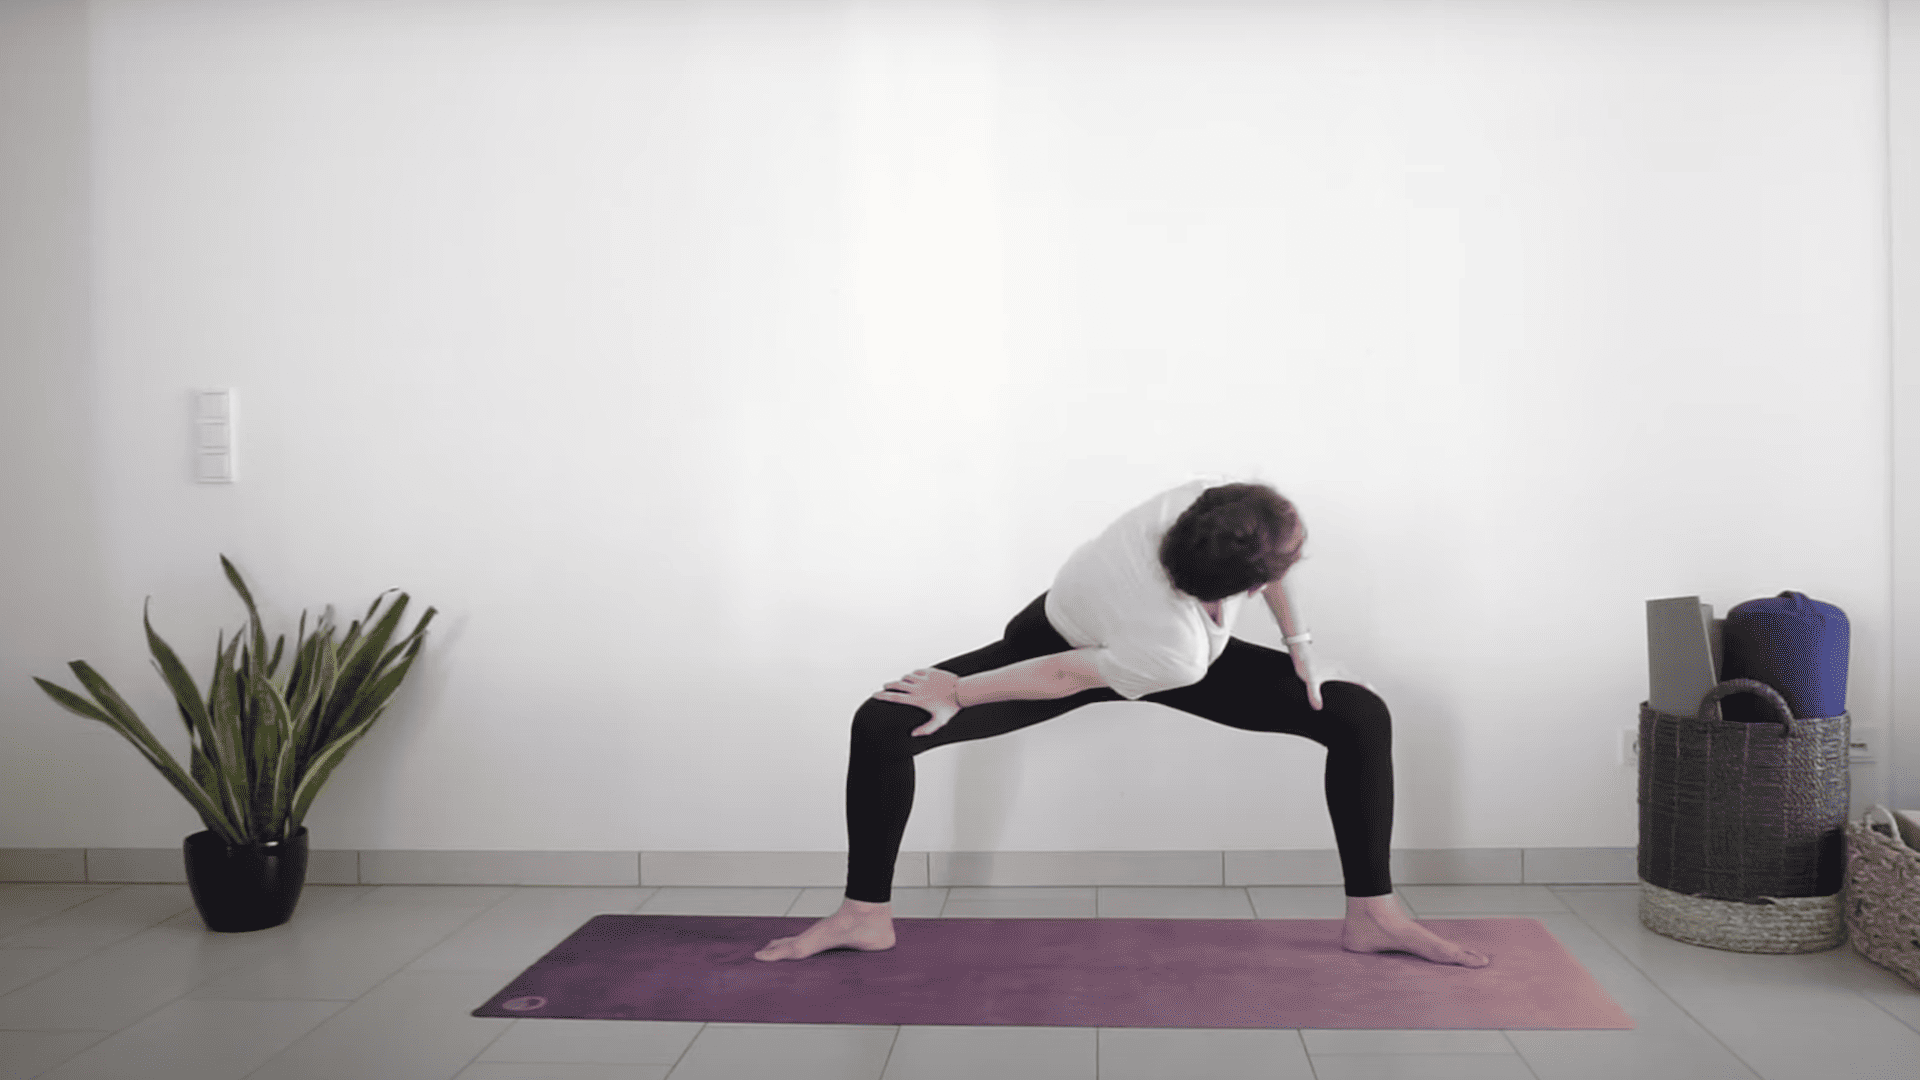
Step 8: Right Side Triangle Pose
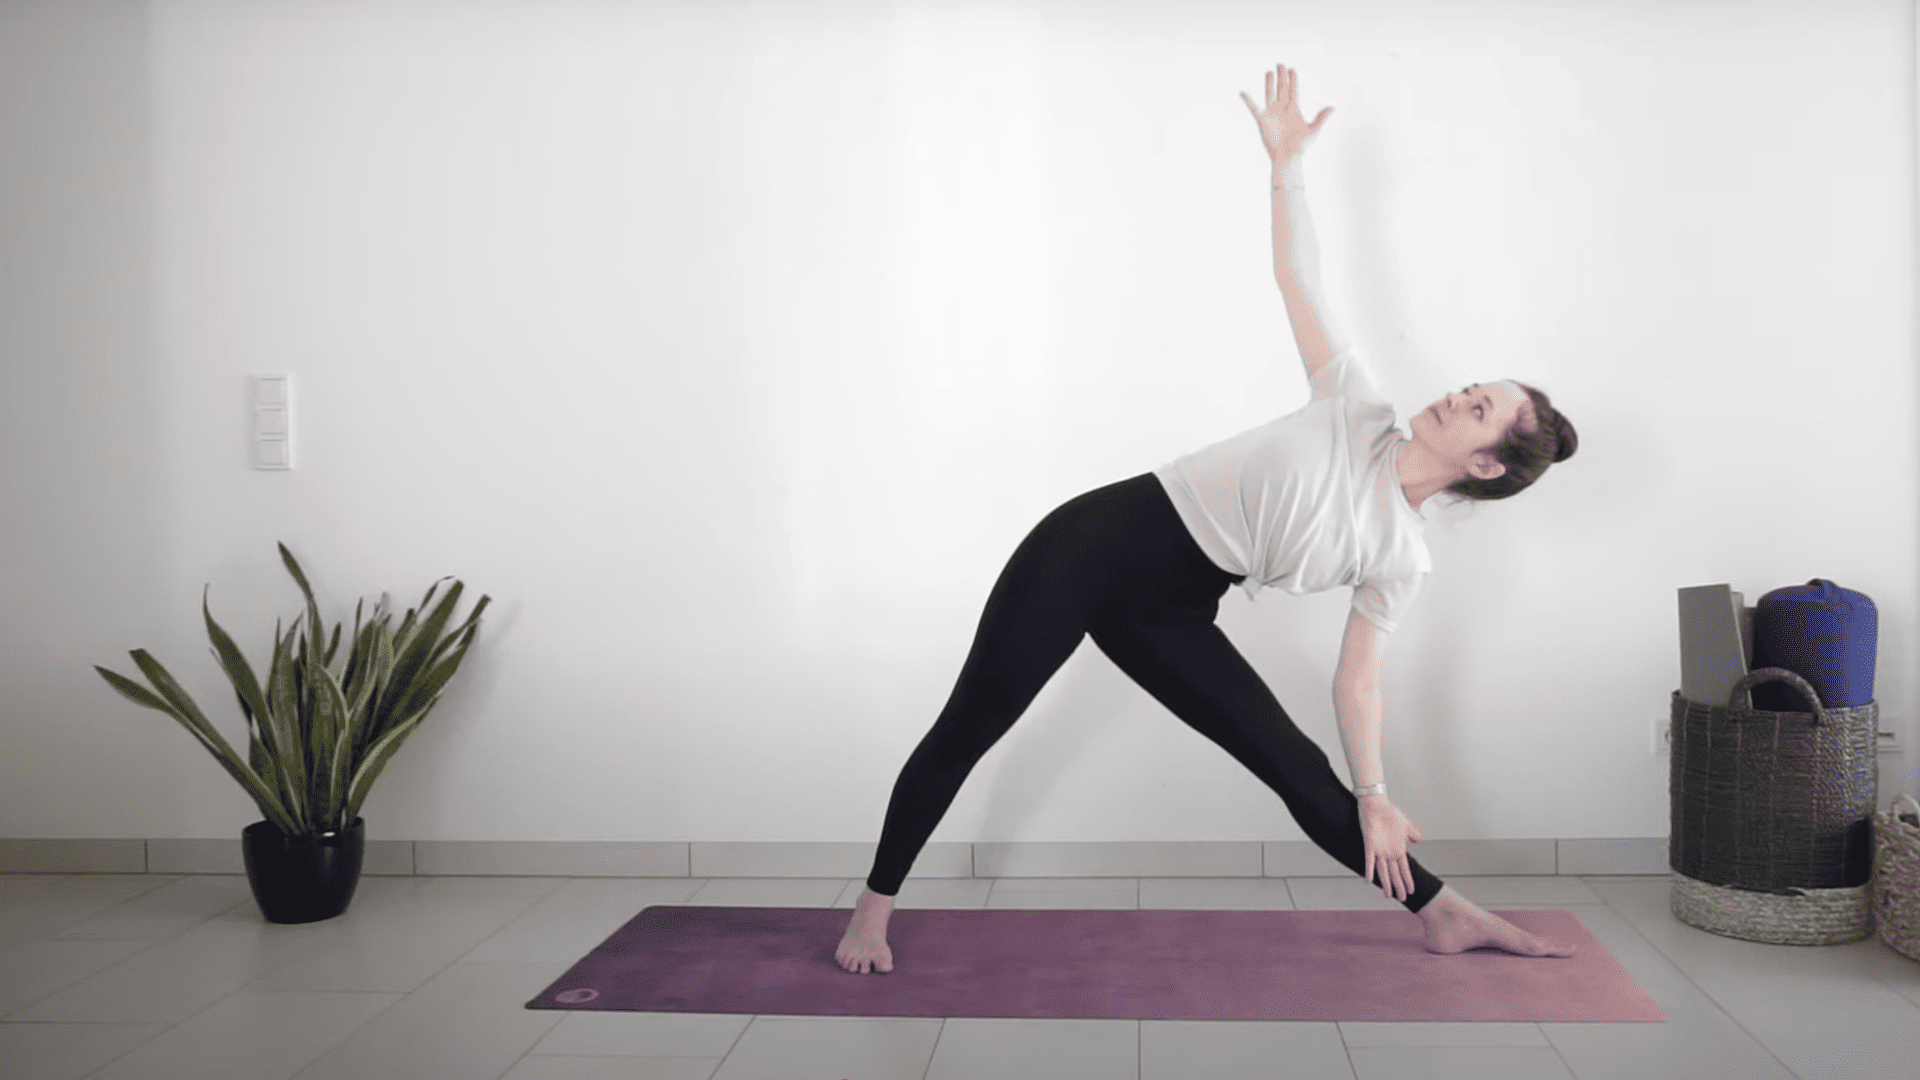
Straighten the left leg. Step the right foot closer if needed. Lean forward, place left hand on shin. Reach your right arm to the sky. Reach right arm forward for a side stretch. Return to standing and step forward.
Step 9: Left Side Warrior Sequence
Step left foot back for high lunge. Reach arms up and sink deeper with each exhale. Fold forward slowly, then return to lunge. Place left heel down for warrior two. Keep the front knee over the toes.
Step 10: Left Side Triangle Pose
Straighten the front leg. Place the back heel closer if needed. Lean forward, hand to shin, left arm to sky. Look forward or down if your neck feels better. Reach left arm forward for a side stretch. Return to standing.
Step 11: Wide-Legged Forward Fold
Step feet wide, parallel to each other. Hands on waist, lift chest, and push hips forward. Fold forward with an elongated spine. Grab opposite elbows and rock side to side.
Step 12: Goddess Pose with Twists
Roll up to standing. Turn toes out, heels in. Bend your knees for the goddess pose. Hands on thighs. Twist right by dropping the left shoulder forward. Return to center. Twist left. Return to center.
Step 13: Tree Pose (Both Sides)
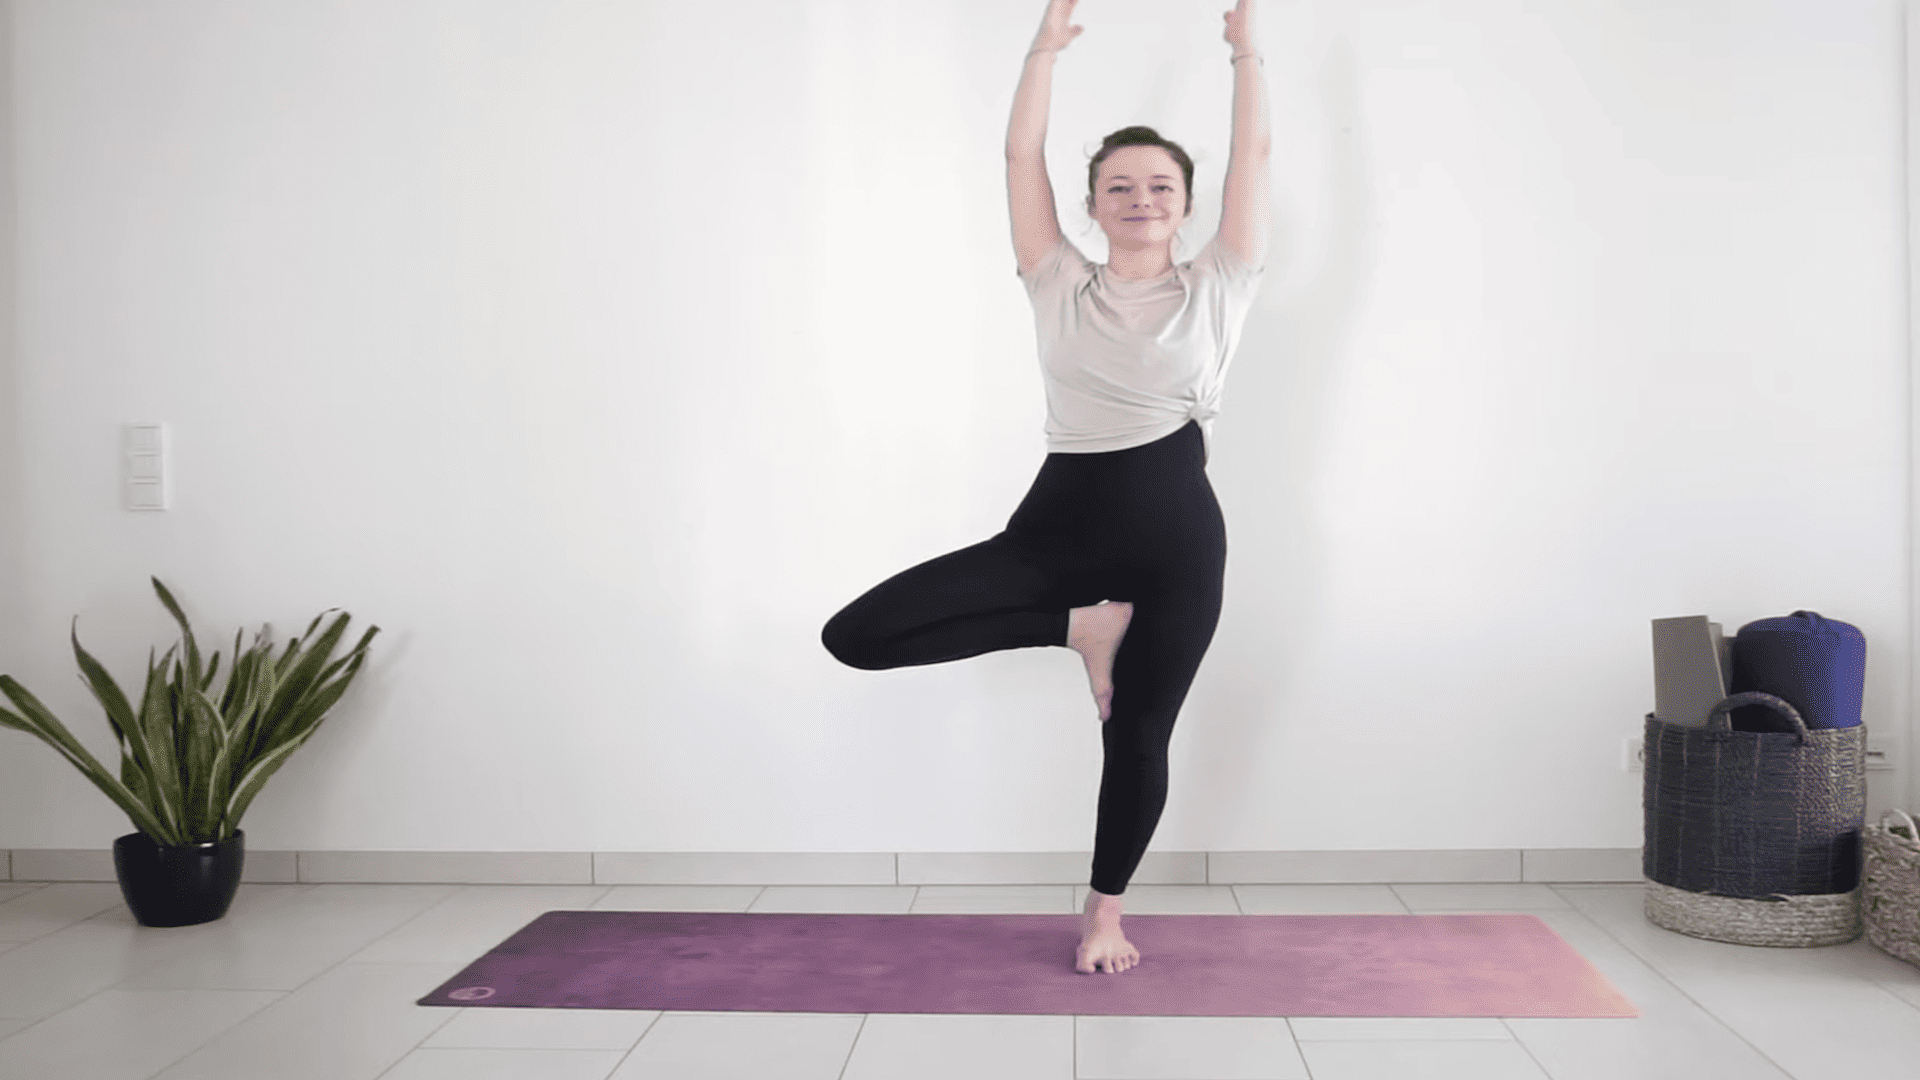
Bring your feet closer together. Shift weight to left foot. Place the right foot on the ankle, below the knee, or above the knee. Reach arms overhead. Hold and breathe. Repeat on the other side. Don’t worry if you fall out of the pose.
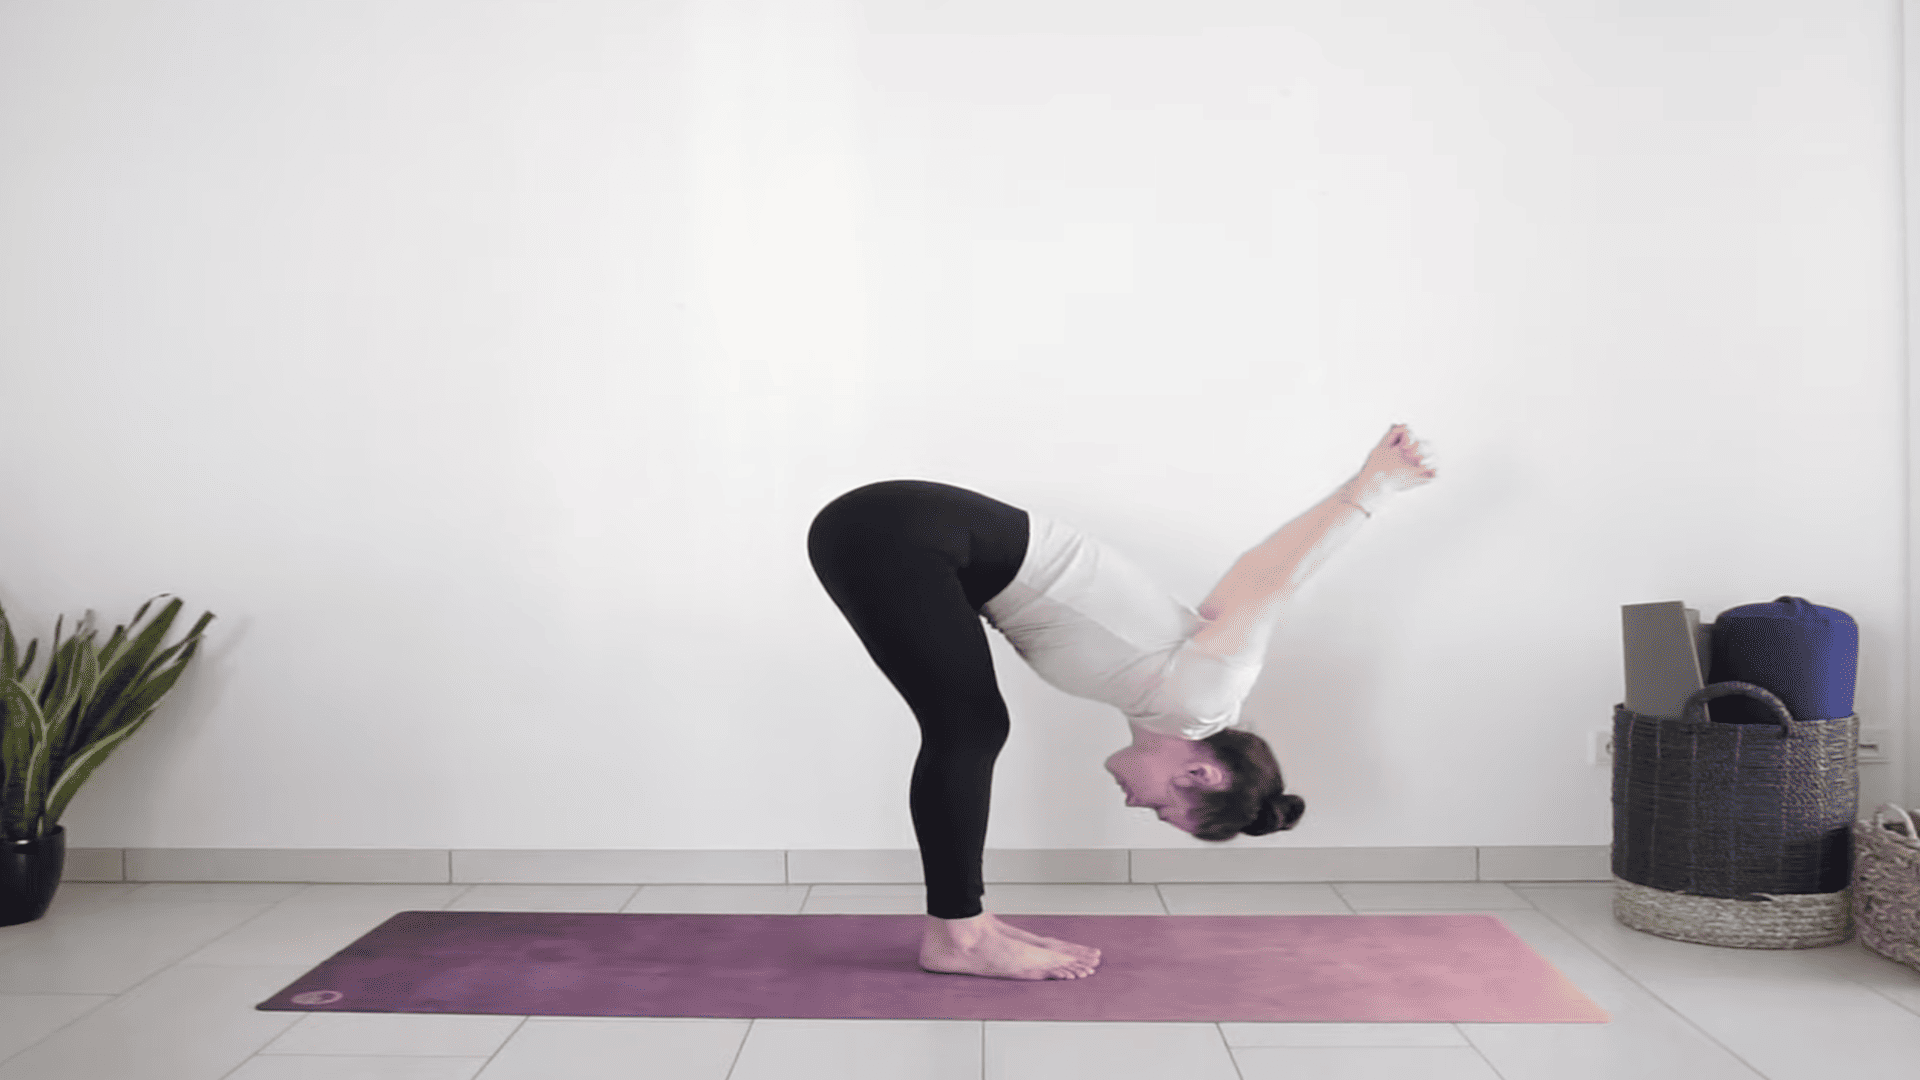
Step 14: Standing Figure Four to Warrior Three (Both Sides)
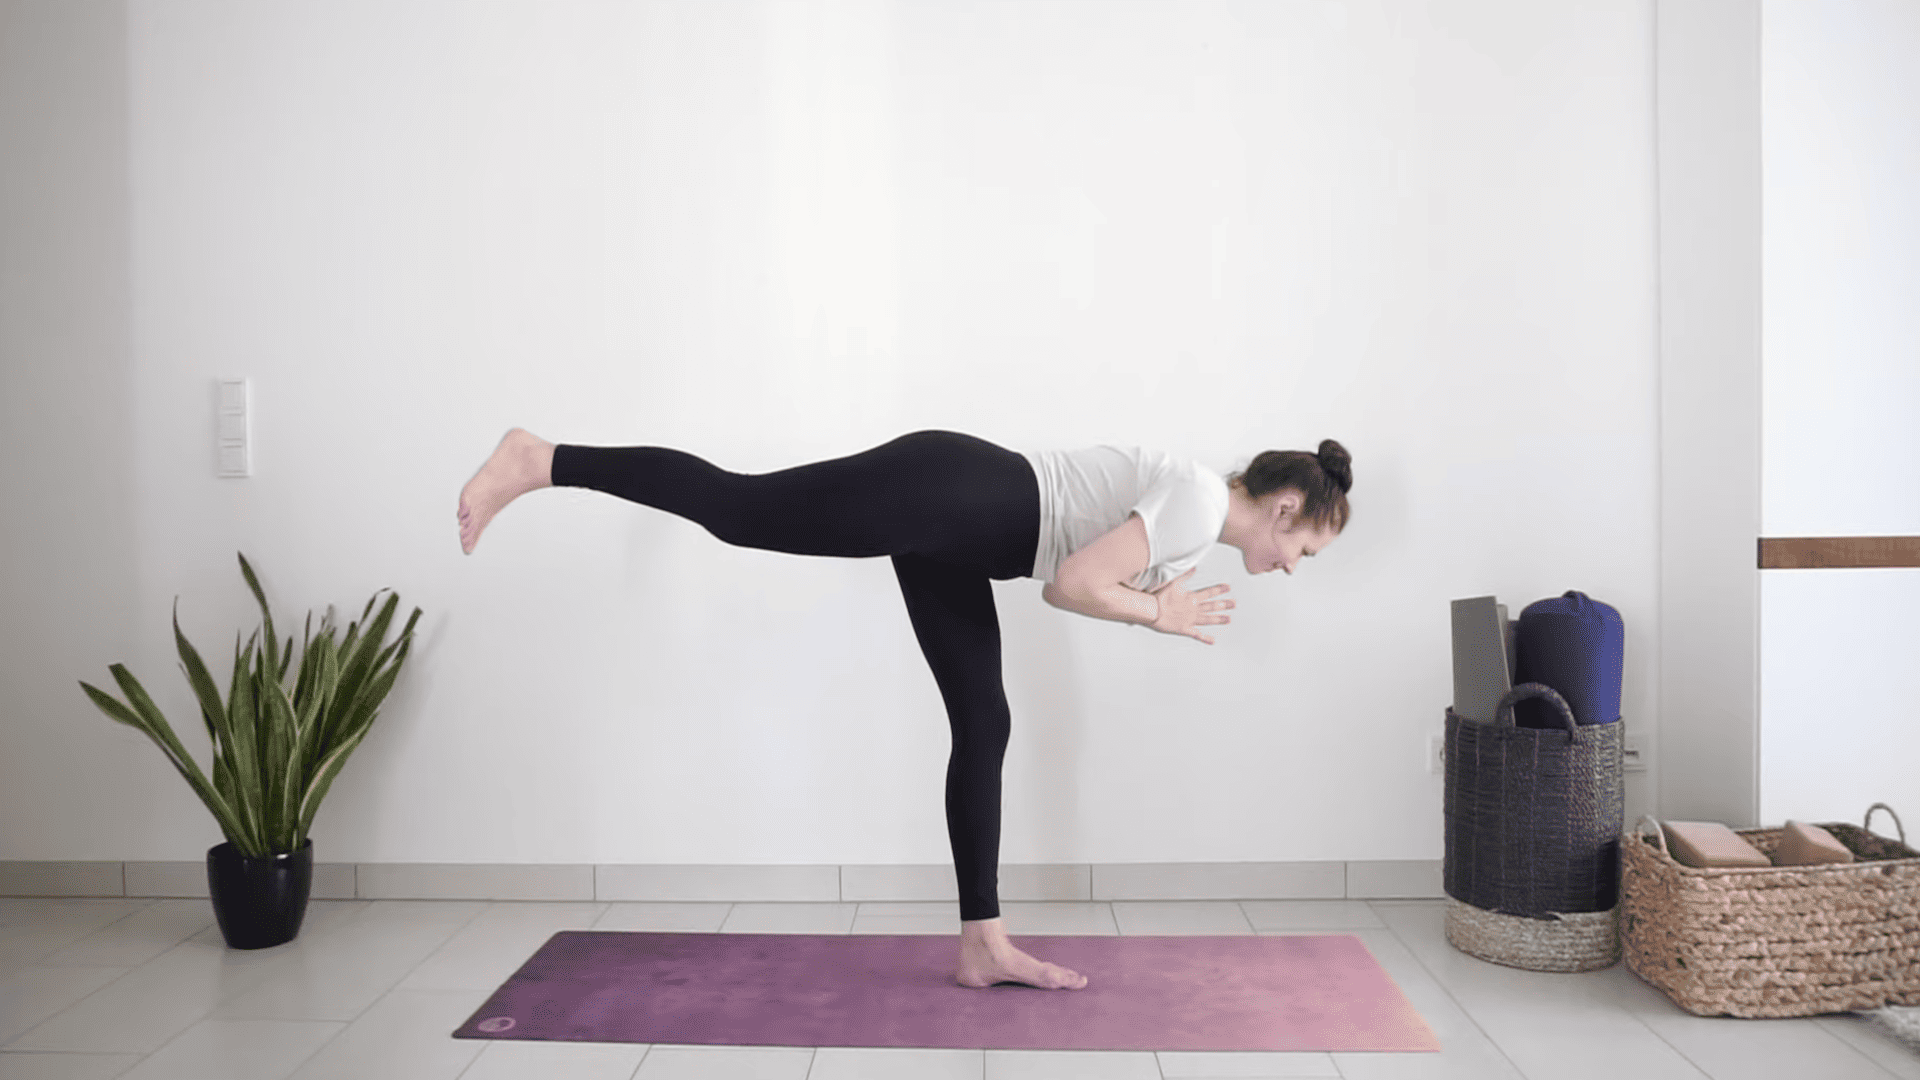
From tree pose, bend the right knee high. Hands at chest. Keep the body in one line. Lean forward and extend your right leg back for warrior three. Hold for one breath. Repeat on the left side.
Step 15: Standing Shavasana and Closing
Place feet wider than hips. Turn palms forward and close your eyes. Find ease and relaxation in this standing pose. Bring palms to the heart center. Thank yourself for practicing. Lift your head and open your eyes.
Video Tutorial
Sequence adapted from video by Yoga With Uliana. Big thanks for the clear guidance and inspiration!
Additional Tips for Practicing Standing Yoga
- Keep a micro-bend in your knees to protect joints and engage muscles properly.
- Breathe steadily through your nose. Don’t hold your breath during poses.
- Ground through all four corners of your feet for better stability.
- Engage your core by gently drawing your navel toward your spine.
- Find a focal point 4-6 feet in front of you during balance poses.
- Move slowly when entering and exiting poses to maintain control.
- Use wall support when learning new balance poses.
- Practice regularly; even 5-10 minutes daily improves balance and strength.
Final Thoughts
These standing yoga poses require no equipment or studio space, making yoga a perfect solution for maintaining consistent practice despite busy schedules.
Start with a few poses from this standing yoga sequence and build up to the complete routine over time. Focus on proper breathing and alignment rather than achieving perfect form immediately.
Remember that consistency matters more than duration when establishing new wellness habits. This yoga sequence adapts to any lifestyle and situation, whether practiced at home, work, or while traveling.
Experience how these simple movements can transform both body and mind through dedicated practice.
Browse our Yoga Poses collection and unlock fresh yoga sequences you can squeeze into your schedule.
The comment section is all yours. Feel free to reach out to us in case of any doubts.